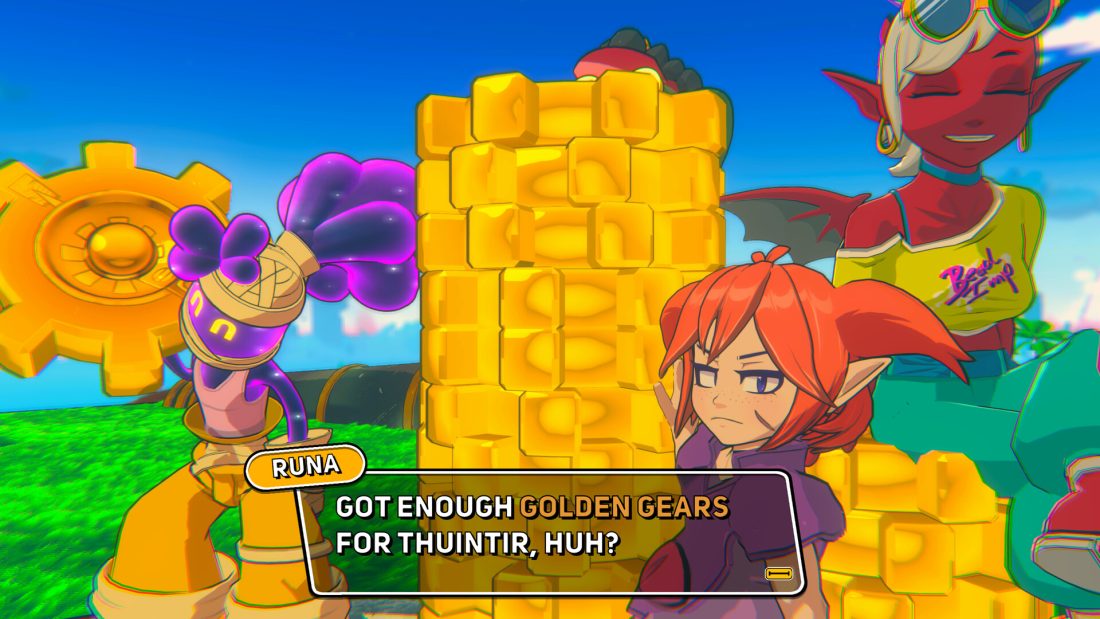
Demon Tides only asks for a deliberate route, not a perfect map. The story advances at 10, 20, and 35 Golden Gears; Jester is part of the first gate, while Tridentarius and Roc are worthwhile side branches that add Talisman capacity. The efficient play is to secure each threshold, clear the dependency that actually blocks the next launch, and leave expensive island cleanup for later.
The route is three Gear checks, not a full map clear
| Checkpoint | What actually moves the story | What can wait |
|---|---|---|
| Lokitana | Meet Runa, dismantle Jester’s three facilities, defeat Jester, and reach 10 Golden Gears. | Hard Mint trials, full Eyetem sweeps, outfits, and distant optional chests. |
| Shiverbeaks | Recover the crew to restore travel, then reach 20 Golden Gears. | Tridentarius is an optional Talisman-slot branch, though doing it now gives a useful combat and movement upgrade. |
| Thuintir | Reach 35 Golden Gears and select Ragnar’s Castle at Runa’s launcher. | Roc is another optional slot upgrade; all-location, all-Gear, and regional-completion cleanup. |
| After the story | Return for the remaining content only if you want completion. | There are 45 Golden Gears in total; the last threshold opens an extra area rather than the main ending. |
The map is intentionally open, so there is no single mandatory list of ten or twenty island Gears. Prefer a visible main challenge over a demanding collectible detour. If one route exposes a movement weakness or seems built around a Talisman you do not own, mark it and take an easier Gear elsewhere. That choice is faster than forcing every island to 100 percent before a launch gate.
Turn the first flag into a retry anchor
The wreckage tutorial is linear: follow the wooden platforms to DK, continue to Luci beside the flag, then reach Midgi in barrel form. Use Boost on the cracked barrier near Midgi to leave the wreck and enter the makeshift camp. Nobody needs escorting; finding a crew member is enough to move that rescue forward.
At camp, Midgi needs four ship parts. Four short routes leave the hub and each ends at one part. Use the objective-direction prompt when a path doubles back, and move the flag only when the new position saves more ground than the old one. A good cycle is:
- Plant at the mouth of a route before the first risky gap.
- Take the part and return to camp; do not spend time emptying every side ledge.
- Move the flag to the next route only after the previous part has registered.
- Give all four pieces to Midgi to repair the ship and receive the world map.
That flag is a retry location, not a permanent save slot. Patch 1.1.x also removed placement on several moving, disappearing, and pinwheel surfaces. If the prompt refuses a dramatic shortcut, step back to ordinary solid ground rather than trying to reproduce a launch-version exploit.
Power Radio Towers before touching its race ring
Radio Towers FM is the first useful detour because it teaches the dependency order and pays out a Golden Gear plus a Talisman. Talk to the Lokian by the reward area, then climb toward the tower carrying the highlighted ring. At the top, activate the radio equipment before starting the ring route. The common failure is clearing the rings first and returning to a chest that still considers the station inactive.
Put the flag beside the starting ring after the radio is live. Follow the spawned rings in order; on a miss, warp back rather than reclimbing the tower. After the route clears, collect the ring-linked Gear and the separate powered-station reward.
Find Runa at the eastern edge of Midgi’s circle
Sail to the eastern side of the search circle on the new map. At Runa’s Village, take the cliff path rising to the right of the dock. Runa explains the Gear gates and marks the Jester branch. If Shiverbeaks is still unavailable later, audit two things separately: the save needs at least 10 Golden Gears, and the Jester line must be finished.
Break Jester’s three workplaces before reading the wheel
Landing at only one marked site is not enough to call out Jester. His arena opens after three facilities stop operating, and each location uses a different completion signal:
- Jester’s Minery: reach and pull the lever for each of the three cranes. The nearby leaderboard chest becomes available after all three have stopped.
- Jester’s Juicery: follow the crystal escalators to the high lever and shut down the plant. For the resident Gearserker, wait for a hand slam, Boost the spikes behind both hands, then hit the exposed target during the short vulnerable state.
- Jester’s Leviathan: locate the two goo-fed eggshells. Bomb dispensers carry a bomb symbol; Boosting a box forces another bomb when waiting is slower. One shell sits near the double-locked chest, while the other is inside the deeper tower.
Before sailing away, check the circular status platform at a facility. If the boss callout has not appeared, a lever or eggshell is still active. This is a better diagnostic than repeating the last island from memory.
Jester has two real damage windows
The prize wheel changes the hazard, but most results are survival tests. Jump the shockwaves from the falling fists, move out of the highlighted finger-gun lanes, and Boost ordinary summons. Damage comes from these two readings:
- Bomb result: leave each marked blast circle. When the rocket enters the arena after the explosions, Boost it toward Jester.
- Mask result: compare the clones, find the one whose appearance differs, and Boost that real Jester before the sequence completes.
After enough successful counters, Jester expands into a cloud and fires mouth lasers. Do not chase the cloud. Preserve health until the bomb pattern returns, then use the next rocket for the finishing hit. The reward is another Talisman slot as well as the boss clear required for the first ocean transition.
Use the 10-Gear launch, then restore Shiverbeaks travel
Return to Runa’s Village and use the launcher interface for Shiverbeaks. The arrival sequence separates Beebz from the crew and temporarily removes ordinary fast travel. Broad exploration at this moment creates needless backtracking, so solve the isolation first:
- Clear the main challenge at King’s Landing.
- Open its reward chest; that action triggers the crew call.
- Look for the smoke flare rather than searching islands at random.
- Follow the smoke to Runa’s Cannon and reunite with the crew.
Once the ship functions again, collect whichever Shiverbeaks Gears fit your current movement loadout. Twenty total opens Thuintir. Tridentarius is not the Gear gate, but her Talisman slot is useful enough that the local boss branch is usually worth completing before leaving.
Open the Gearserkium from the outside in
Three external switches control the three doors inside Tridentarius Gearserkium. Activating only the first switch produces a long climb that ends at a locked door, so collect all three before committing to the tower:
- King’s Landing: take the switch in the starting area while completing the crew-recovery objective.
- Red Forest: search the island’s platform route for the second control.
- Giant’s Fire: leave the main route for the small adjacent island that carries the final switch.
Inside the Gearserkium, pass the presses and first door, wall-run around the tower, and climb into the top-down maze. From the maze entry, take the right path to its end, go north to the crossroad, then turn left. Yellow paint confirms the line to the second door. Beyond it, ride the exterior rail and finish the wall-running ascent to door three.

The last guard fires bombs and leaves poison in a small arena. Circle until a bomb lands without detonating, then either throw it or Boost it back. A returned bomb opens the chest core; rush in with Boost for the actual damage and retreat before the poison closes the route. Repeat the counter-and-core cycle three times. Plant the flag on safe ground outside the arena, not inside the hazard pattern. The elevator after this fight leads to Tridentarius.
Treat Tridentarius as a tube-and-chase fight
Trading attacks with the mech does not advance the battle. Every phase has a visible job:
- Ground chase: keep moving while watching both walls. Boost each glass tube as it extends. After both break, close on the fleeing Tridentarius; strike her head when she trips.
- Flying mech: the tubes return, now behind sweeping fire patterns. Wait for a safe lane rather than lunging through fire. Break both, chase the stumble, and land the second head hit.
- Rocket platforms: commit to the platform route and use rocket shadows to judge threatened landing spots. Reaching Tridentarius triggers the finish automatically.
If a phase seems to loop forever, stop attacking the mech body and count the wall tubes. If Tridentarius recovers from a stumble, the opportunity was missed; survive until the mechanism cycles again. Victory adds a Talisman slot, but Thuintir still depends on reaching 20 Golden Gears and selecting it at Runa’s launcher.
In Thuintir, finish Roc’s three incidents in one circuit

After the Thuintir landing, speak with Runa’s group and treat Roc’s branch as three event flags rather than one boss marker:
- Tartar Village: travel northwest from Runa’s Cannon and defeat the four attackers while Runa occupies Roc.
- Avian Gaol: climb the central tower and open all three cages. The chest at the summit is the confirmation that the prisoner event registered.
- Naval Conflict: find the two fighting ships in southwestern Thuintir, east of the Golden Crow’s Nest, and defeat all six enemies across the decks.
Roc calls only after all three incidents finish. Dueling Grounds lies southeast of Avian Gaol. Patch 1.1.1 fixed both an Avian Gaol chest revisit issue and a rare early Dueling Grounds cutscene, so a missing call on an old build is a version problem worth eliminating before replaying the events. On 1.1.5, check the three completion signals first.
Attack Roc only after the gold drops
Roc’s golden aura is the invulnerability signal. In the first phase, avoid the tackle, slash, and falling swords; punish the recovery only after the aura fades. When the hammer appears, jump the slam shockwave and attack the landing recovery.
His bird form creates tornadoes, so running directly at him wastes health. Let the last tornado pattern end. Roc lands tired and exposed; a Boost during that exhaustion closes the duel. This branch grants the fifth Talisman slot, but players interested only in the story can instead continue collecting toward 35 Gears.
Reach 35 Gears, disable Ragnar’s barrier, and protect phase two
Ragnar’s Castle appears through Runa’s launcher after the 35-Gear threshold. The throne room is initially sealed. Take the side platforming route, pull the lever at its far end, and use the newly spawned rail to return to the chamber entrance. If the barrier remains, the lever interaction—not the Gear count—is the incomplete step.
Ragnar’s first arena mixes several readable recoveries:
- Move aside from charges and punish after his two-handed ground slam.
- Jump the shockwaves from the bird-form hops; the recovery after the final hop is longer.
- When he becomes a drilling castle, give the spin room and jump the glowing trail instead of chasing behind it.
- Clear summoned enemies only when they obstruct the next safe lane; they are not the boss damage condition.
After sufficient damage, the castle breaks and Ragnar becomes a giant serpent over the ocean. Complete the intervening platform route to reach the second combat arena. A defeat there returns Beebz near that arena rather than before the entire castle sequence, so do not abandon the attempt believing phase one must be repeated.
The final patterns are harsher versions of the same tells: the tackle becomes a three-part sequence, the drill trail remains dangerous, and magic continues falling into the arena. Wait for the last action in a string, then Boost during recovery. Reaching the ending this way satisfies the story route; all 45 Gears, every island checklist, outfits, Mint trials, and Gearserkers belong to a separate completion pass.
Use the boss rewards to diagnose a stalled save
If a launch or ending marker is absent, check state rather than roaming:
- Shiverbeaks missing: confirm 10 Gears and the Jester boss clear.
- Fast travel missing in Shiverbeaks: open the King’s Landing reward chest and follow its smoke flare to Runa’s Cannon.
- Tridentarius tower blocked: verify all three external switches; a locked interior door names the missing dependency, not a movement failure.
- Thuintir missing: the relevant requirement is 20 Gears, not the optional Tridentarius achievement.
- Roc call missing: check the Tartar fight, all three Avian Gaol cages plus summit chest, and all six Naval Conflict enemies.
- Castle missing: return to Runa with 35 Gears. The three general achievements are useful upgrades and completion goals, but the later ocean gates are Gear-driven.
The official achievement page separates Jester Shenanigans, Tridentarius Machinations, Roc’s Rock, Crash the Party, and Topple Another Monarch. Use those names as hard confirmations for bosses and castle progress, while the live Runa launcher remains the authority for the next destination.
Sources & credits
Game identity, AppID 2585890, the February 19, 2026 release, Fabraz credits, 40-achievement total, and all three untouched 1920×1080 JPGs were verified through the official Demon Tides Steam page and appdetails. The standard-save boundary and current 1.1.5 cautions were checked against Fabraz’s official Demon Tides patch notes. Route dependencies and boss readings were reconciled across the supplied community guides and verified walkthrough references; competitor images, removed-guide media, unverified video, exact exploit routes, and unsupported drop rates were not used.