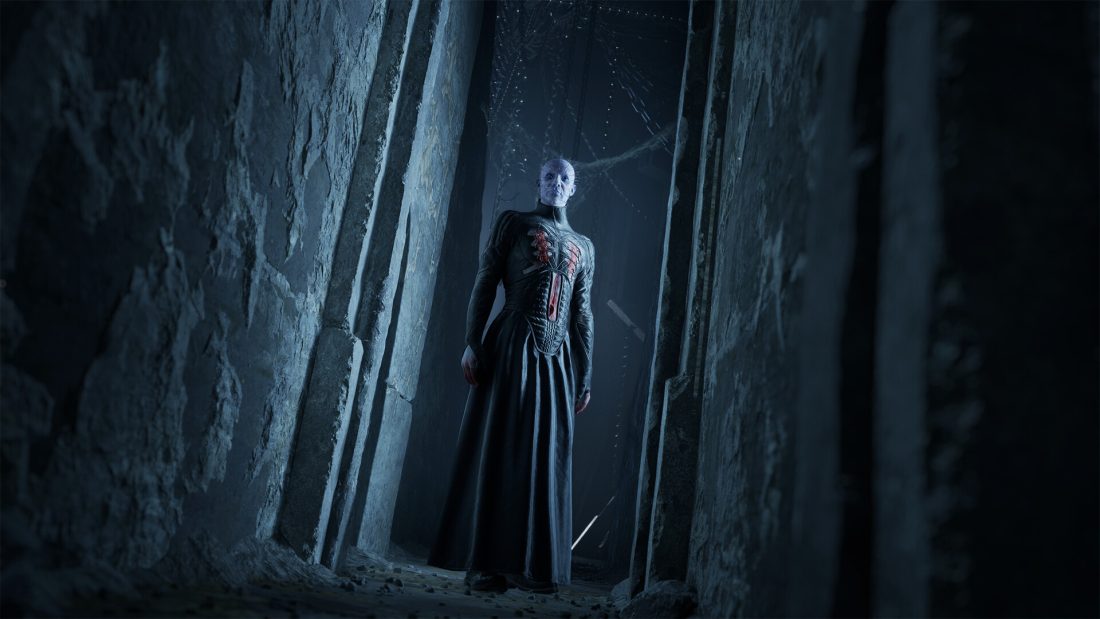
Follow Sunny into the Labyrinth, escape the cult, then use the Genesis Configuration to reach her again. Charlotte’s gate later sends you after a Hand, a Head and a Tongue on three connected branches. This walkthrough takes you through those gates, the mansion, the club and the factory, then finishes with Marlowe and the final choice.
This is a story walkthrough for Clive Barker’s Hellraiser: Revival. It includes puzzle solutions and ending spoilers. It does not cover every collectible or achievement.
The Labyrinth and the cult’s hideout
In the opening Labyrinth, follow Sunny’s voice and the pale blue flames. Stand on the floor plates to open the timed doors, then sprint through before they close. Slide under the low obstruction when the passage narrows. Later, when writing draws your attention to the darkness behind you, turn around: the route changes instead of ending at the wall in front.
Continue through the red passage and the heart sequence until you regain control with the box. At the broken crossing, absorb the blue flame from its pedestal. Aim at the glowing blocks and move them into a walkable connection. Cross to Sunny and finish the encounter with the Cenobites.
Get out of the chair and reach the clothes room
After the cult’s interrogation, use the interaction beside the chair to work the sharp implement free, then cut the stitches holding you. Search the room before leaving. Cloth and Chemicals let you craft a Bandage; open Crafting and make one when the tutorial appears.
Search the drawer for the Blemished Fragment and take the Diamond from the statue. Bring both to the plaque marked M359 and fit them into its recesses. Search the open drawers along the route for a Lockpick. At a basic lock, rotate the pick a little at a time and test the lock gently. If it resists, ease off and change the angle rather than forcing the turn.
Pass the cages and operating area, unlock the way to the ladder and climb into the clothes room. Take the key there and save at the glowing wall symbol. Use the nearby storage to put away spare weapons before you collect more equipment in the hospital.
The skull, Tongue Key and Bruno’s keycard
Rotate the skull on the desk and press the pins with red heads. Check the crown, back and both sides, including the pins close to the barbed wire, so you do not miss one. The marked pins sink into the skull when pressed. Once they are all in, the skull opens and reveals the Tongue Key. Take it before leaving the desk.
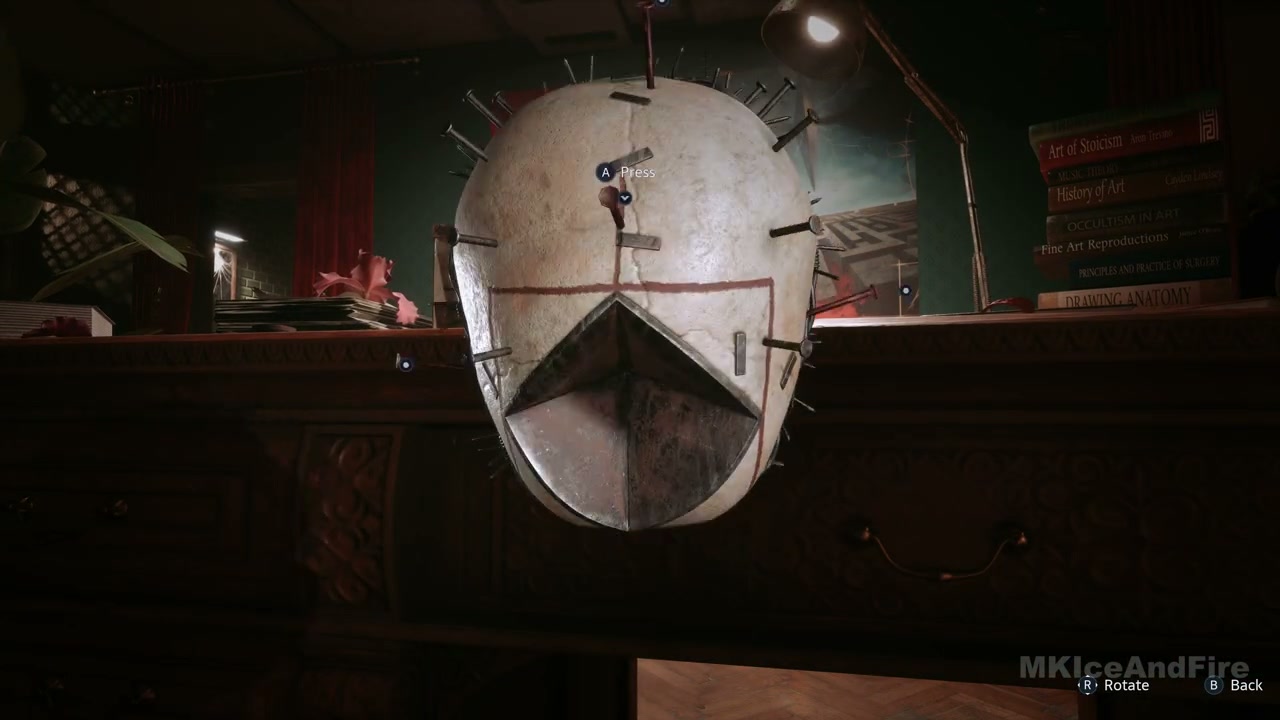
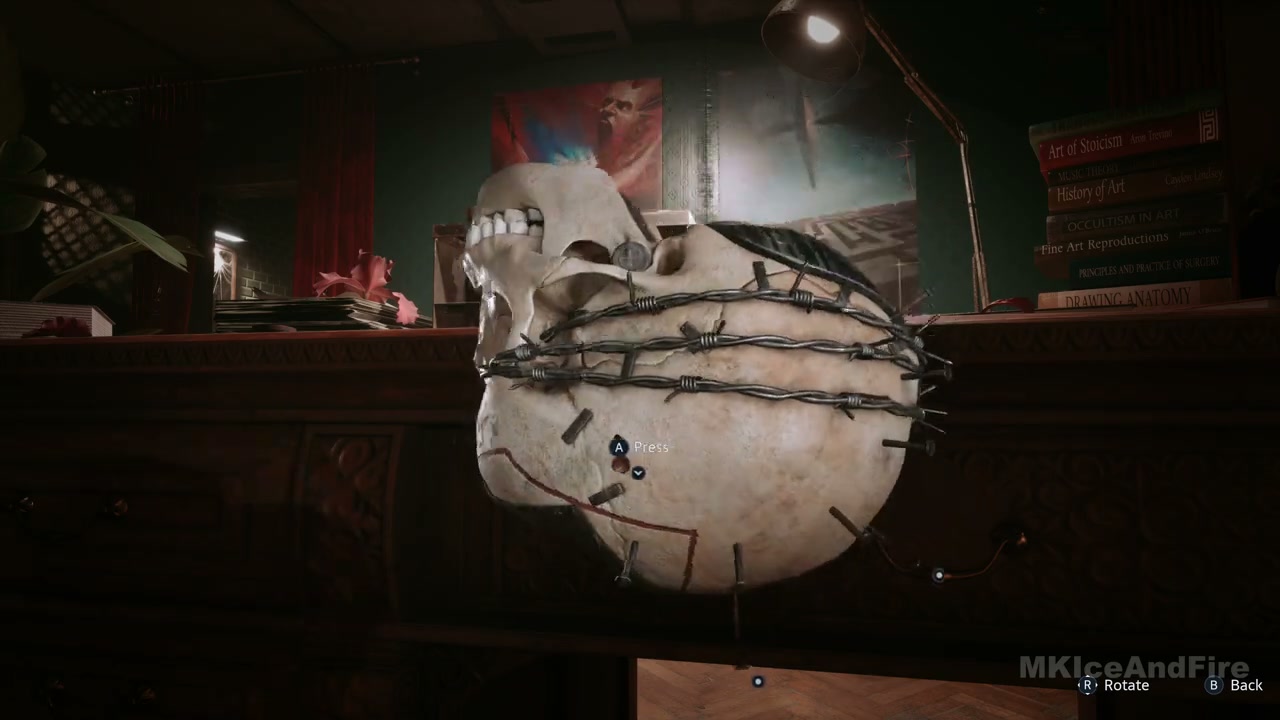
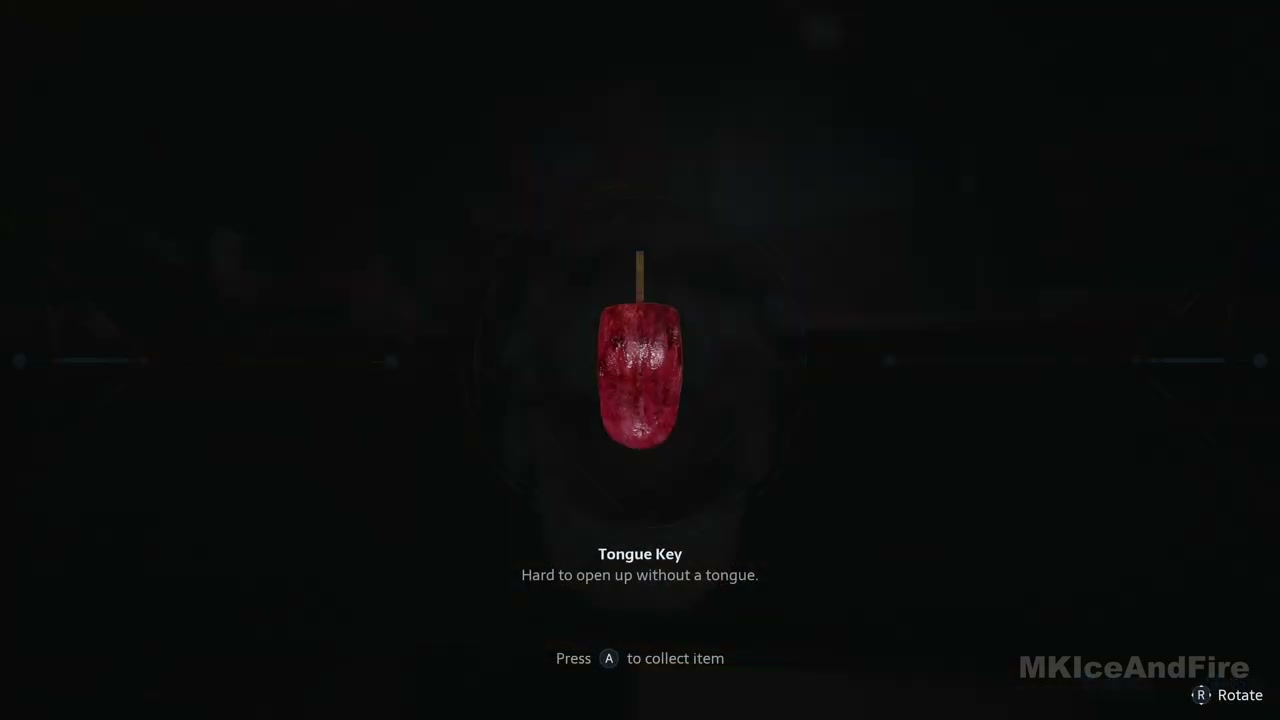
Use the Tongue Key to reach Bruno’s room. Stay behind the furniture while he moves around the painting. Wait for his back to turn, collect the keycard and retreat through the same cover. The card reader is the way out; fighting Bruno here is unnecessary.
In the next art-filled corridor, the locked cabinet uses 9901. Its nearby artwork provides the clue. Take the supplies inside, use the save point and proceed into the passage where Chatterer appears.
Escape Chatterer and open the hospital Exit
Run as soon as the chase begins. Follow the open corridor, duck beneath the hanging chains and use the struggle prompt when Chatterer grabs you at the obstruction. Once you break free, turn away from him and sprint into the open passage. Take the steps and keep going to the exit.
Beyond the chase, take the knife and use the low passages and furniture to get behind isolated enemies. The machete gives you a stronger melee option, but it can wear down. Use a Basic Repair Kit on a damaged melee weapon through the inventory rather than discarding a weapon you still want.
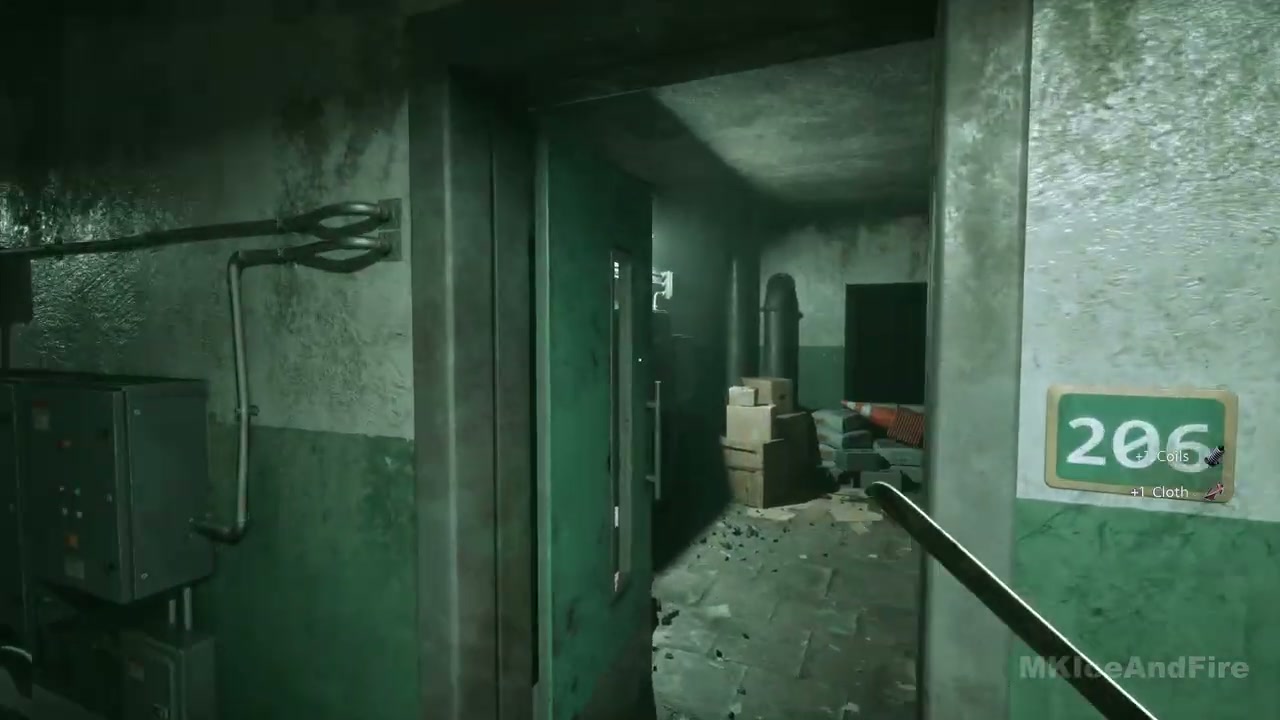
Read the book on the route through the hospital rooms. At the locked Exit door, collect the flashlight and read the note directing you to Room 206. Enter Room 206 and press the green button on its electrical panel. Return to the Exit door, which now opens, and take the pistol from the body beyond it. The medical-area cabinet can be opened with 9891 if you want its supplies before the chapel.
The Leviathan obelisk and the club’s first key
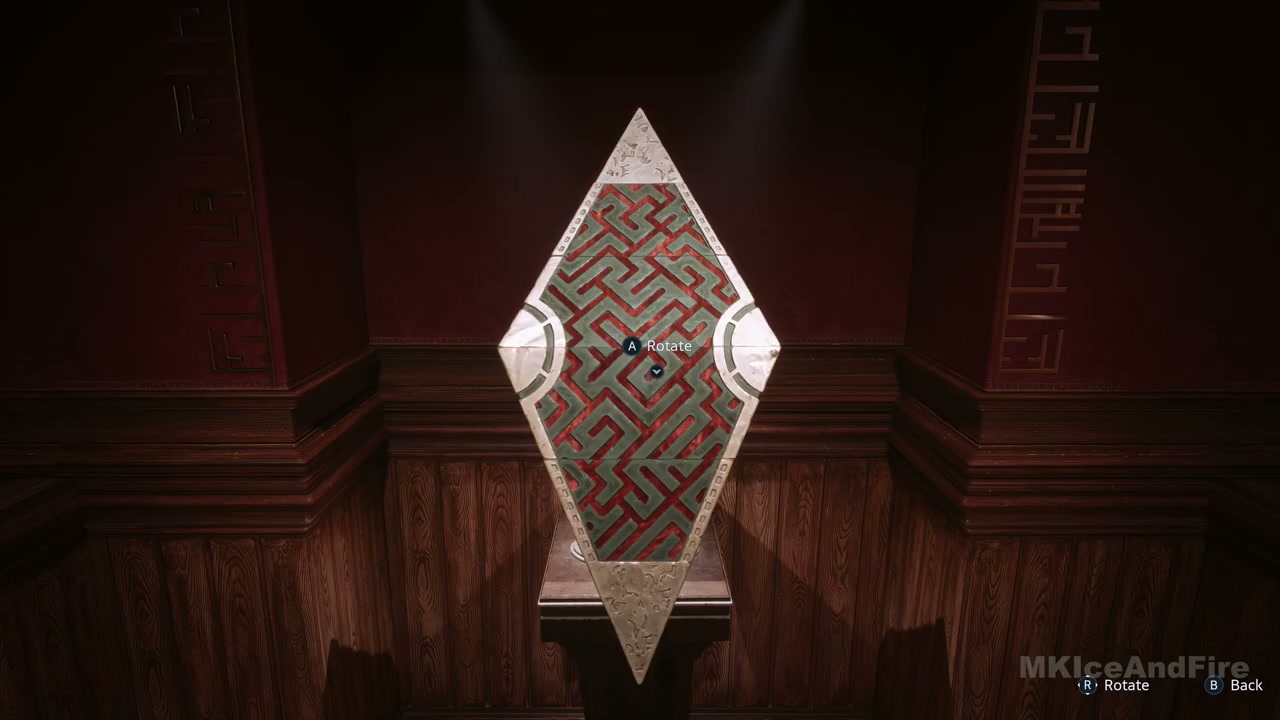
Fight through the chapel and search the office beyond it for the Leviathan Tip. Fit the tip into the obelisk. Rotate its separate sections until the red markings form a continuous pattern through the stack. When it opens, collect the S&M Duckie and place it in the duck-shaped recess. That opens the stairs below.
At the club’s VIP door, the guard directs you to a woman in white. She wants three items: a spreader bar on the floor in the green room, a paddle on a pouffe through another oval arch, and a dildo on a shelf in the pink-lit room. Bring them to her and complete the interaction to receive the Bunny Key. Open the VIP door, follow the corridor, then return through the newly accessible room. Use the save point and interact with the pile of clothes to disguise yourself.
The graveyard and Sunny’s pillar
Meet Zora on the sewer route and use her shop and storage before heading out. Once the Genesis Configuration gains its ability to move highlighted objects, aim at the blue surfaces to shift barriers and platforms. It also carries flame from a source to a target. Watch for the blue outline: an ordinary piece of scenery will not respond like a movable block.
In the flooded electrical area, crawl through the side pipes and climb onto the boxes to stay above the water. Reach the generator through the next pipe. Its switch transfers the current between sections, so move it away from the water you need to cross. Farther on, take the Van Key from the body behind the armored enemy. Open the van’s rear doors and climb through it to reach the woods.
Charlotte pursues you through the woods. Run along the open trail, watching the ground for bear traps. If one catches your leg, complete the release interaction and repair the injury before trying to sprint again. The path leads to the graveyard and its small house.
The graveyard house and shed
Enter the house and search the bedside area for the Shed Key. The note beside it supplies the safe’s date clue: enter 9606. Collect the contents, then return outside and unlock the shed. Take the inset from inside and bring it back to the matching graveyard gate.
At the next confrontation, use the hanging flame against Charlotte. Shoot the fixture above her when she is beneath it, then move through the exit that becomes available. This encounter leads back into the Labyrinth rather than ending the hunt.
Through the moving Labyrinth
Watch the spinning hazards from an alcove before entering their path. Move behind a passing hazard and take the next recess instead of running straight down the middle. In the bathroom-like room, examine the reflection and break the mirror to expose the way through.
At the broken beam, aim at the blue panels on the circular structure ahead and rotate the crossing into place. Follow the Hell Priest downstairs and through the repeating rooms. Interact with the chair when the passage closes; it opens the next door. Beyond the save point, take the route under the low wall and collect the Suffering upgrade from its pedestal.
The red plant room sends you around a short loop. Take the tunnel marked by the blue torch and crouch through the vines. When you return, use the next open tunnel and repeat until the center of the room changes and reveals a red opening. Go down through it.
During the Chatterer chase, slide the upper cube aside and lift the lower one to make room to pass. In the cell, interact with the seated man to continue. After the next chase, move a cube over the wall switch to open the door behind you. Run through it and follow the ruins, crouching beneath the low gaps, to reach Sunny’s pillar.
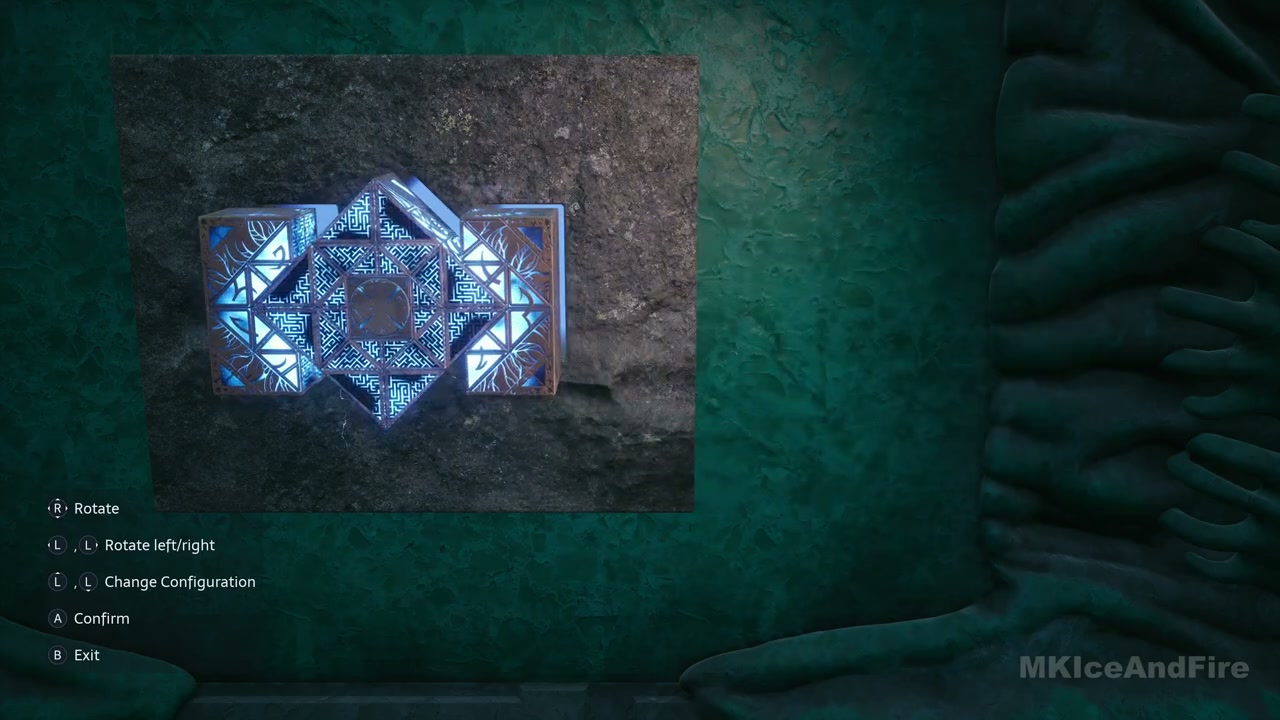
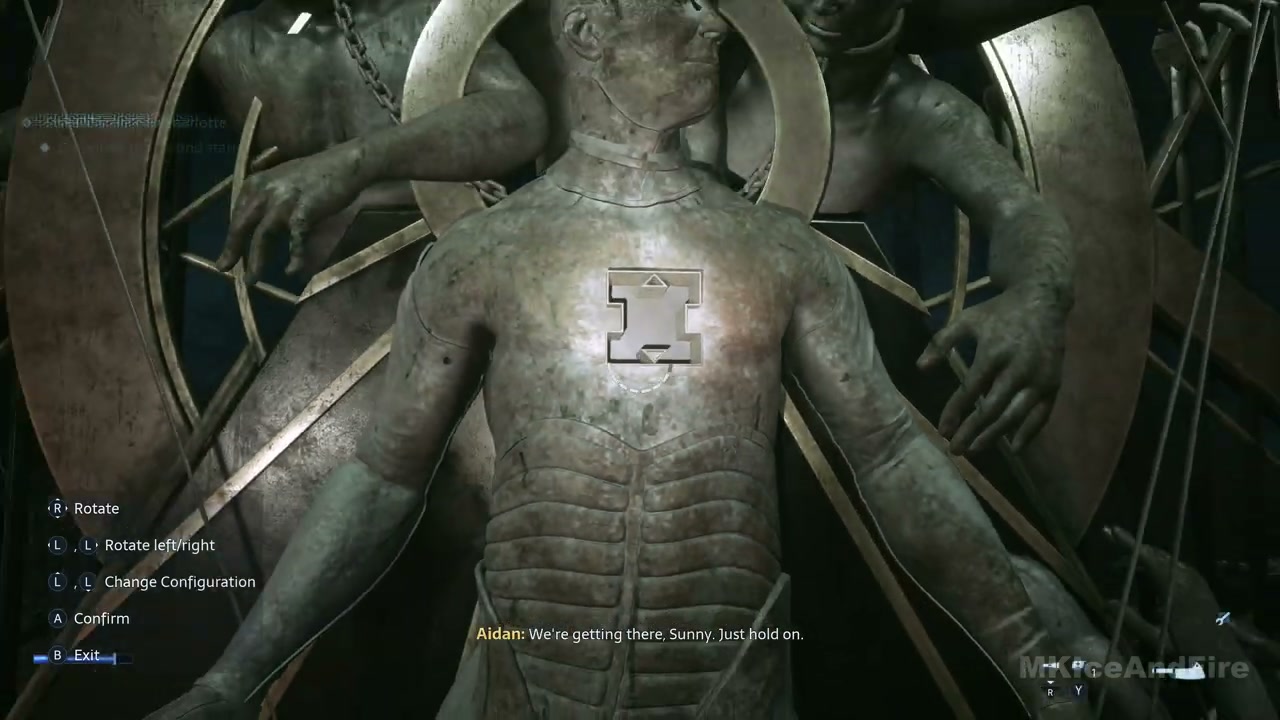
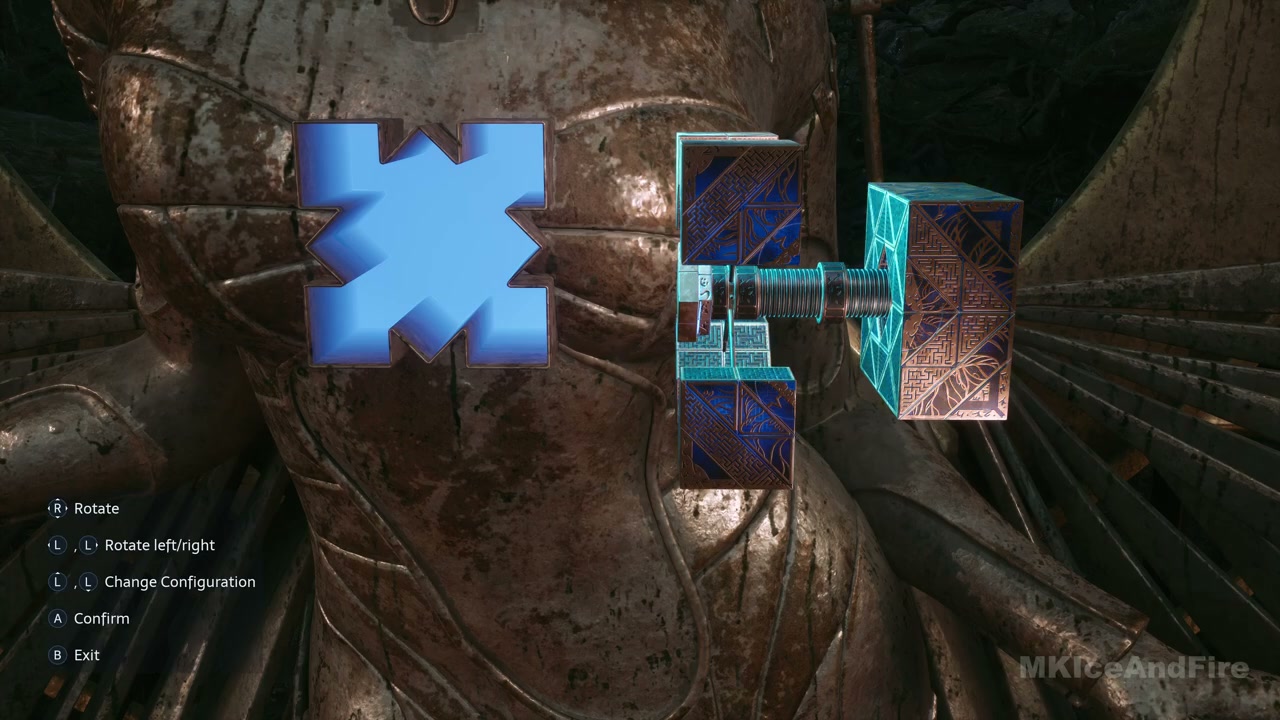
At Sunny’s pillar, inspect the socket. Change the Genesis Configuration’s shape and rotate it to match the silhouette, then confirm the fit. The pillar collapses after the sequence, and the next objective sends you back to the place where Sunny was taken.
The Hand, Head and Tongue gates
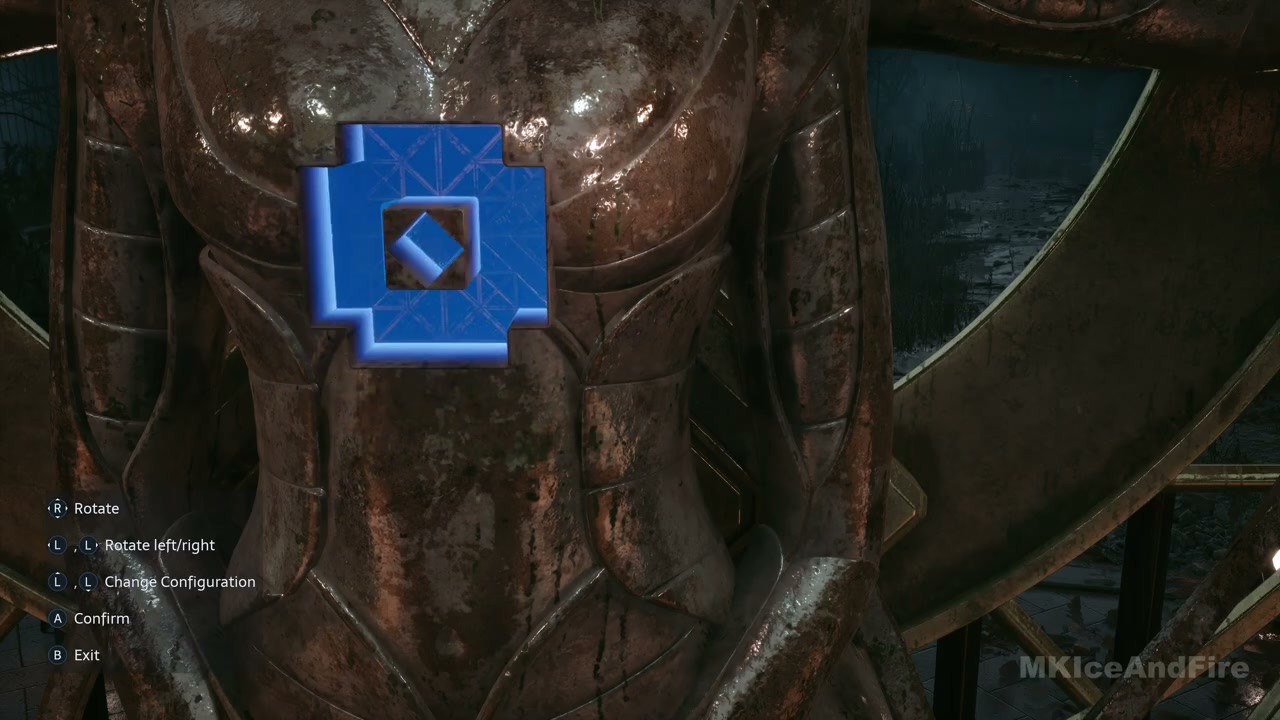
Start at the mansion to find the Hand for the first incomplete statue. Opening its gate takes you to the cabin and the Head. The Head’s gate leads toward the well and the Tongue. Bring each body part back to its statue, then fit the Genesis Configuration into the socket on its chest.
The mansion: two figurines and the Hand
At the mansion, find the Bolt Cutters and cut the chain at the cellar entrance. Deal with Bruno below, then follow the conversation in the main hall. Zora is available here; restock before exploring the upstairs rooms.
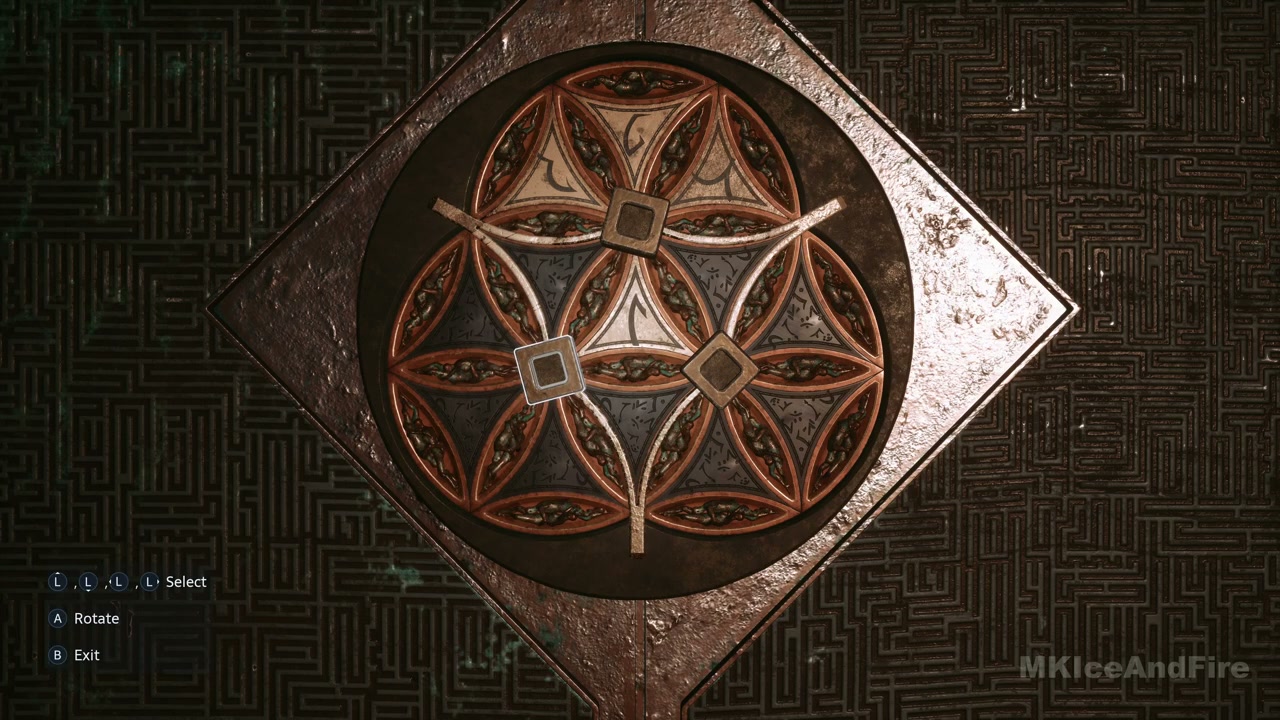
The display in the hall needs two figurines. One comes from the rose puzzle in the study. Inspect the rose drawing on the desk, then rotate the three overlapping flower discs to match it. Use the dark triangular spaces in the petals to judge their orientation. When the shapes line up, the compartment opens and gives you the Marlowe Figurine.
The music-room cabinet uses 1966. Collect the Winding Handle, take it to the gramophone in the dining room and wind the mechanism. Retrieve the Bruno Figurine from the opened compartment. Place both figurines in the hall display to obtain the Hand and the Resurrection Key.
Taking the Hand starts the mansion’s lockdown fight. Clear the enemies before trying to leave. The next room fills with gas and contains three hooded statues; its painting shows the poses you need.
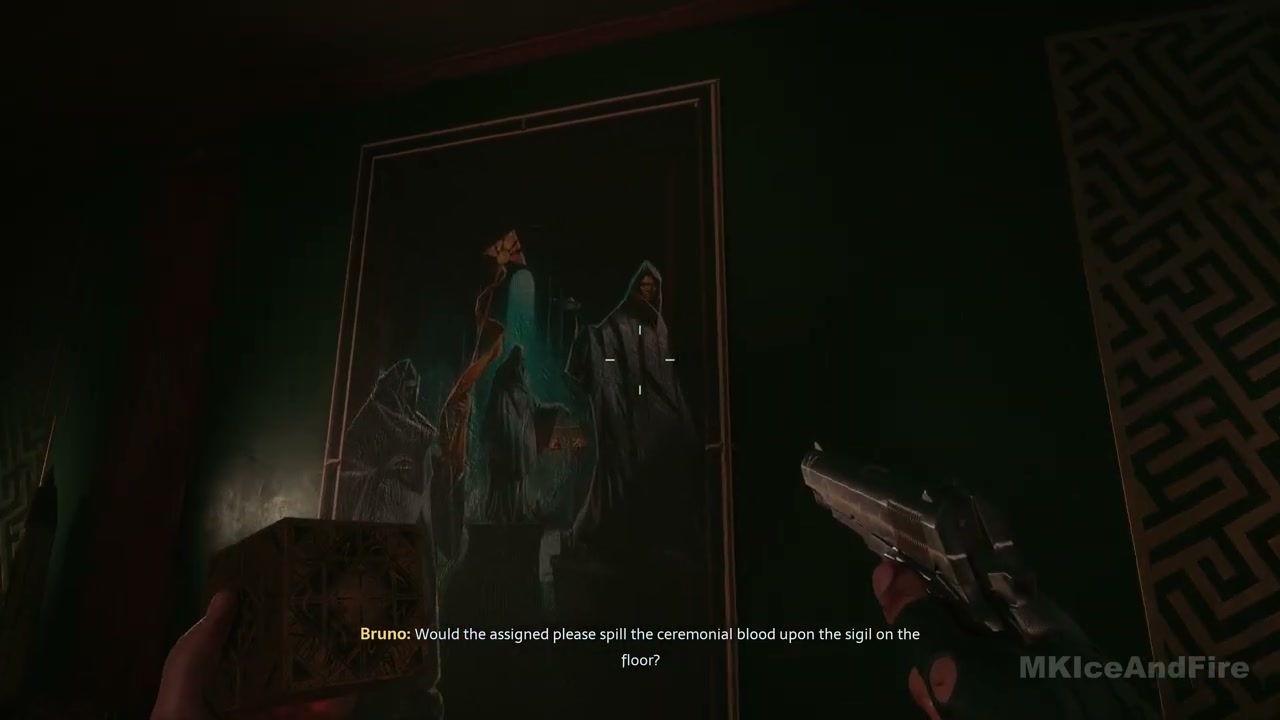
- Compare the statues with the painting before rotating their arms.
- Set the staff-bearing figure’s staff upright.
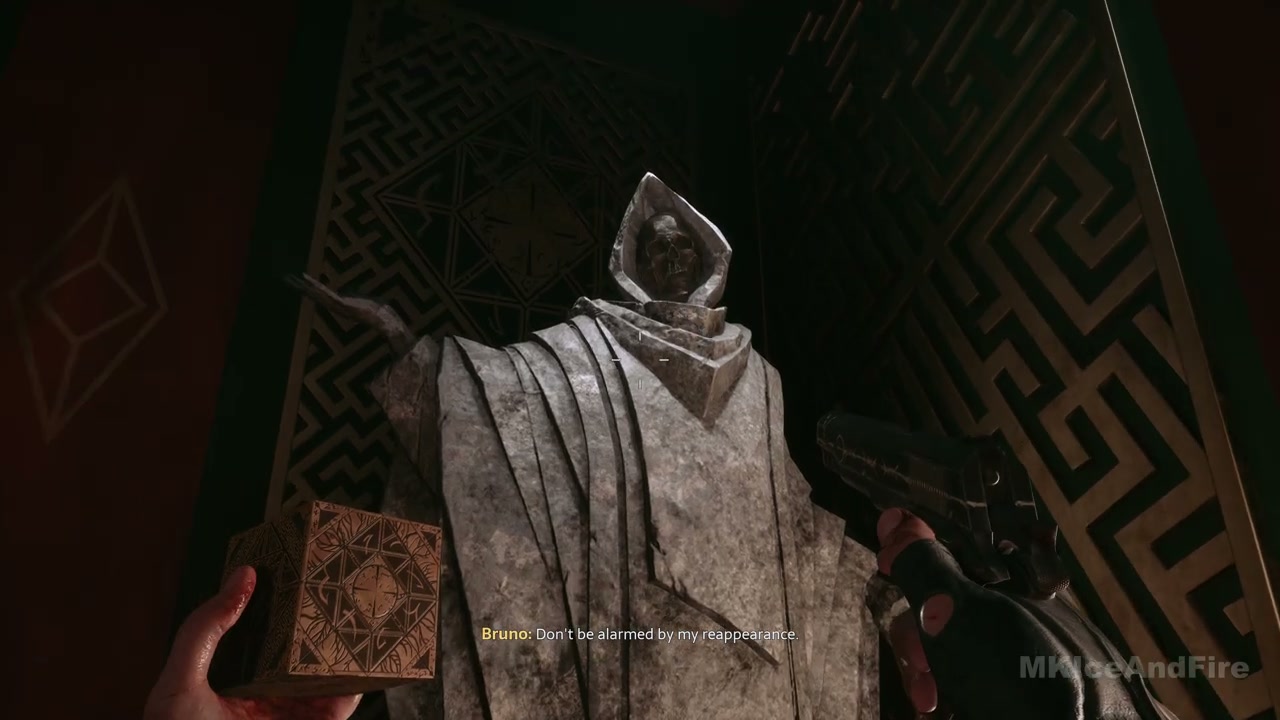
Staff statue: leave the staff upright. Video still 02:09:27. Footage: MKIceAndFire. - Raise the snake on the middle figure into the upright pose shown in the painting.
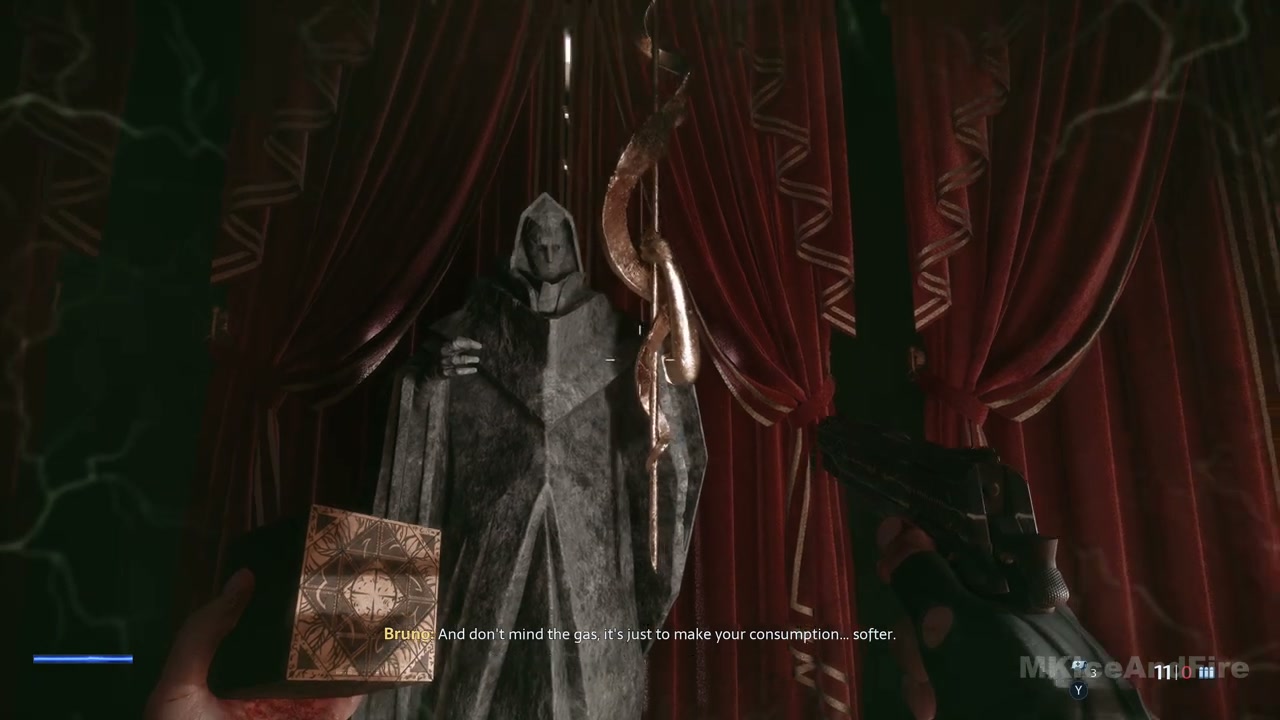
Snake statue: raise the snake into this upright pose. Video still 02:09:34. Footage: MKIceAndFire. - Level the scales so both pans hang at the same height. When all three statues match the painting, it opens.

Scales statue: level both pans to complete the set. Video still 02:09:39. Footage: MKIceAndFire.
Move through the painting as soon as it opens. In the room behind it, collect the Bedroom Key from the desk and push through the concealed exit. Use the key upstairs, search the bedroom’s diary area and take the Security Card. Return to the entrance and use the card at the reader beside the front door.
Back at the first statue, place the Hand and solve the box-shaped socket by changing and rotating the Genesis Configuration. Once the gate opens, follow the path toward the cabin. If enemies interrupt the interaction, clear them before returning to the statue.
The cabin: survive the attack and take the Head
The Head is inside the cabin. Taking it brings attackers to the windows and doors. Use the boards provided to close the openings, then move between the gaps as enemies break through. Bear traps can cover an entry while you reload or repair another opening; place them where an attacker must step rather than in the middle of your own route.
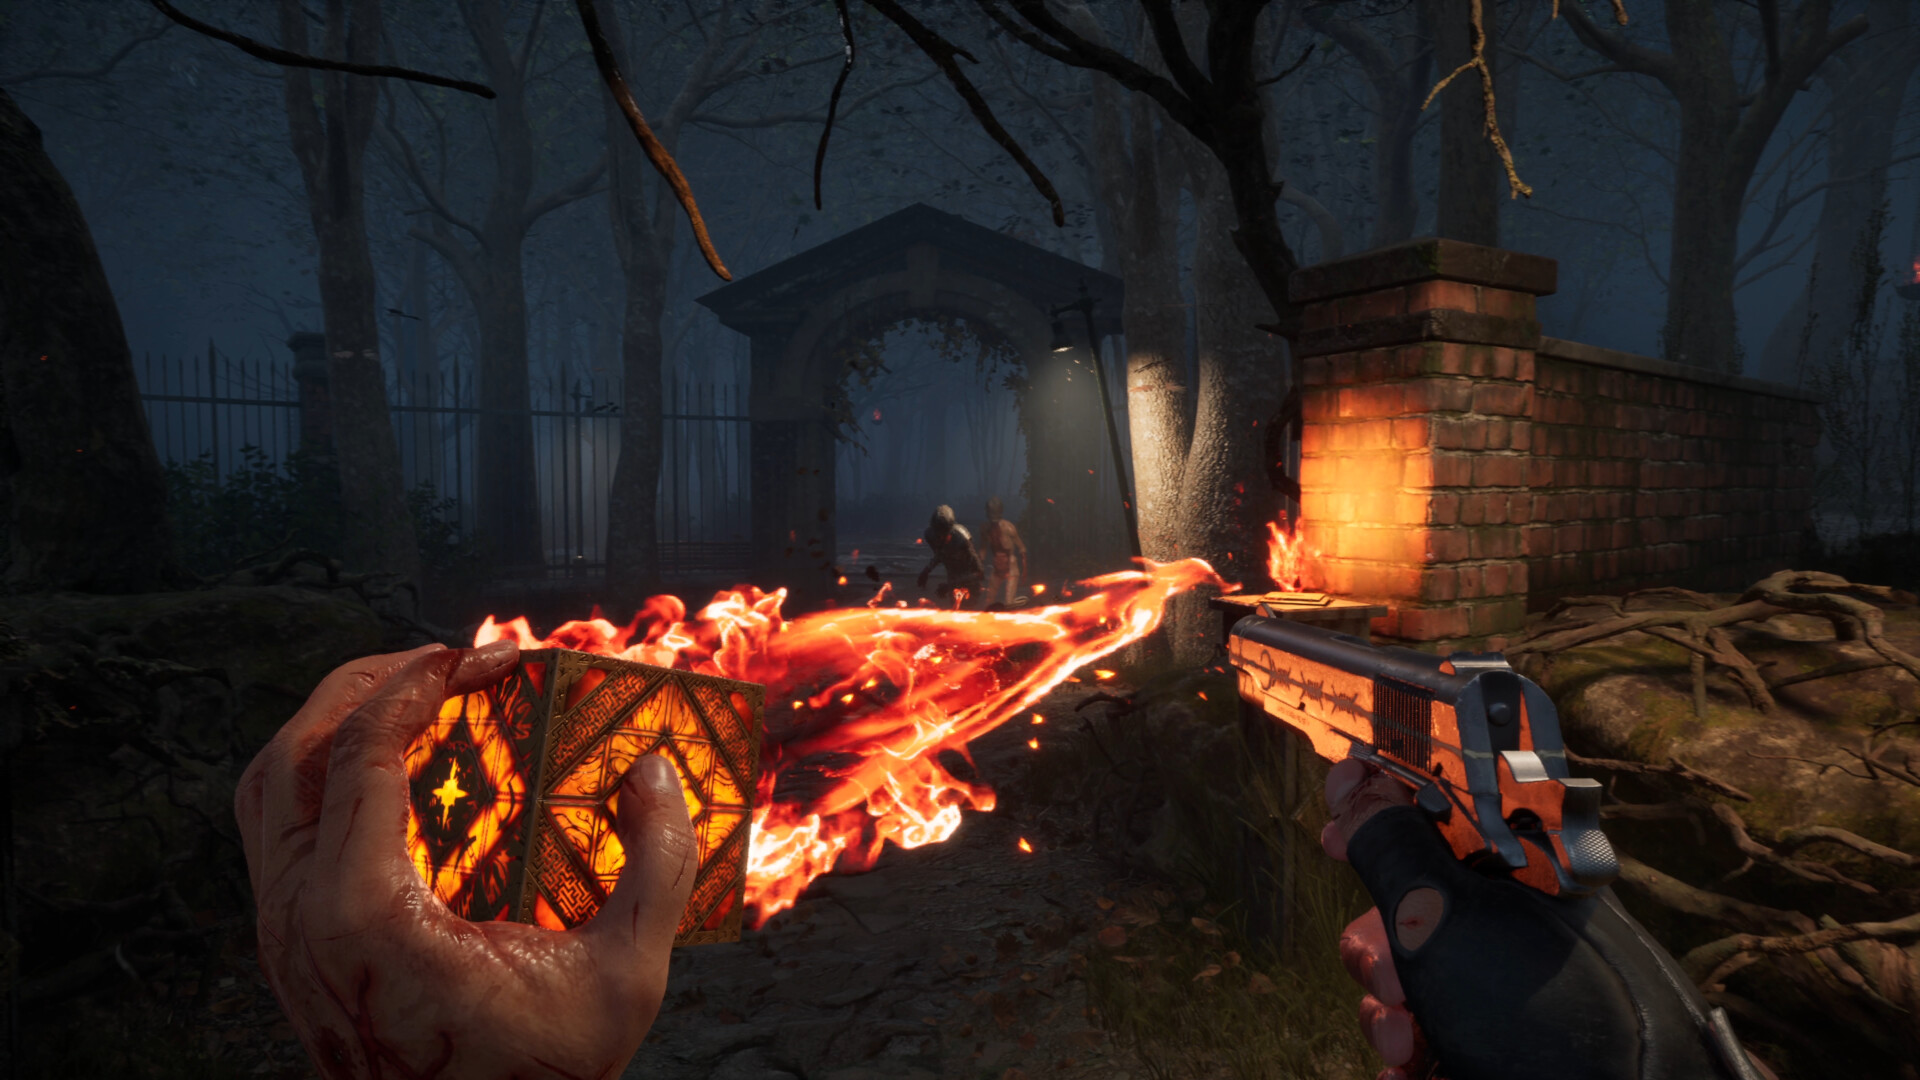
After the attack, search beneath the cabin for the Crank Handle. Bring it to the bridge winch and operate it to raise the crossing. Return to the Head statue, fit the Head and reshape the Genesis Configuration for its socket. The next branch introduces the fire ability and leads to the well.
The well: three blocks, the Tongue and the fuse box
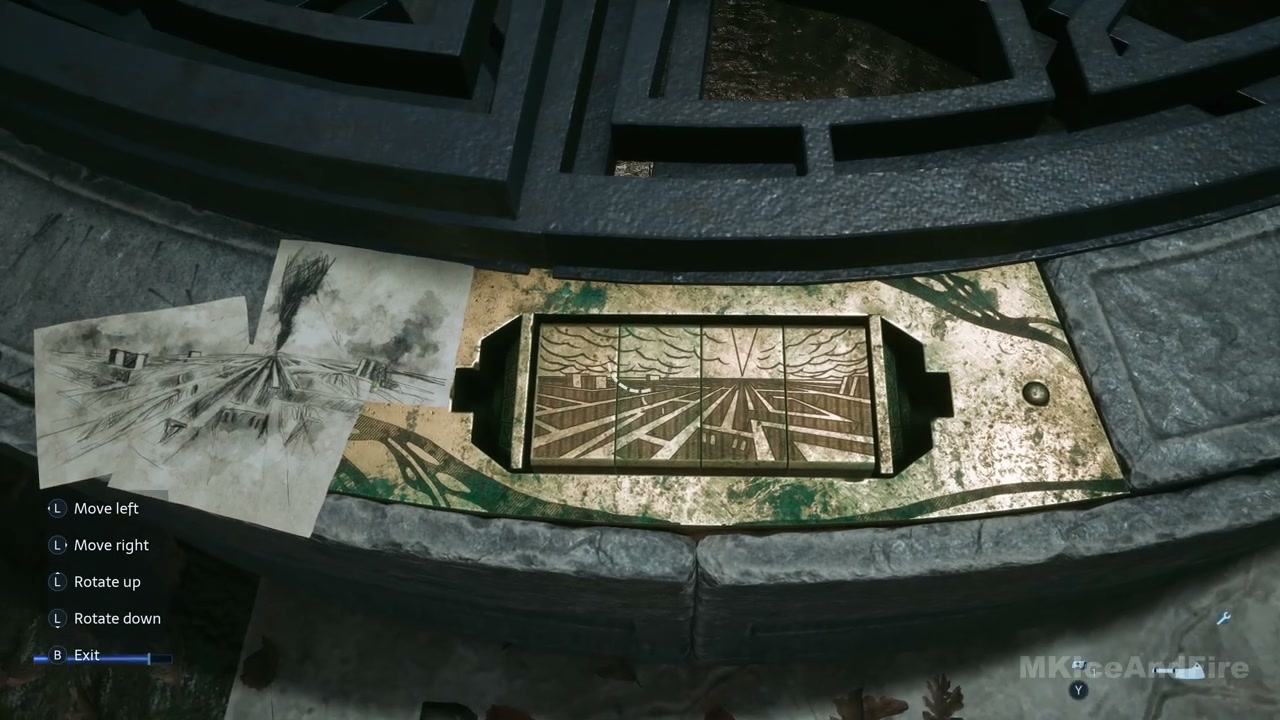
Collect the well’s three blocks from the surrounding grounds. Search the playground, the boat and the pagoda. At the dock, use the winch to pull the boat into reach before trying to collect its item. Return all three pieces to the well mechanism.
Insert the pieces and rotate the picture sections. The finished image shows a receding passage through the Labyrinth: the perspective lines must run continuously through the joins, with the dark entrance at the far end. Work from the obvious architectural edges rather than matching the color of the stone. The mechanism opens once the picture connects.
Defeat the enemies around the well, then climb down its ladder. Take the Tongue from the desk beyond the ritual room. At the fuse box, trace each cable across the panel and rotate the connectors to join matching colors. Check the red, blue and orange connections at both ends before leaving the panel.

Use the restored exit and return to the last statue. Place the Tongue, change the box to match the socket and confirm it. The completed gate leads to Charlotte’s arena. Visit Zora on the return route if you need ammunition or healing before entering.
Charlotte and the return to Sunny
Charlotte closes distance quickly. Keep room behind you, evade her approach and shoot after she commits to an attack. Use the Genesis Configuration to take flame from the arena’s torches and burn her. The police cars also contain gas canisters, and hanging flames can be shot down to put fire on the ground.
When Charlotte disappears, kill the regular enemies that replace her to bring her back. Banish a weakened enemy when it glows blue to recover Health and Suffering. Once Charlotte glows blue, approach and Banish her too, then take Charlotte’s Heart.
Hold the door open with a cube
Descend the new stairs and follow the Labyrinth past the spike traps. At the floor plate, the door ahead stays raised only while you stand on it. From the plate, use the box to move one of the cubes beyond the door into its opening. It must sit beneath the descending door so the door cannot close completely.
Slide the second cube out of your way. Step off the plate and let the door rest on the first cube, then squeeze through. If it closes, stand on the plate again and push the first cube farther beneath the door.

In the next trap, lift the ceiling with the box and run through while it is raised, avoiding the spikes underfoot. This leads to a series of apartment memories.
The apartment keeps repeating
Read the book lying on the dining table in the first apartment. In the next loop, inspect the phone. Put it down and wait for another vibration, then reopen it to read the new messages. Take the photograph from the printer before heading upstairs.
On the following pass, read the note beside the flickering lamp. Turn back toward the double doors that have opened and inspect the tin on the table. Go upstairs again. In the red version of the corridor, read the next note, enter the room at the foot of the stairs, pull the curtain aside and interact with the doll.
Take the stairs and repeat the corridor once more to return to Sunny. Give her Charlotte’s Heart. If you are still circling the same apartment, revisit the current loop’s book, messages, photograph, tin or doll; simply walking upstairs does not replace the required interaction.
The club and the Sister of Mercy
Back at the club, the way to Marlowe runs through the private rooms. Open the cabinet with 1952 and take the Snake Key. Use it at the door with the snake emblem. Search the room beyond for the Voyeur Ticket and use it to enter the viewing area.
The creature beyond the viewing room gives you the inset needed for the next door. Collect it after the fight and return to the peephole entrance. At the rotating portrait, turn the head toward the left to open the passage. Zora is close to this part of the route, so sort your inventory before the Sister of Mercy takes the box.
Get the Genesis Configuration back
Crouch behind the furniture while the Sister has the box. Move when she turns away, reclaim it and leave through the open passage. Walk around the broken glass beside the patrol route so it does not give away your position.
The Labyrinth beyond contains a segmented platform. Rotate its sections into one connected walkway, cross and continue through the room with the chair and television. Use the pills to move through the next sequence, then enter the white door. The Chatterer encounter ends with another meeting with the Cenobite who grants Hellchains.
Hellchains uses Suffering. Keep enough for the upcoming boss: when the game displays Insufficient Suffering, the attack will not fire. Banish vulnerable regular enemies and use the resources available around the route before committing to the next encounter.
The ear statue, picture blocks and Hobby Horse
The ear-shaped statue has another pin puzzle. Press the lower-right pin, the top pin, the middle-right pin and the left pin to obtain the Embossed Block. Bring it to the picture mechanism and rotate the four sections to match the large artwork nearby. Compare the outlines crossing between sections; a single recognizable face can still be upside down relative to the rest.
The private bathroom’s optional cabinet uses 1923. To continue the main route, search beneath the damaged desk, then take the ladder down. Pick up the Hobby Horse and place it in the matching recess to open the Swinger Rooms.
Defeat the creature inside and collect the Gagged Skull. Return to the door decorated with three skulls and insert it. Restock before going through to the Dance Room, where the Sister of Mercy fight begins.
Defeat the Sister of Mercy
Keep the Sister in view and move around the dance floor while she attacks. Use the pillars and furniture to break her line of attack when the room turns red. Shoot during the openings between her attacks, then use Hellchains when she is exposed and you have enough Suffering.
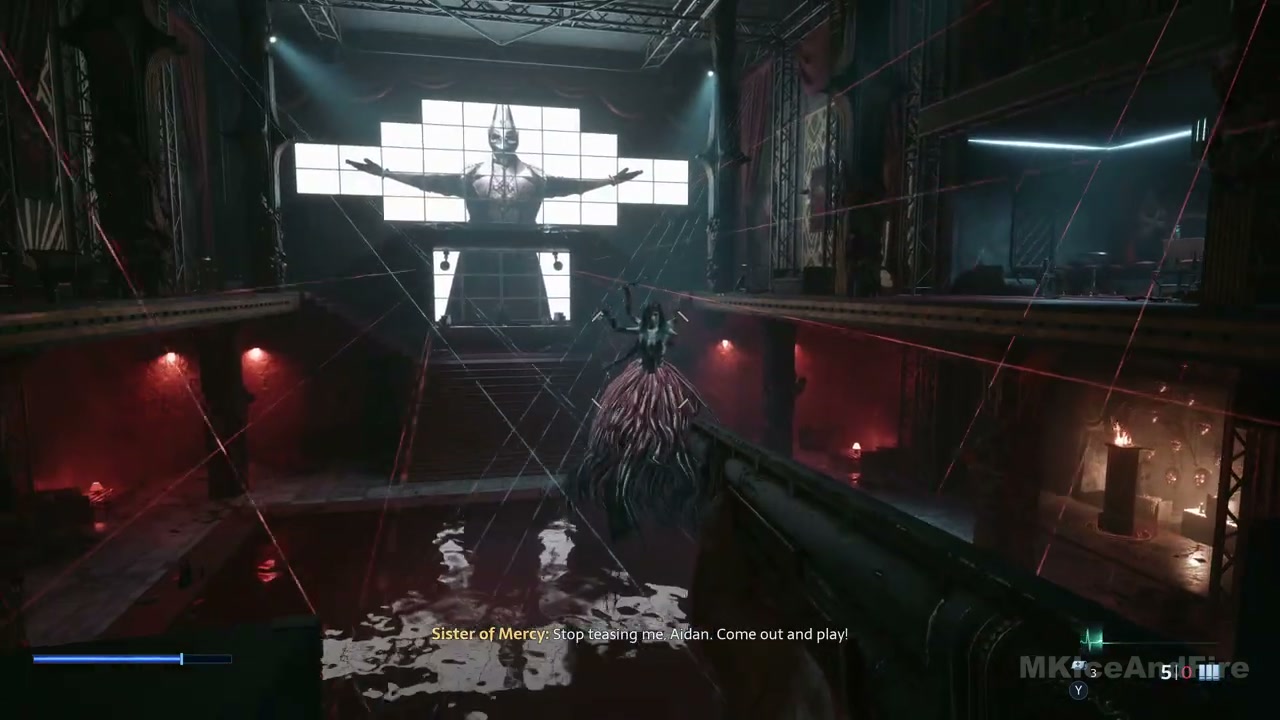
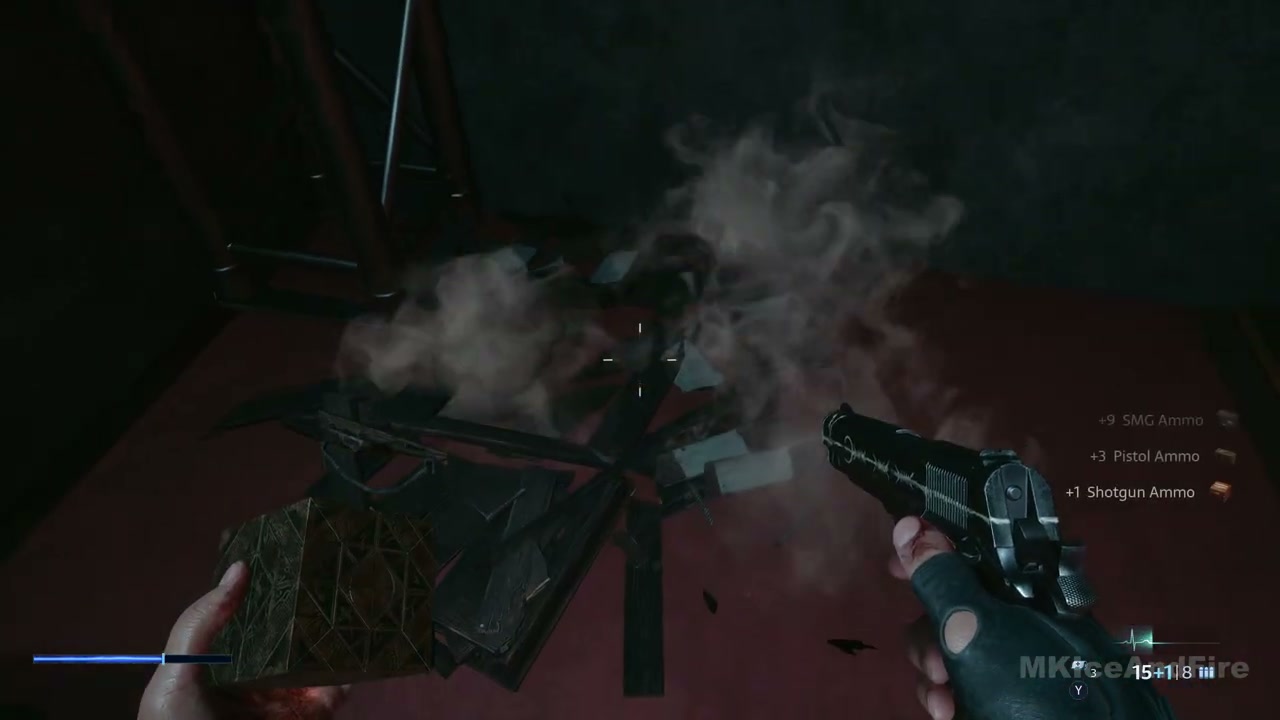
The fight continues after the first Hellchains sequence. Break the supply crates for ammunition between attacks, keep moving through the next pattern and use Hellchains again at the next opening. Once she falls, approach and complete the finishing interaction. Take her Heart and follow the Labyrinth route back to Sunny to deliver it.
The factory, Bruno and the bells
At the crossing after Sunny, hide behind the tall pillars while Leviathan’s beam sweeps past. Raise the next highlighted pillar with the Genesis Configuration, then move behind it. Repeat until you reach the far doorway. Leave the blue flame in its holder until you have crossed the bridge it powers.
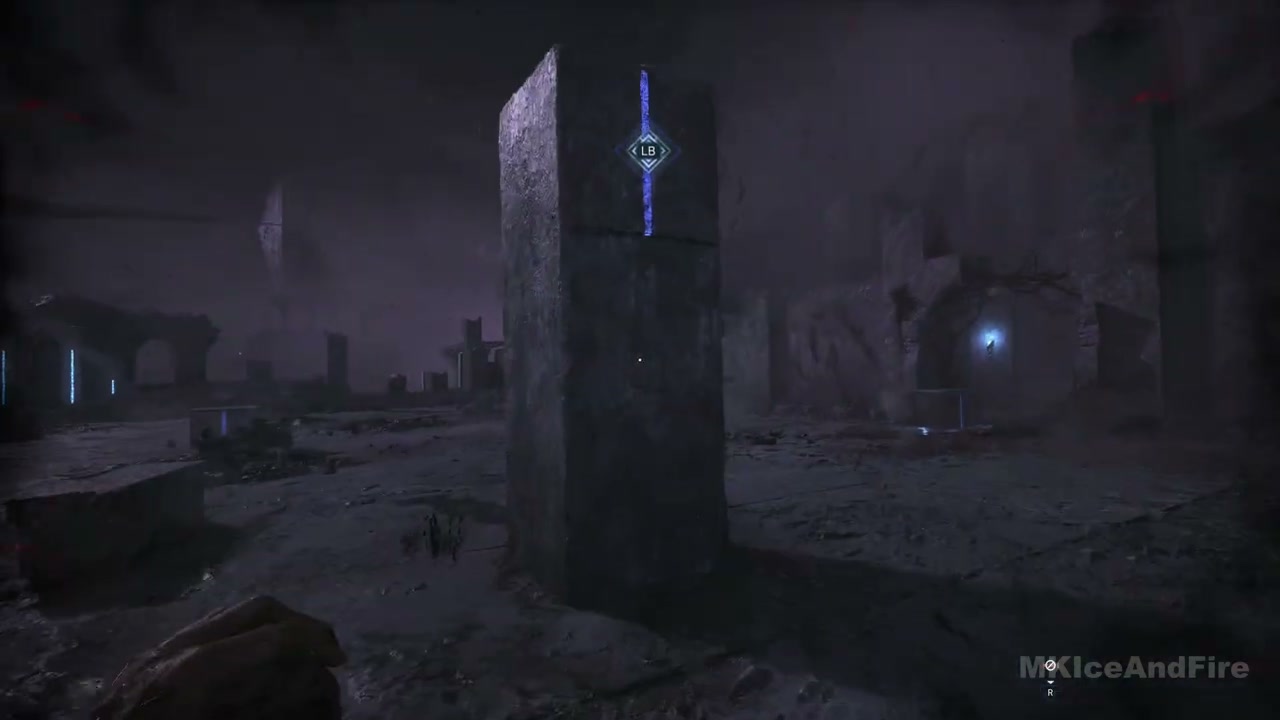
Listen to Bruno and Marlowe through the bars, then follow the maintenance route to Zora and the factory. At the factory monument, interact with the box-shaped socket and collect the Heart-Shaped Inset. Use it to enter the Pig Blues area.
The missing bell and Bruno’s second fight
The bell mechanism is missing one bell. Search the rooms beyond for the winding mechanism and music box. Wind it to release the missing bell, then return toward the bell room. Bruno intercepts you before you can finish the puzzle.
Fight him while circling the room’s obstacles. Use flame to keep pressure on him without standing within reach of his grab. The fight moves into another room; follow that route and continue damaging him. When he takes the Genesis Configuration, the encounter changes and leaves you able to return to the bells.
Insert the missing bell, then rearrange the five bells to follow the emphasized words on the plaque. From left to right, the finished row is grinning mask, skull, coiled serpent, Genesis Configuration, group of figures. Select a bell and then its destination to swap their positions. If the door stays shut, compare the symbols across the whole row; the puzzle requires their placement rather than a melody.
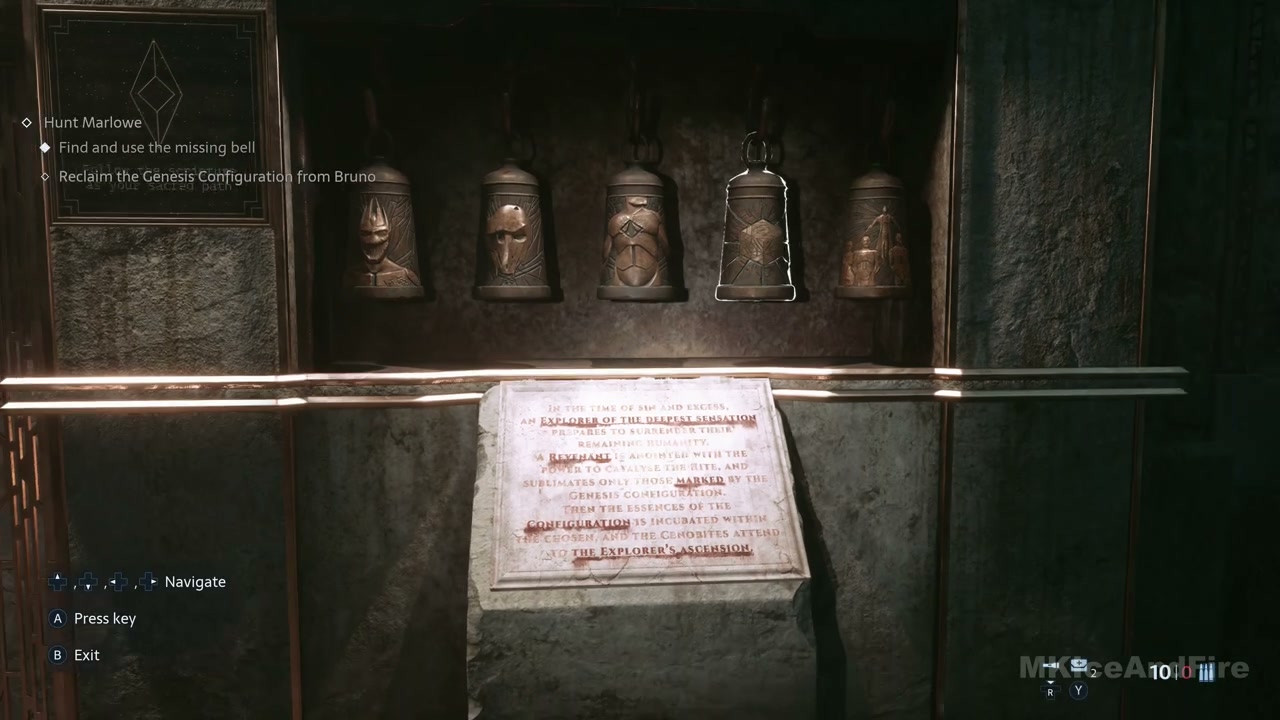
Enter the opened room and take the Elevator Key. Return to the factory monument and unlock the lift. Bruno gives the box back during the sequence beyond it, letting you resume using its powers on the sewer route.
The sewers and Marlowe
The sewer creatures attack through narrow passages, so leave space to back away from their limbs. At the electrified platforms, use the wall controls to stop the current before entering the water. Check the whole flooded section for sparks before crossing to the next control.
Search the bodies near the bridge for the Lever. Fit it into the bridge mechanism and operate it to extend the crossing. Enemies arrive around this section; clear the immediate attack before crossing a narrow bridge with no room to evade. Continue to the Cenobite encounter, then visit Zora for the final shop stop.
Expose the figures on Marlowe’s head
Watch the smaller human figures emerging from Marlowe’s head. Shoot them when they are exposed, then aim Hellchains at Marlowe during the opening. Save your ammunition for those figures rather than firing continuously into his body.
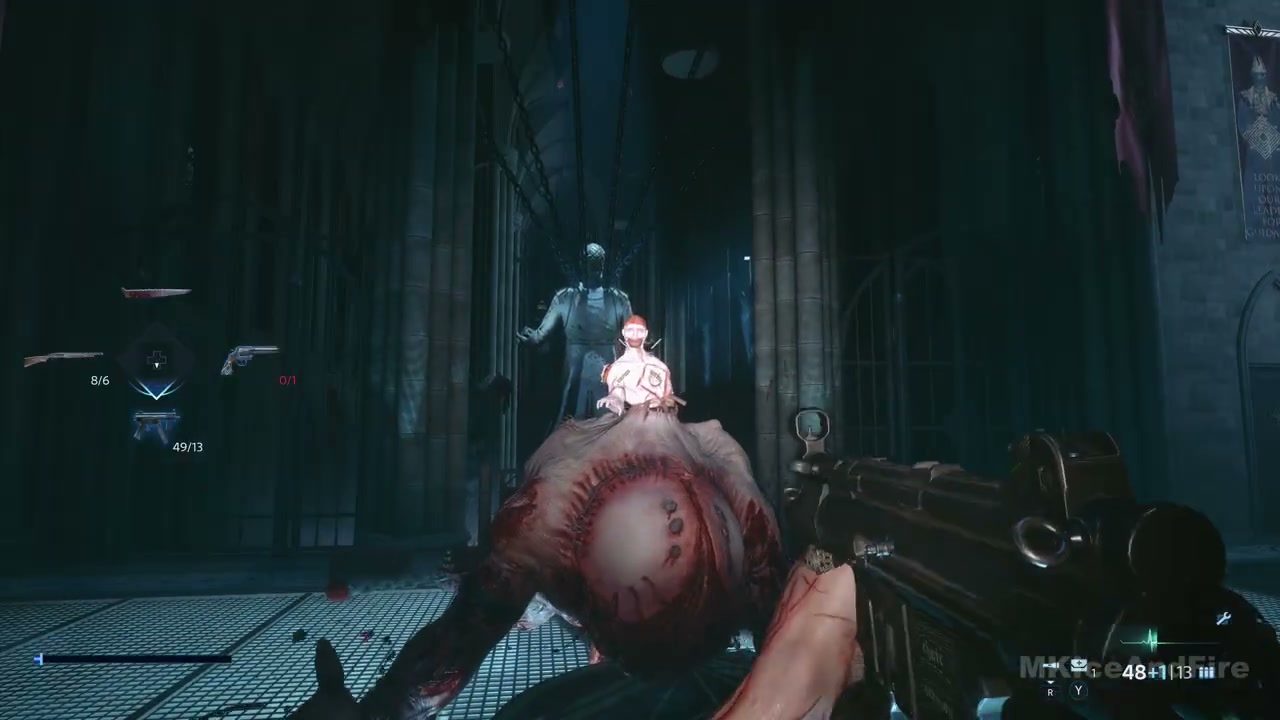
The next phase adds movable hazards. Pull the highlighted blocks out of the floor and put them in his charge path. Move aside so he strikes the obstruction. Use the box on the spinning hazards when they appear, then send them toward him. When spiked blocks hang overhead, shoot one down as he passes underneath.
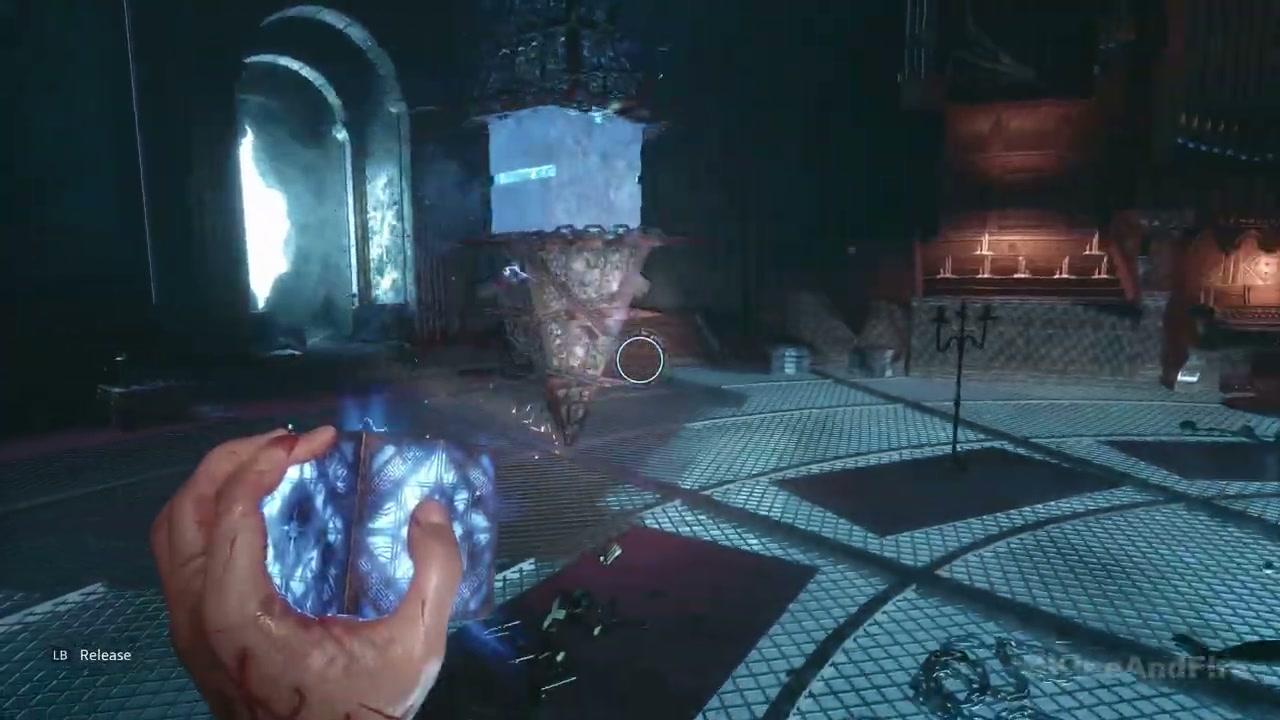
Watch his head again after these attacks. Shoot the next exposed figure and use Hellchains for the second opening. When Marlowe is down and becomes vulnerable to Banish, finish him with the box and collect his Heart. Take the newly opened corridor back toward Sunny and give her the Heart.
The final escape and both choices
After the sequence with Sunny, run down the red corridor and duck below the chains. Move the first blue-highlighted platform into place with the Genesis Configuration, then cross immediately. The bridge collapses behind you, and falling pillars obstruct the path ahead.
Keep running until the broken stairs stop you. Use the box to pull the highlighted stair sections back into a connected staircase, then climb. After the fall into the hospital corridor, run through it and follow the fleshy tunnel to the final encounter.
When the objective changes to Make your choice, Fallen stands beyond the broken wall. Walk toward her to accept the Cenobites’ offer. To reject it and remain human, aim the Genesis Configuration at Fallen and attack her instead. The two actions lead to different ending scenes.
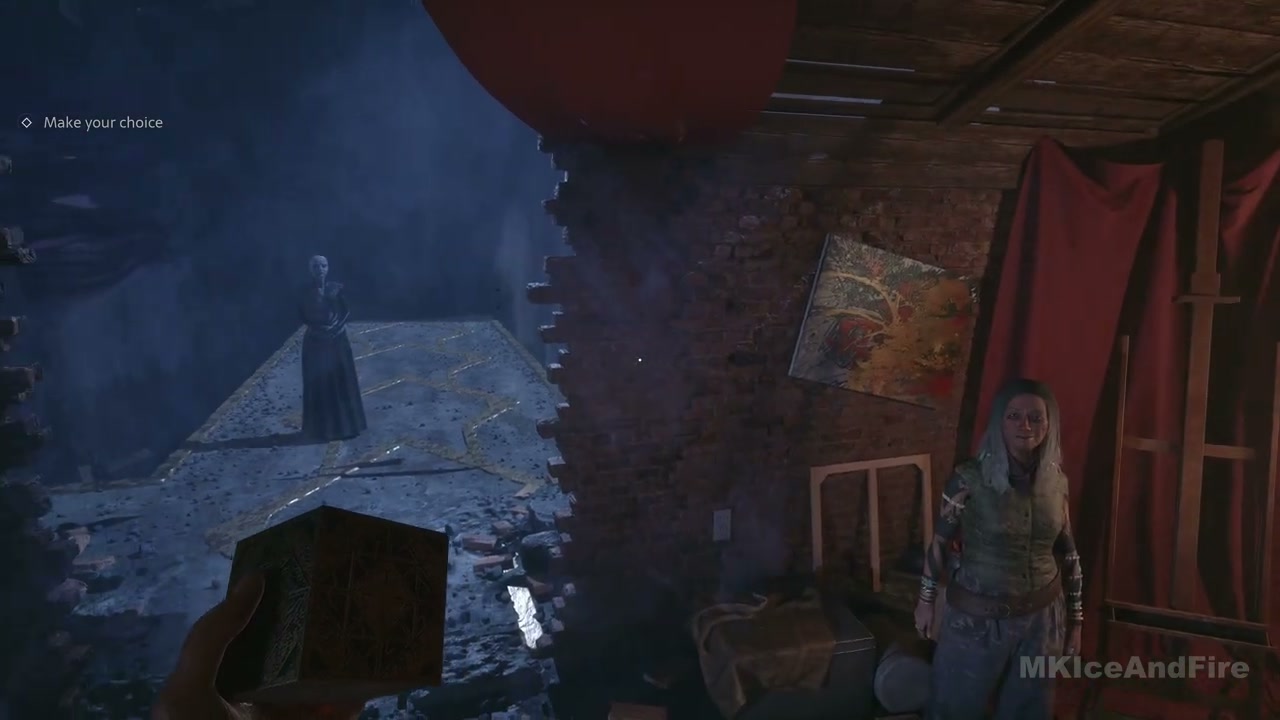
Accepting the offer awards Experience Beyond Limits; refusing it awards Human After All. To see the other ending, load the autosave made before this choice and take the other action. Keep that save until both scenes are finished.