For your first campaign in Battleplan, choose Readiness mode, give each formation a manageable area to control, and arrange its supply before executing the plan. A tank division can break through a line quickly, but infantry must hold the corridor behind it. Otherwise the tanks can reach their destination with too little fuel and ammunition to fight there.
This guide covers the command sequence from the training missions into the early Normandy battles: creating an army, drawing and executing orders, surrounding enemies, defending Bayeux and preparing an offensive. The October 2026 release supports both timeline plans and Zone Orders. Prerelease screenshots illustrate the controls. It does not cover the entire campaign through Operation Varsity.
Choose when you can change orders
Readiness lets you create new plans throughout the day. Wait until a plan reaches 100% readiness to execute it without the readiness penalty. It gives you time to learn how long a formation takes to assemble, receive orders and begin moving. You can redraw the response to a breakthrough without waiting for the next daily planning window, although the replacement plan still needs preparation.
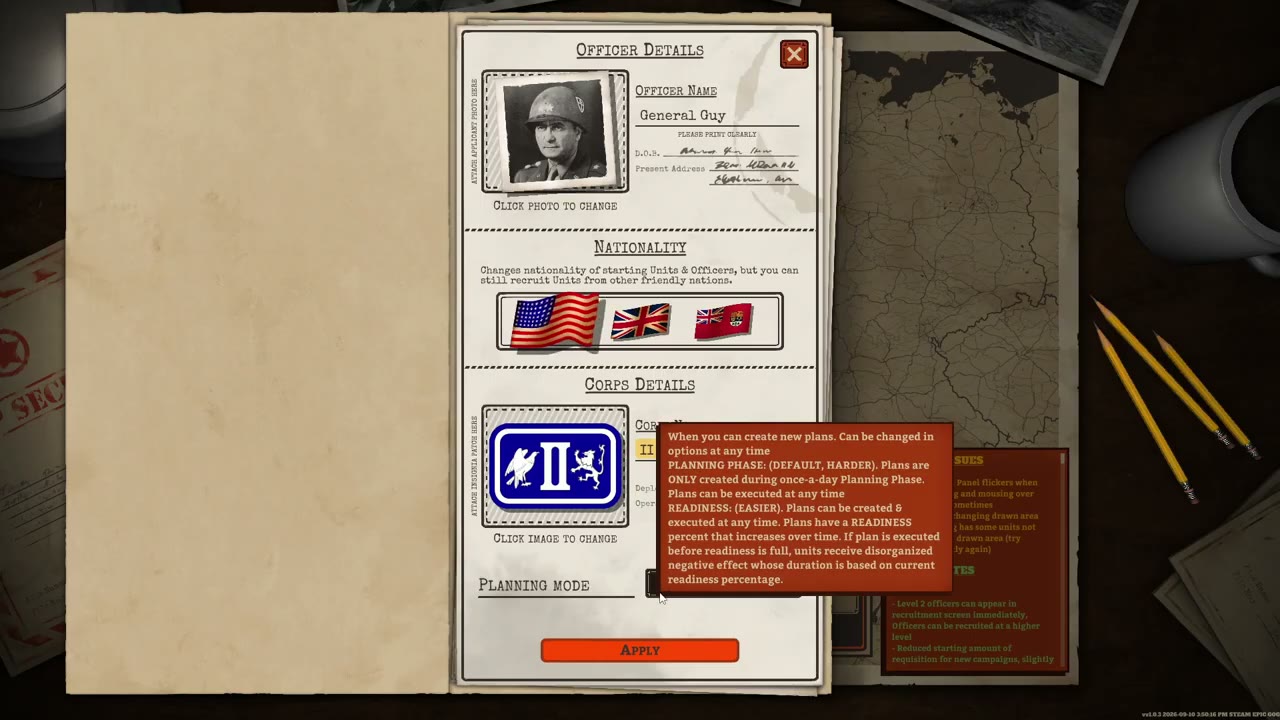
Planning phase restricts order preparation to a daily phase. In that mode, finish the plans for every formation before ending planning. Check the air formations as well as the infantry and armour, particularly when you need reconnaissance before a ground attack.
Keep 3D unit icons enabled if you are still learning the NATO symbols. The formation display relies on icons, and the 3D view makes infantry, tanks and guns easier to distinguish. Once you can identify a formation’s components, the NATO view gives you another way to read the battlefield.
Choose your army within the mission’s weight limit
Your country determines your starting division, but you can recruit units from the U.S., U.K. and Canada. The first infantry division is provided before the first tutorial. Each later mission limits the logistical weight you can deploy, so inspect the weight at the top of the formation in the Army Constructor before adding companies or choosing the mission force.
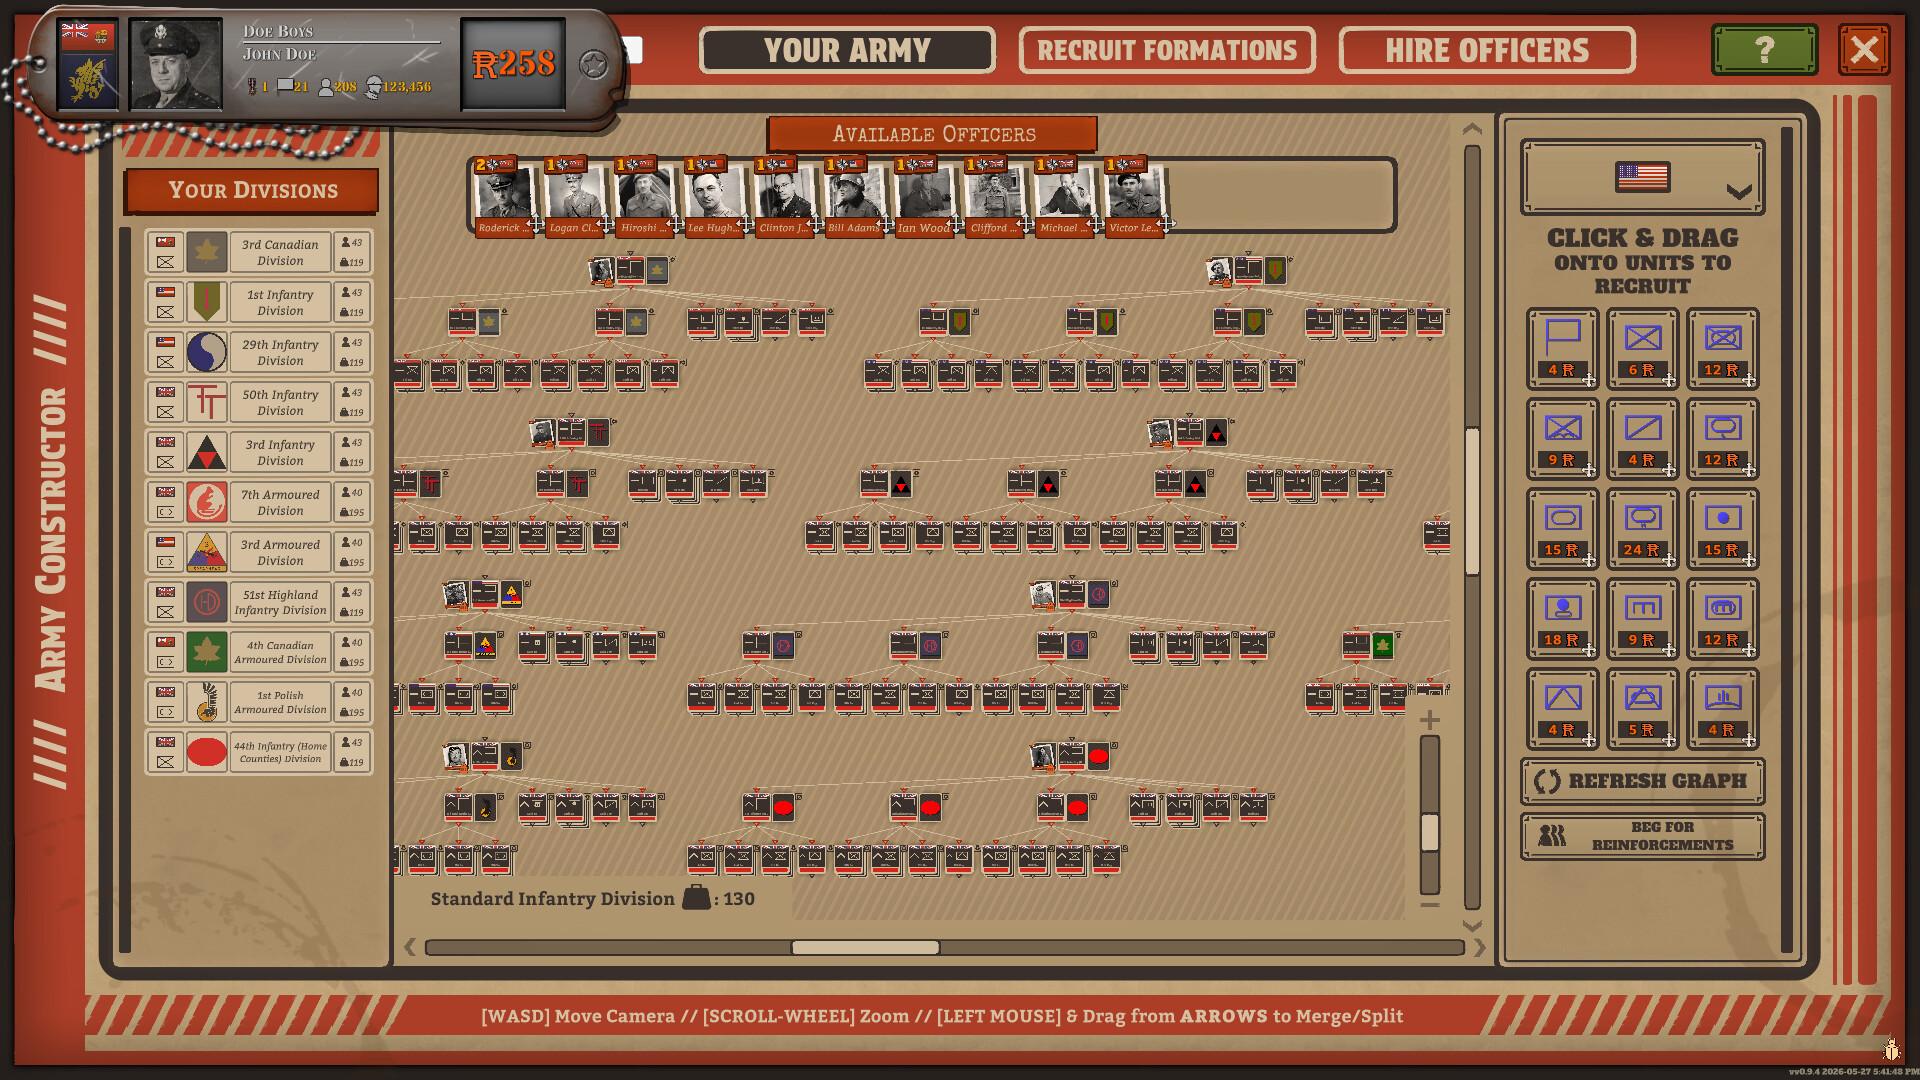
The weight limit applies to the whole force. Combining divisions into a corps changes how you command them, but it does not create extra deployment capacity. If the mission selection displays a weight warning, remove a formation from the deployment slots or reduce the companies attached to it. Buying another battalion can make an otherwise valid deployment too heavy.
Every formation needs a headquarters with an officer. Keep that connection intact when restructuring the army. The constructor lets you change the chain of command by dragging the white connecting lines; a regiment’s structure also matters because a Regimental Plan divides responsibility between regiments. Before leaving the constructor, check that the troops you intend to command together are connected to the intended headquarters.
Leave room in the attacking formation for scouts, artillery and engineers. Scouts reveal defenders, artillery prepares the attack, and engineers help against fortifications and mines. A formation holding a quiet stretch of the line has a different requirement from the force expected to break through. Avoid filling the deployment allowance with extra armour while leaving the infantry too thin to protect its supply route.
A drawn plan still needs an execution order
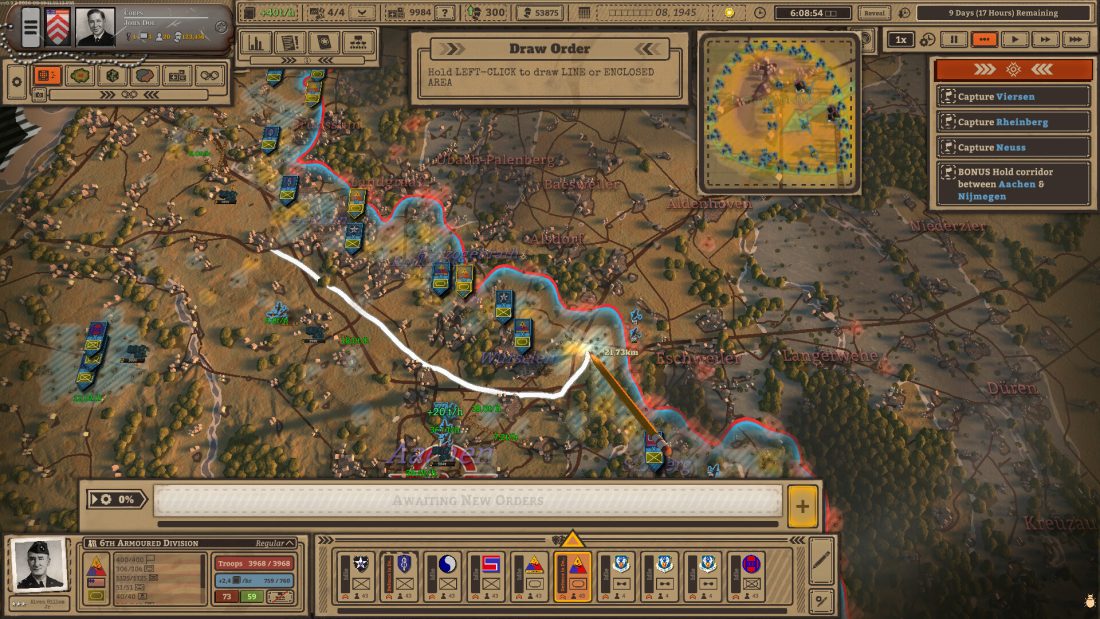
Select the formation you want to command, open Draw Order and choose the order before drawing on the map. A line, an enclosed area and a route can represent different instructions. Watch the order label and its preview as you draw; cancel a mistaken shape before adding another step. Selecting a subordinate group instead of the division changes which troops receive the plan.
For a prepared attack, start with an Assemble order in friendly territory near the intended approach. Add an artillery barrage over the enemy position, then the attack itself. The plus button adds another order to the plan. Read the sequence before executing it: the tanks should assemble and finish their preparation before the breakthrough begins.
Ending planning and executing a plan are separate actions in the timeline interface. After finishing the planning phase, select each prepared formation and click Execute Plan. If the clock is running but a formation remains idle, inspect its plan before accelerating time. It may still be waiting for execution, a scheduled time or a signal.
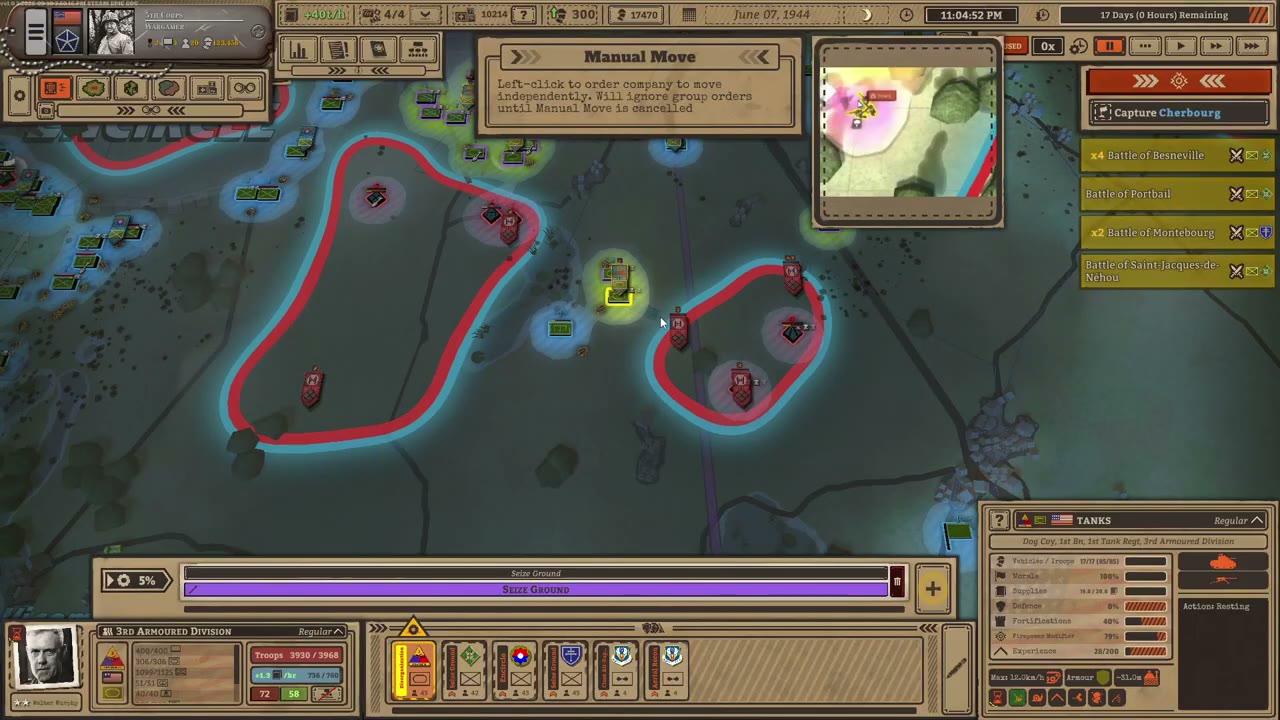
If one company ignores the formation’s new plan, check for Manual Move. A company under that order moves independently and ignores group orders until you cancel it. Return it to formation control before expecting a Regimental Plan to move it with the rest of the division.
Use a wait-until date or signal when two attacks need to begin together. This is especially useful when infantry and armour have separate plans. A manually drawn barrage on one division and an immediate attack on another do not establish coordination by themselves. Give them a common start condition or keep the preparation and attack inside the same planned sequence.
Regimental Plans divide the front into areas of responsibility
Draw a Regimental Plan over the territory you want the division to handle. Battleplan divides the area into zones based on its regiments and assigns the headquarters and support elements to a reserve area. The zones show which regiment covers each part of the front, so you can adjust one section without sending the entire division to a new destination.
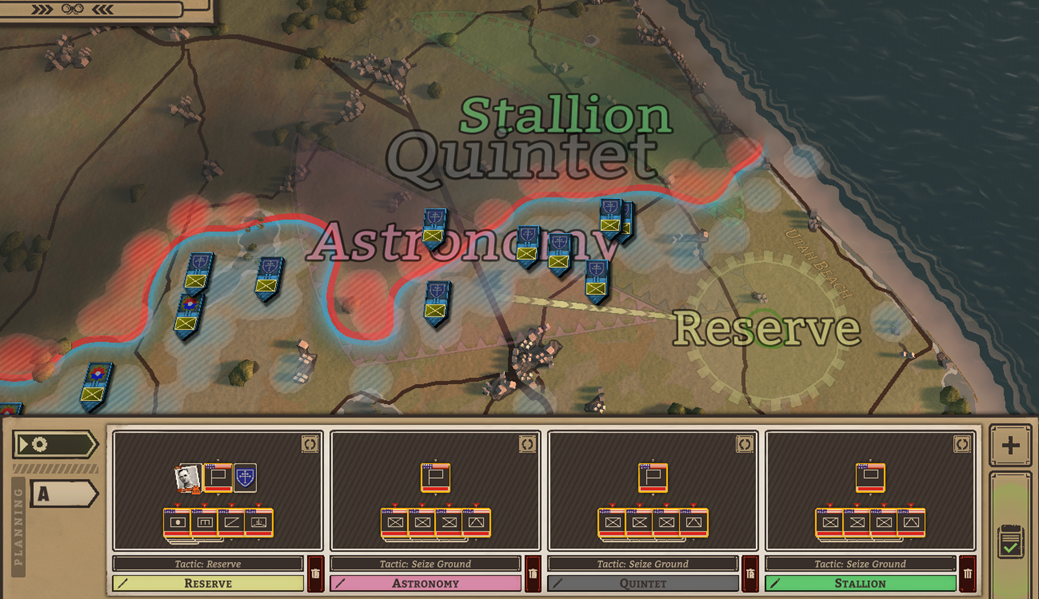
Choose the tactic for each zone with its Tactic button. Seize Ground pushes forward aggressively, including when troops are outnumbered or risk overextending. Balanced Hold advances when the flanks are secure and the local force is not outnumbered. Use Balanced Hold for a formation that must keep a corridor open; use an aggressive tactic where you have concentrated an attack and can support the advance.
Hover over a zone to inspect its battle information. The upper blue and red bar predicts an attack with the allocated force; the lower bar predicts its defence. The panel also shows the participating divisions, soldier totals and information such as difficult terrain or elevation. A favourable defence prediction does not mean the same force can attack that position successfully.
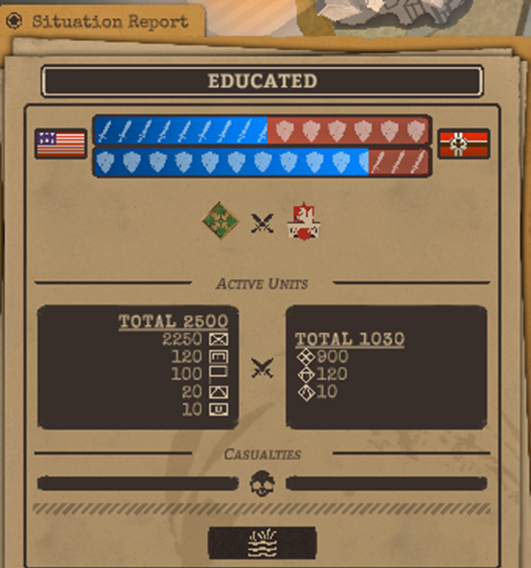
If the attack prediction is poor, drag battalions into the zone’s allocation panel or shrink the area they must cover. Hold the right mouse button at a zone edge to reshape it. You can change its outline during execution, so shorten a stretched salient before it becomes a long, narrow supply corridor. Recheck the adjacent zones after moving troops: reinforcing the attack may leave the defensive side understaffed.
You can prepare several alternative plans. The rotating gear identifies the one currently executing. When you switch from holding a front to making an attack, confirm which plan has that icon; another visible drawing on the map may be a prepared alternative.
The training missions: Honiton, Exeter and Newton Abbot
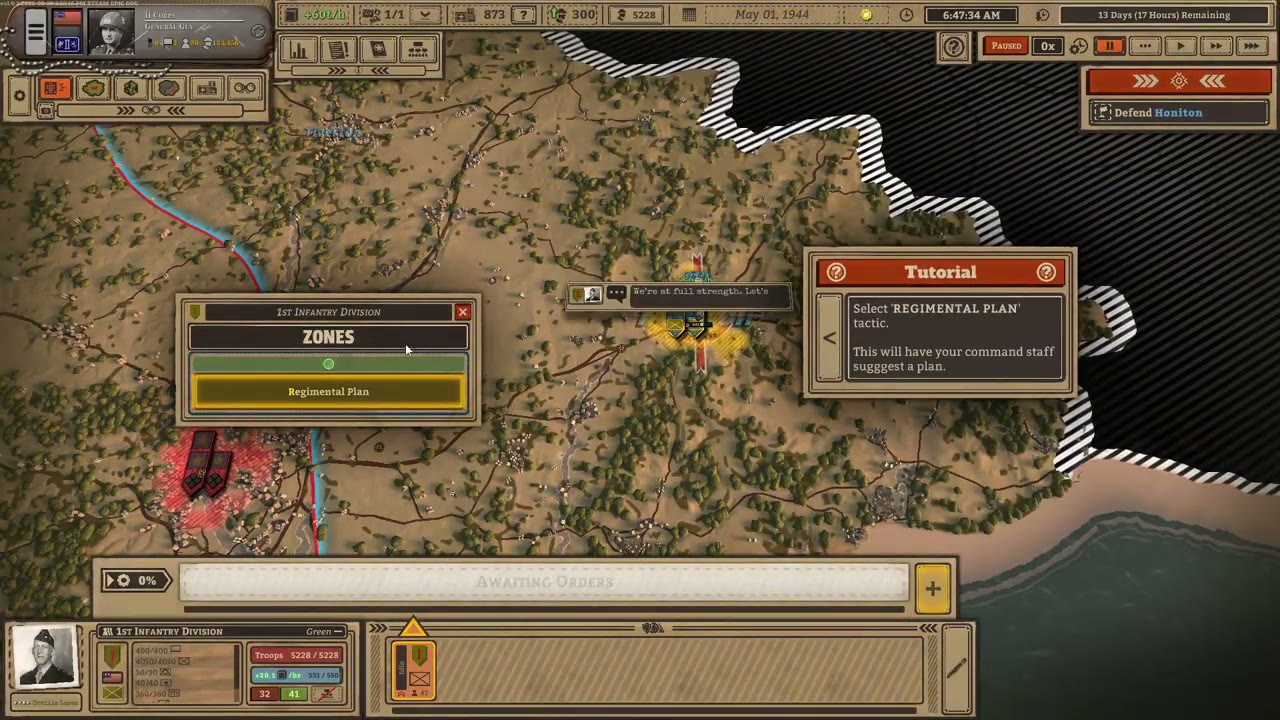
The newer opening tutorial begins with Defend Honiton. Select the infantry division, open Draw Order, choose Regimental Plan and draw an area between your front and Honiton that blocks the approaching enemy. Inspect the zones, pick a defensive tactic such as Cautious Hold, and use the green execution control when the plan is ready. Let the troops reach their positions and dig in before the attack arrives.
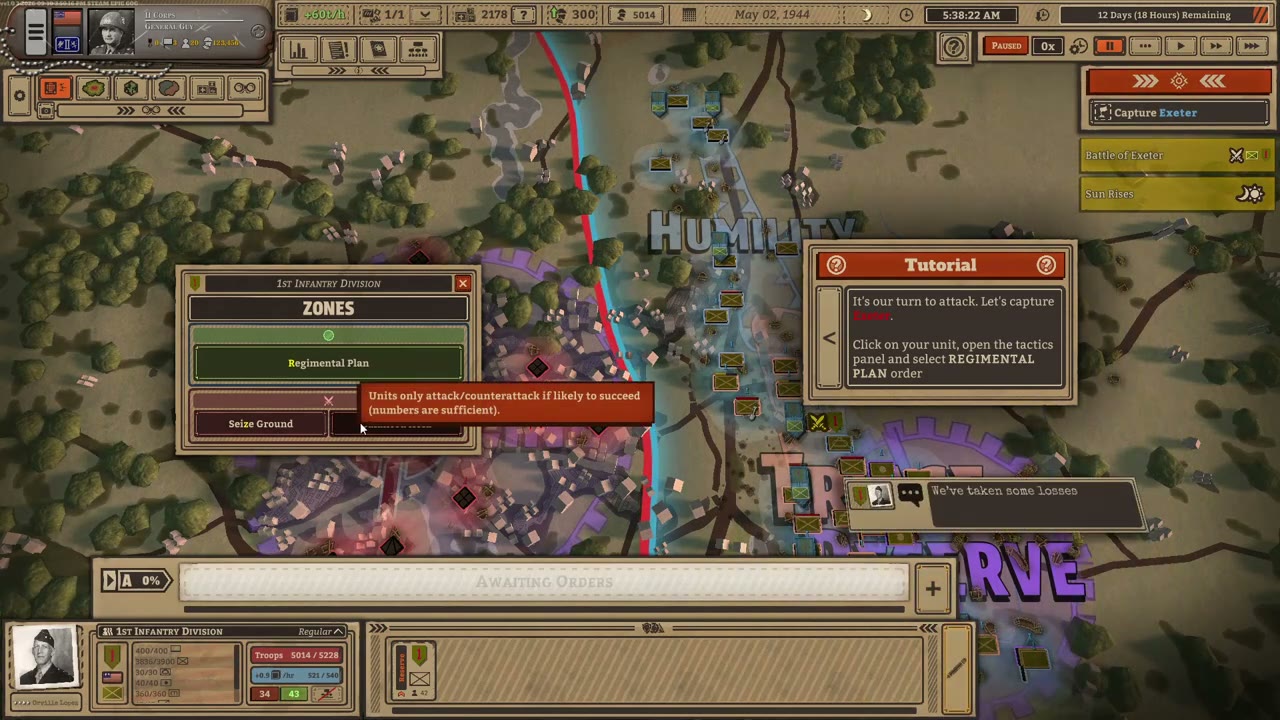
After repelling the attack, the objective changes to Capture Exeter. Create a new Regimental Plan starting in friendly territory and extending into Exeter. Give the attacking zones Seize Ground, execute the plan and watch for the capture notification. The name printed across a zone identifies that area; read the tactic above its name in the order bar to see what the assigned troops will do.
Switch to Supply View when prompted and inspect the division’s delivery route. Use the depot control at the top of the screen to establish another depot near your troops, on valid friendly ground. The advance toward Exeter has moved them away from the original supply position, so make this adjustment before ordering the next assault.
Newton Abbot is fortified and mined. The tutorial asks for a Regimental Plan near the town that does not touch the enemy positions. Draw that preparation area on your side of the front and execute it when ready. Keep engineers with the assault force to deal with mines, and use artillery to reduce the fortifications. Once prepared, extend a Seize Ground plan into Newton Abbot. Keep troops assigned to the town after the capture notification; leaving it open can let surviving enemies take it back.
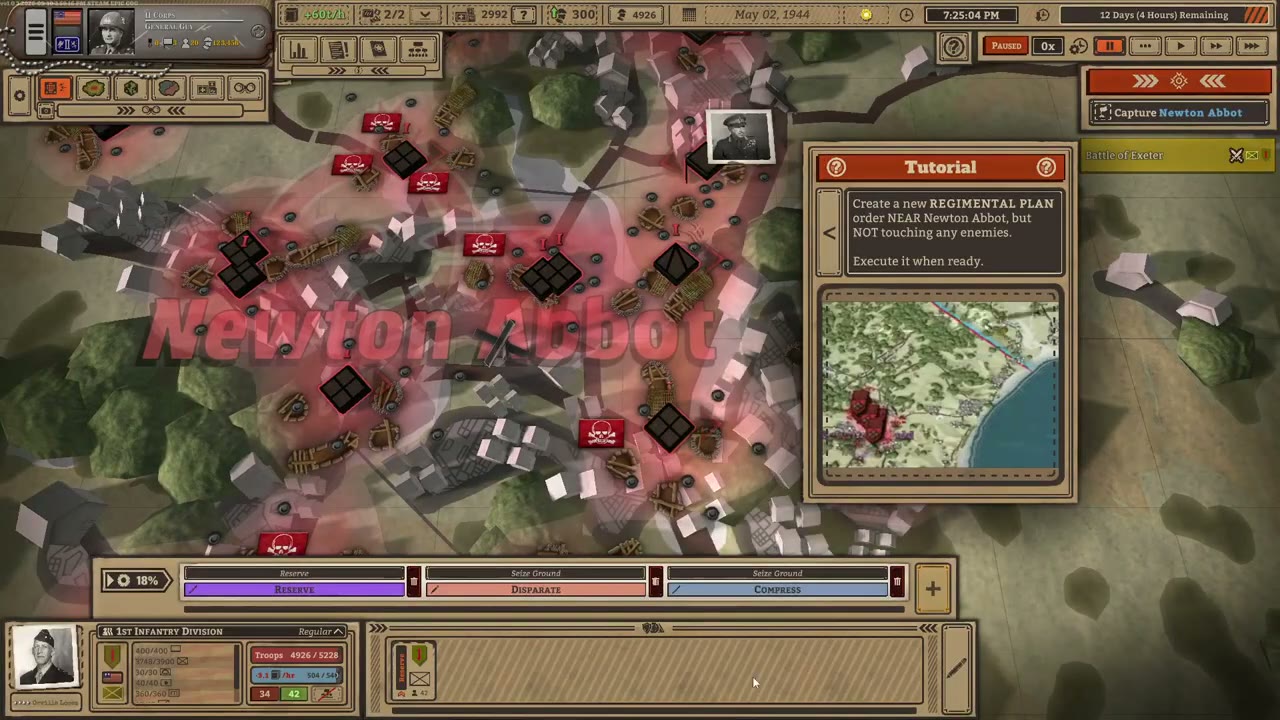
To isolate defenders you cannot efficiently beat head-on, use the timeline Encircle order to draw a route around their position, outside the enemy concentration. After cutting the surrounding territory, send supporting formations or split-off groups to capture the enemy supply hub and depot. Taking only the hub can leave the enemy living on supplies already stored in its depot.
Advance time after the supply objectives are captured and monitor the trapped formation. Isolation does not make every company surrender immediately. Keep the ring closed while the stockpile runs down. If an enemy breaks out or reconnects its territory, close that gap before expecting supply starvation to finish the battle.
A full depot cannot fix a bad route to headquarters
Each company carries ammunition, fuel and food represented by supply. Moving and fighting consume much more than remaining idle. Low supply applies combat penalties; at zero supply, units suffer attrition and are much more vulnerable to surrender. Check the division’s balance as well as its remaining stock. A negative balance means the division is consuming supply faster than it receives it.
Supply hubs bring material onto the map and feed depots. Hubs are fixed locations such as ports or transport centres. Capturing an enemy hub stops supply for its original owner, but does not turn it into a working source for your side. A captured depot is different: its stored supplies can support the troops that take it.
The delivery route runs from the depot to the divisional headquarters, and its rate depends on distance and terrain. Inspect the headquarters location when a division reports poor supply despite a nearby stockpile. A long route through difficult terrain can deliver too little for an armoured division in continuous combat.
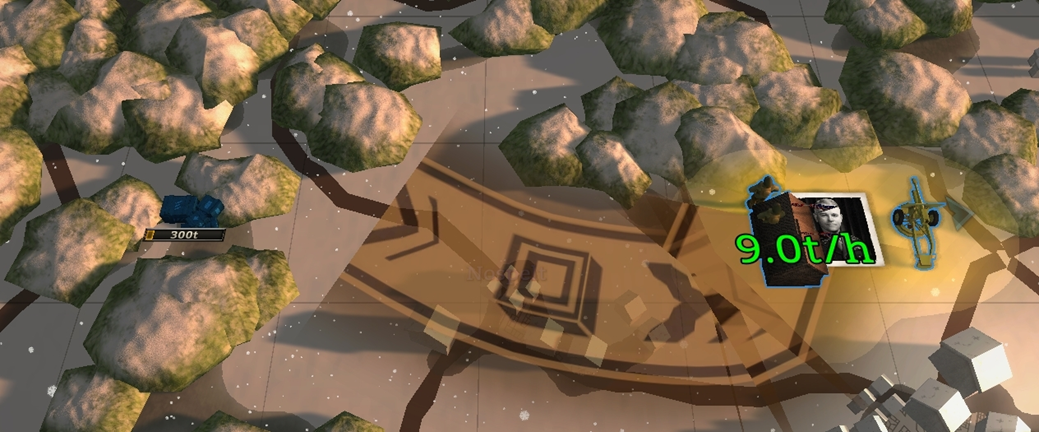
Place a depot at the assembly area before beginning a major offensive. During deployment, establishing or dismantling depots is immediate; after the mission starts, those actions take time. Keep the depot on ground you can defend, close enough to supply the headquarters. A thin frontline with an exposed depot can hand the enemy both the position and its stockpile.
When supplies fall, pull the formation toward a depot and reduce the moving or fighting that is draining it. If the enemy has isolated the formation, reopen the corridor or withdraw through a safe route before ordering it to resupply. If the division still has a negative supply balance, shorten the delivery route before sending it into another attack.
Cherbourg needs a corridor behind the northward advance
The Cherbourg mission sends you north through the peninsula toward the port. Begin by inspecting the condition and supplies of the formations selected for deployment. An armoured division that arrives depleted is a poor choice for the initial breakthrough, even if its formation name looks suitable. Use a fresh attacking force and put supporting infantry where it can follow the same approach.
Prepare a limited breach in the German defensive line, with artillery and reconnaissance supporting the approach. Once the armour opens it, send infantry to seize and hold the ground behind the tanks. Include enemy depots in the route where practical, and bring your own supply forward as the advance moves away from its starting base.
Watch both sides of the corridor while the leading formation advances toward Cherbourg. German troops left behind the spearhead can move back into the gap. If the front cuts across your route and the leading division becomes isolated, pause the advance and use the supporting infantry or reserve to reopen it. The same tank division cannot reliably keep racing north and defend every section of its rear at once.

Before attacking the port’s defences, shorten the front and replenish the troops that will make the assault.
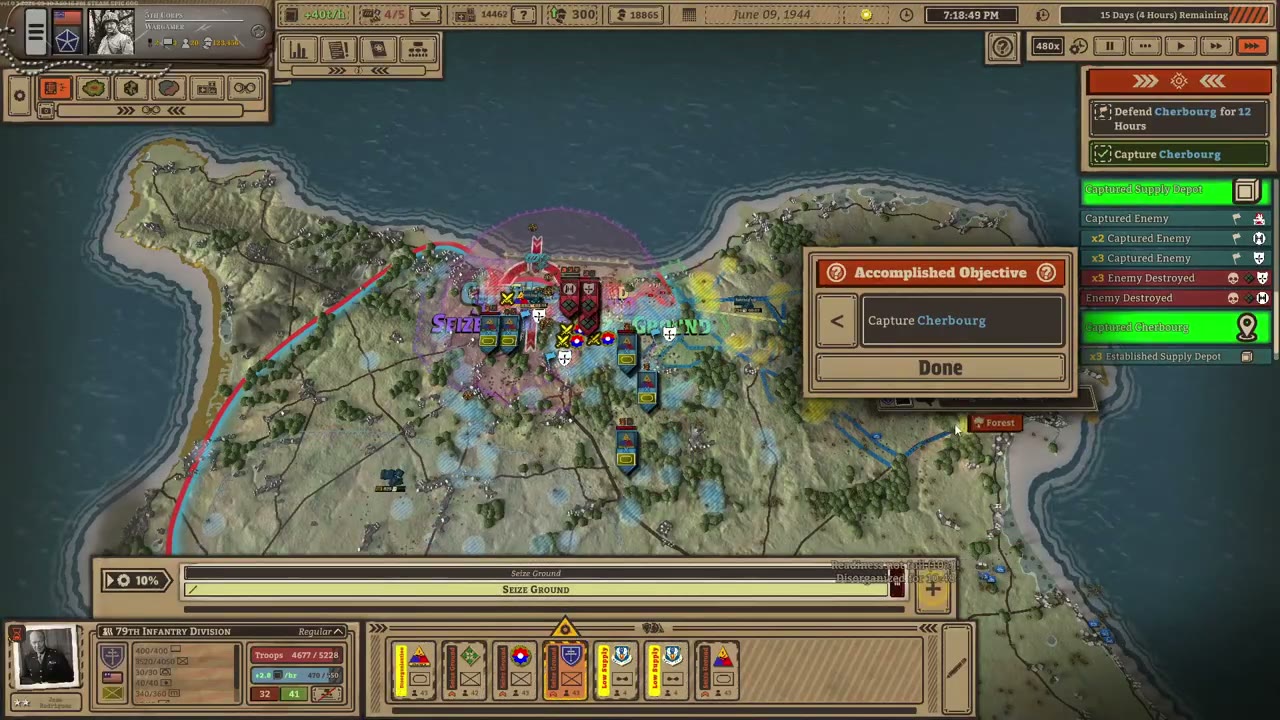
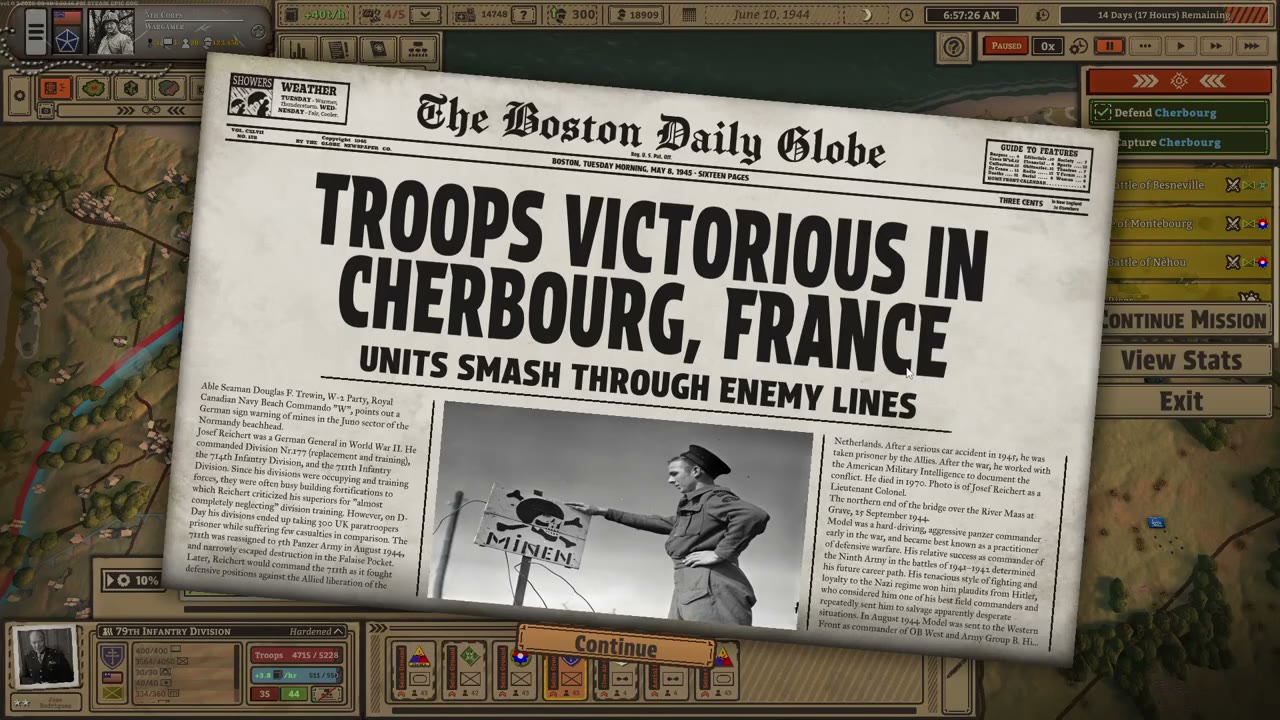
After Capture Cherbourg is checked off, keep a defending force in the city. The newer mission then displays Defend Cherbourg for 12 Hours. Hold it until that objective completes and the victory newspaper appears. Leave enough troops in Cherbourg to hold it through the countdown while the remaining formations secure the approaches.
Keep armour available when panzers push toward Bayeux
The early Caen battle opens with a German counterattack while you wait for reinforcements. Protect Bayeux and the roads leading to it. During deployment, put infantry along a defensible front and keep armour a few kilometres behind it on Reserves or Counterattack orders. Position that reserve near a depot and on an approach to the town so it can intervene without a long, poorly supplied march.
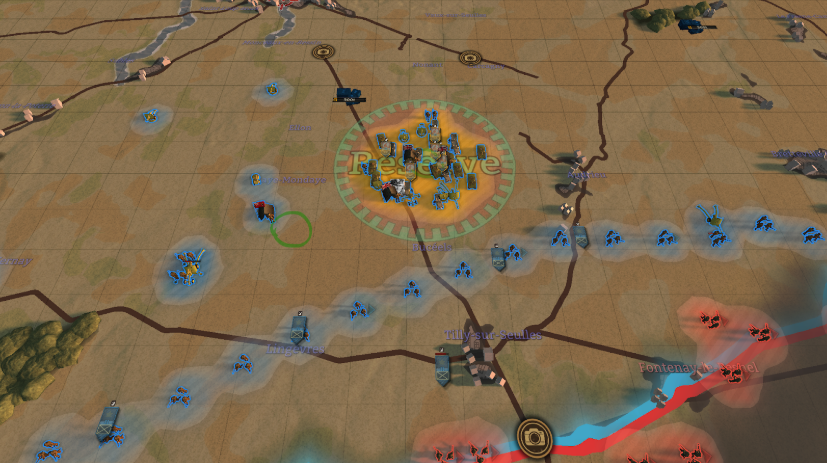
Use forest and town edges where possible. They improve defence and firepower, while swamps, wetlands and beaches penalize the troops standing in them. The Elevation view helps you locate higher ground, which improves observation and combat. On the eastern side of the Caen map, pulling airborne troops out of the swamps across the river can shorten the front and put more troops into a smaller defensive area.
An infantry line may bend or break under a panzer attack. Let the reserve deal with the penetration while the infantry holds or reforms the shoulders of the gap. If the Germans drive forward without protecting their rear, closing the gap behind them can cut their supply. Check for a depot inside the pocket before assuming the trapped armour is about to collapse.
Support the counterattack with reconnaissance and close-air support over exposed enemy formations. Fighter-bombers damage morale and apply combat penalties, making a ground attack more effective; they cannot capture the town for you. They are less effective against fortified troops. If flak interferes, move the aircraft’s operating area or attack the anti-aircraft position with ground troops.
When reinforcements arrive, give them their own plan and confirm its execution. Keep a force assigned to Bayeux as you shift troops toward the later objectives. Clearing one pocket does not secure every approach, and sending the whole defending division after a retreating enemy can leave the town open to another panzer group.
Prepare an offensive that your supply can sustain
Before an offensive such as Operation Cobra, identify the objective, the available time and the strength of the defending position. For a lightly held line and a short timetable, Breakthrough Attack followed by Assemble can carry a formation through the front and quickly onward. Breakthrough keeps moving along its route; it does not wait to eliminate every enemy or hold the territory behind it.
Against heavy fortifications or veteran defenders, use Complex Attack to generate a preparation and assault sequence. The plan assembles troops near the front, conducts artillery and scouting preparation, assigns breakthroughs and reserves, then uses Seize Ground to take the remaining area and form a perimeter. Inspect and edit that generated plan before executing it.
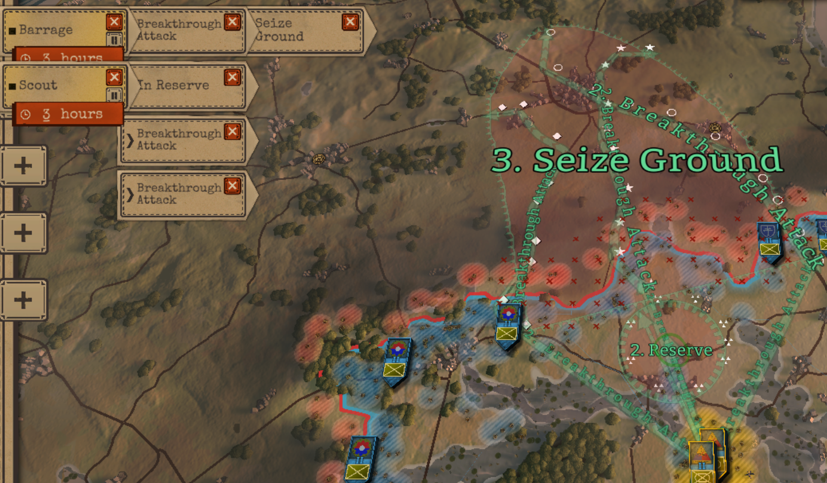
Keep the first attack area within reach of the force and its depot. The developer’s offensive guidance recommends drawing inward roughly 5 to 15 kilometres from your frontline, depending on both armies’ strength. Expand the offensive after the first area is secure. A huge drawing can allocate troops across more ground than they can occupy and supply.
Use a formation with at least half of its maximum supply as a starting precaution for the assault, and replenish it before attacking if it is below that level. Armour consumes supplies quickly. Set the barrage duration to give the guns time to reduce fortifications, while allowing for the ammunition it uses. Match scouting preparation to the barrage so the assault follows a period of observation and bombardment.
Prepare the ground attack before ordering carpet bombing. The bombing damages fortifications and can make defenders panic, creating an opportunity before morale recovers. Aircraft still need fuel and supply, so keep their headquarters or airfield near a depot and protected from enemy ground units.
Keep engineers with the assault troops when attacking mines or fortifications. Different nearby unit types also provide combined-arms bonuses; adding repeated units of the same type does not stack that support effect. A mixed regiment can support its infantry and tanks while keeping artillery and engineers close enough to perform their specialist work.
Preserve the officers you need for the next mission
Keep headquarters behind the fighting companies. An officer’s bonuses and penalties pass down the chain of command, so losing the headquarters affects more than its own small unit. A formation is temporarily paralysed and suffers combat penalties if its officer is incapacitated during the battle. Moving headquarters forward to use an active skill exposes it to that risk.
Between missions, inspect officer availability before committing another formation. A wounded officer is unavailable for the following mission and needs a replacement; a captured or killed officer is permanently lost. Passive skills apply continuously, while active skills need manual activation during a mission. Choose the next deployment with its officer, supply needs and logistical weight together, then rebuild the plan around the troops you can actually field.