
Build your first Planet Zoo 2 zoo around one species you can house, feed and breed, then research its Release Group before preparing a Wildlife Reserve. The useful order is a connected staff area, a valid enclosure, healthy animals, enough guest income to support their care, and an ecosystem ready to receive them. Finalising a Release Group commits those animals permanently, so finish your destination and check its requirements before taking that step.
The route below takes you from a new zoo to its first reserve release, with the construction changes needed for birds, exhibit animals and fully aquatic species. It covers the October 2026 launch mechanics rather than every Career scenario or achievement.
Choose a mode, then choose a species
Career introduces FEN’s conservation work through linked zoos and reserves. Start it from Career > Start New Career +, read Eric Ashford’s letter and travel to the first Chapter 1 Wildlife Reserve. Scenario objectives earn Bronze, Silver and Gold medals, which raise your Accreditation Tier.
For a zoo of your own, Franchise connects your zoos, reserves and animal trading with other players. It requires an internet connection and a Frontier account. Choose Franchise, sign in, create a franchise, then choose the zoo’s biome and continent. Conservation Credits are shared across that franchise, while each zoo keeps its own Cash. A healthy balance in another zoo therefore does not pay this zoo’s staff.
Sandbox lets you practise the same construction tools with adjustable economy and welfare settings. Choose Create New Zoo, a biome and continent, then a Default, Creative or Challenge preset. Open Sandbox Settings if you want to change the preset. To practise animal care as well as construction, keep the relevant welfare settings enabled.
Before spending on a large enclosure, open the Zoopedia for your intended species. Check its housing, barrier strength and height, social group, terrain, temperature and nesting needs. Plan space for the adult group you want to breed and release. Juveniles eventually mature, and additional adults increase space requirements. A habitat that fits the original pair may become crowded when their offspring grow up. If Trading requires a higher Accreditation Tier for that species, work toward the listed tier. Career medals raise it; in Franchise, improve your zoos’ Reputation and reserves’ Biodiversity. Choose an available species for the first enclosure while working toward those unlocks.
Make the staff route work before animals arrive
Connect your guest spawner to a Zoo Entrance Gate, then extend a path to the first viewing area. Guests must pass through the gate to buy tickets. Run a Staff Path behind the enclosure to give your team a route guests cannot enter. Connect each building’s access point to the network; a decorative building group alone does not supply an accessible facility.
Place a Trade Centre for adoption and animal moves, a Keeper Hut near the habitat’s Staff Gate, and a Staff Room for breaks. Add a Quarantine and Vet Surgery so new arrivals can be checked and sick animals treated. All staff facilities need power and path access. Check the power coverage after placing them, especially if you have moved the service area away from the entrance’s starting power.
The Keeper Hut is where keepers prepare animal food. A Small Hut admits one keeper at a time; a Large Hut accommodates six. Distance from the hut to the gate determines how far a keeper travels to deliver food, so put the hut on the service side of the enclosure. Staff Rooms restore energy and also complete assigned training. A Small Staff Room accommodates four staff members, and a Large one holds twelve.
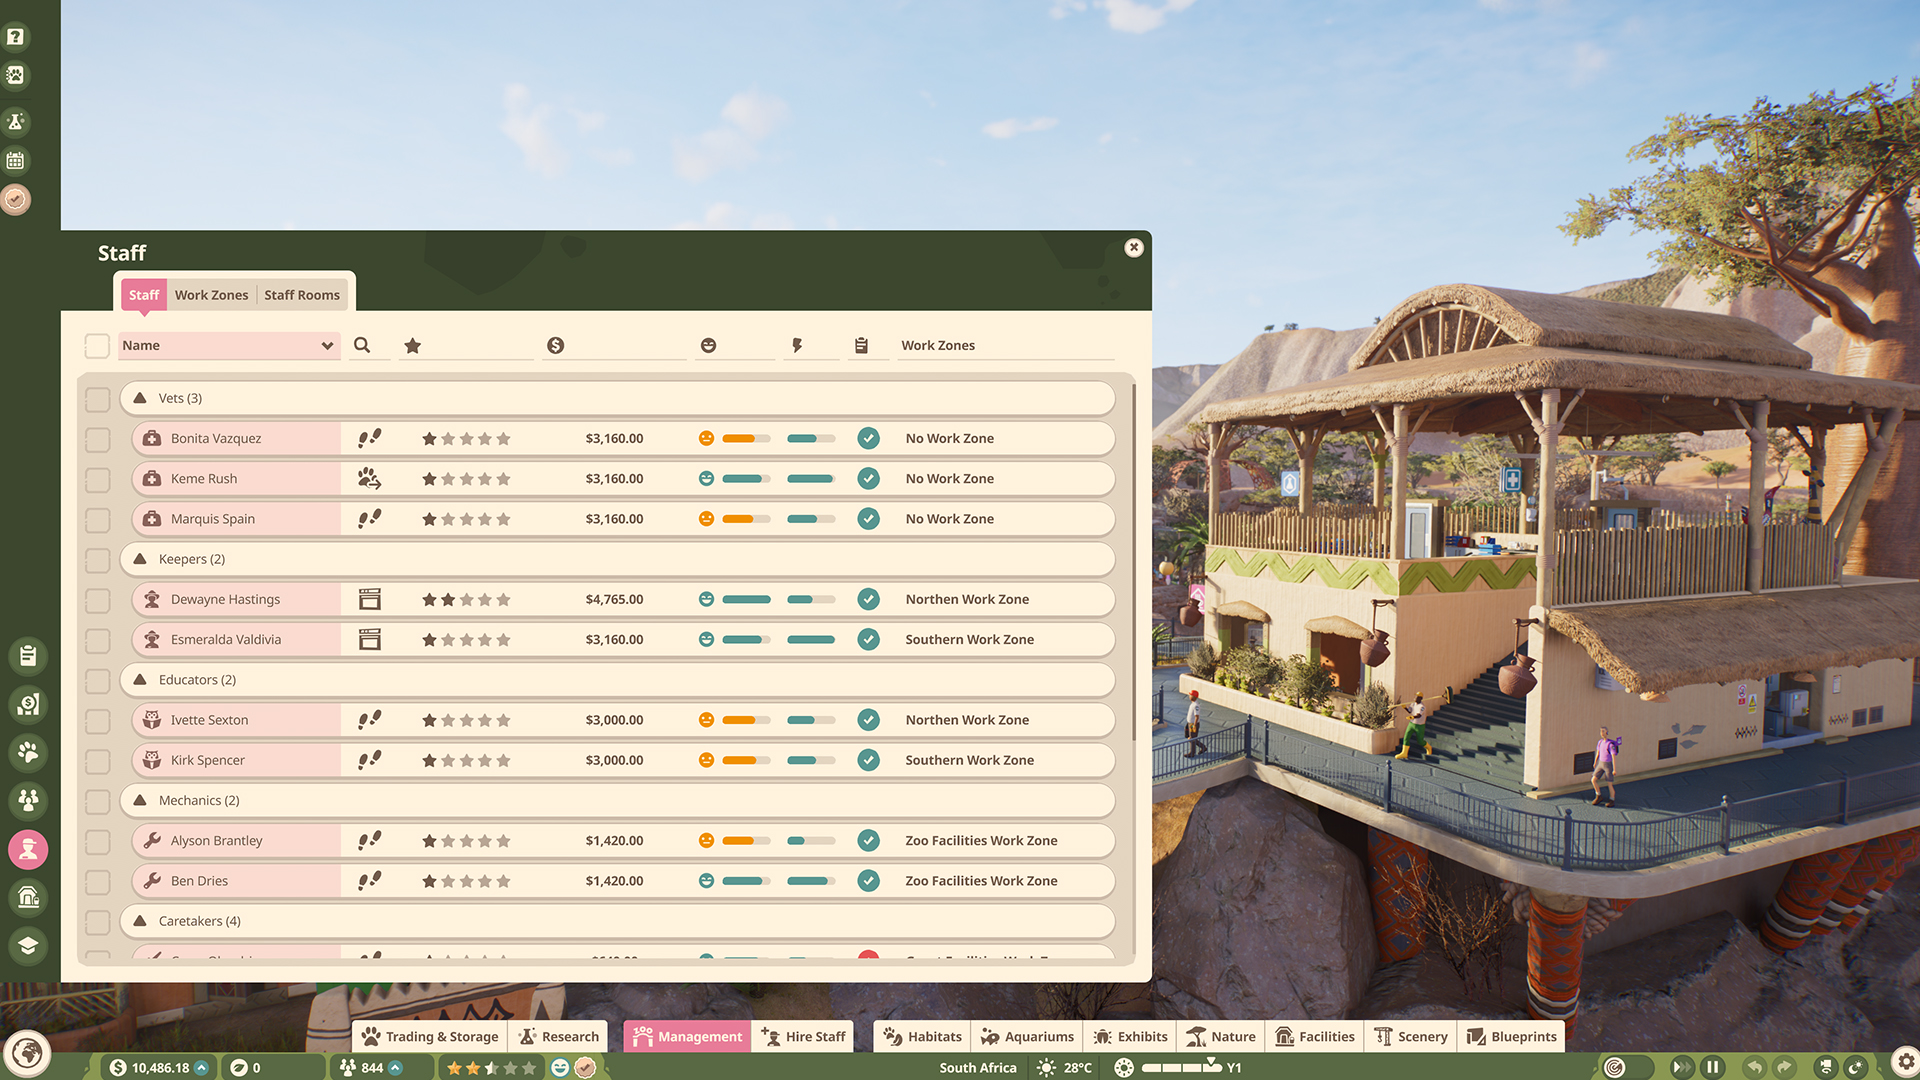
Hire staff through the Browser’s Hire Staff tab and place them on a path. Keepers feed animals and clean their homes. Caretakers transport animals and handle guest litter and toilets. Vets treat illness and capture escapees; mechanics maintain barriers, power and water filters. These jobs need different staff types, so another keeper will not repair a leaking aquarium wall.
Close the habitat and pin its animal requirements
Open Habitat Barriers and choose a barrier that meets the species’ Zoopedia requirements. Draw one continuous perimeter, add exactly one Staff Gate and connect that gate to a path. A complete loop with no gate cannot receive animals. If you merge two habitats and end up with two Staff Gates, delete the extra gate in the Barrier Tool to make the enclosure valid.
After building the basic habitat, select it and open Animals > Pin Species. Choose the species, use + Add to Selection, then Confirm Selection. This displays the planned animals’ combined requirements before you introduce them. Meet those displayed space and environment requirements while the enclosure is still empty.
Place the species’ feeders, water sources, shelter and enrichment from the Habitats tab. Filter items by species to find suitable equipment. Make sure the animal can fit inside its shelter and reach the ground beneath it. Inspect the Shelter and Traversable Area heatmaps, and smooth any steep approach that prevents access to water.
If you use a natural water body, sculpt a depression and fill it with Add Water. Place a Water Pump whose radius reaches that water body, then connect the pump to a powered Water Filter through Edit Filtration Network. Keep enough filtration capacity for the water volume. Land animals can drink from freshwater only, so keep the connected network set to Freshwater or provide a separate water station. A shared saltwater network can leave an animal thirsty even when its habitat contains water.
Natural cliffs and scenery still need a defined perimeter. Use Null Barriers beneath a physical obstruction, but do not leave an open stretch of Null Barrier where animals can walk across it. Decorative segments placed with Habitat Perimeter disabled also break a habitat’s continuous loop. If the habitat is invalid or animals escape through an apparently finished boundary, inspect those segments before replacing the whole enclosure.
Birds need flying space above the enclosure
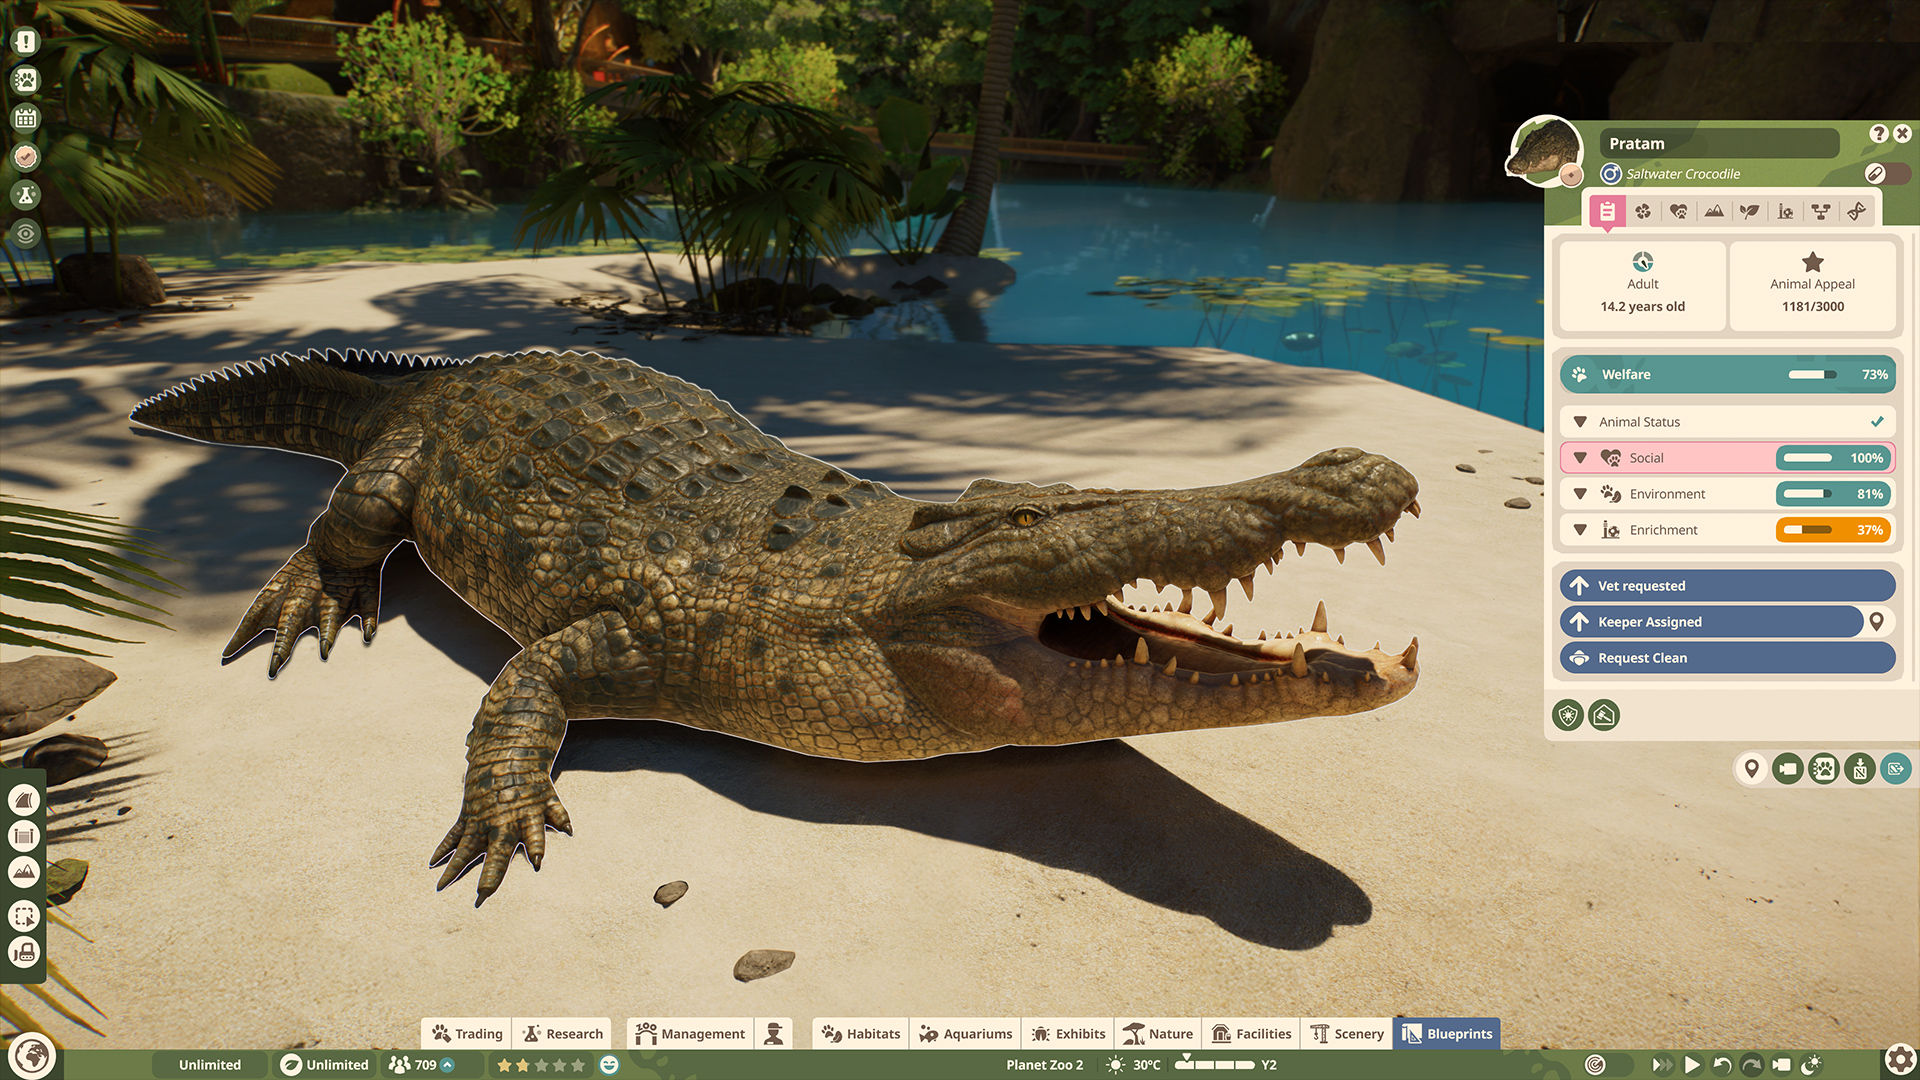
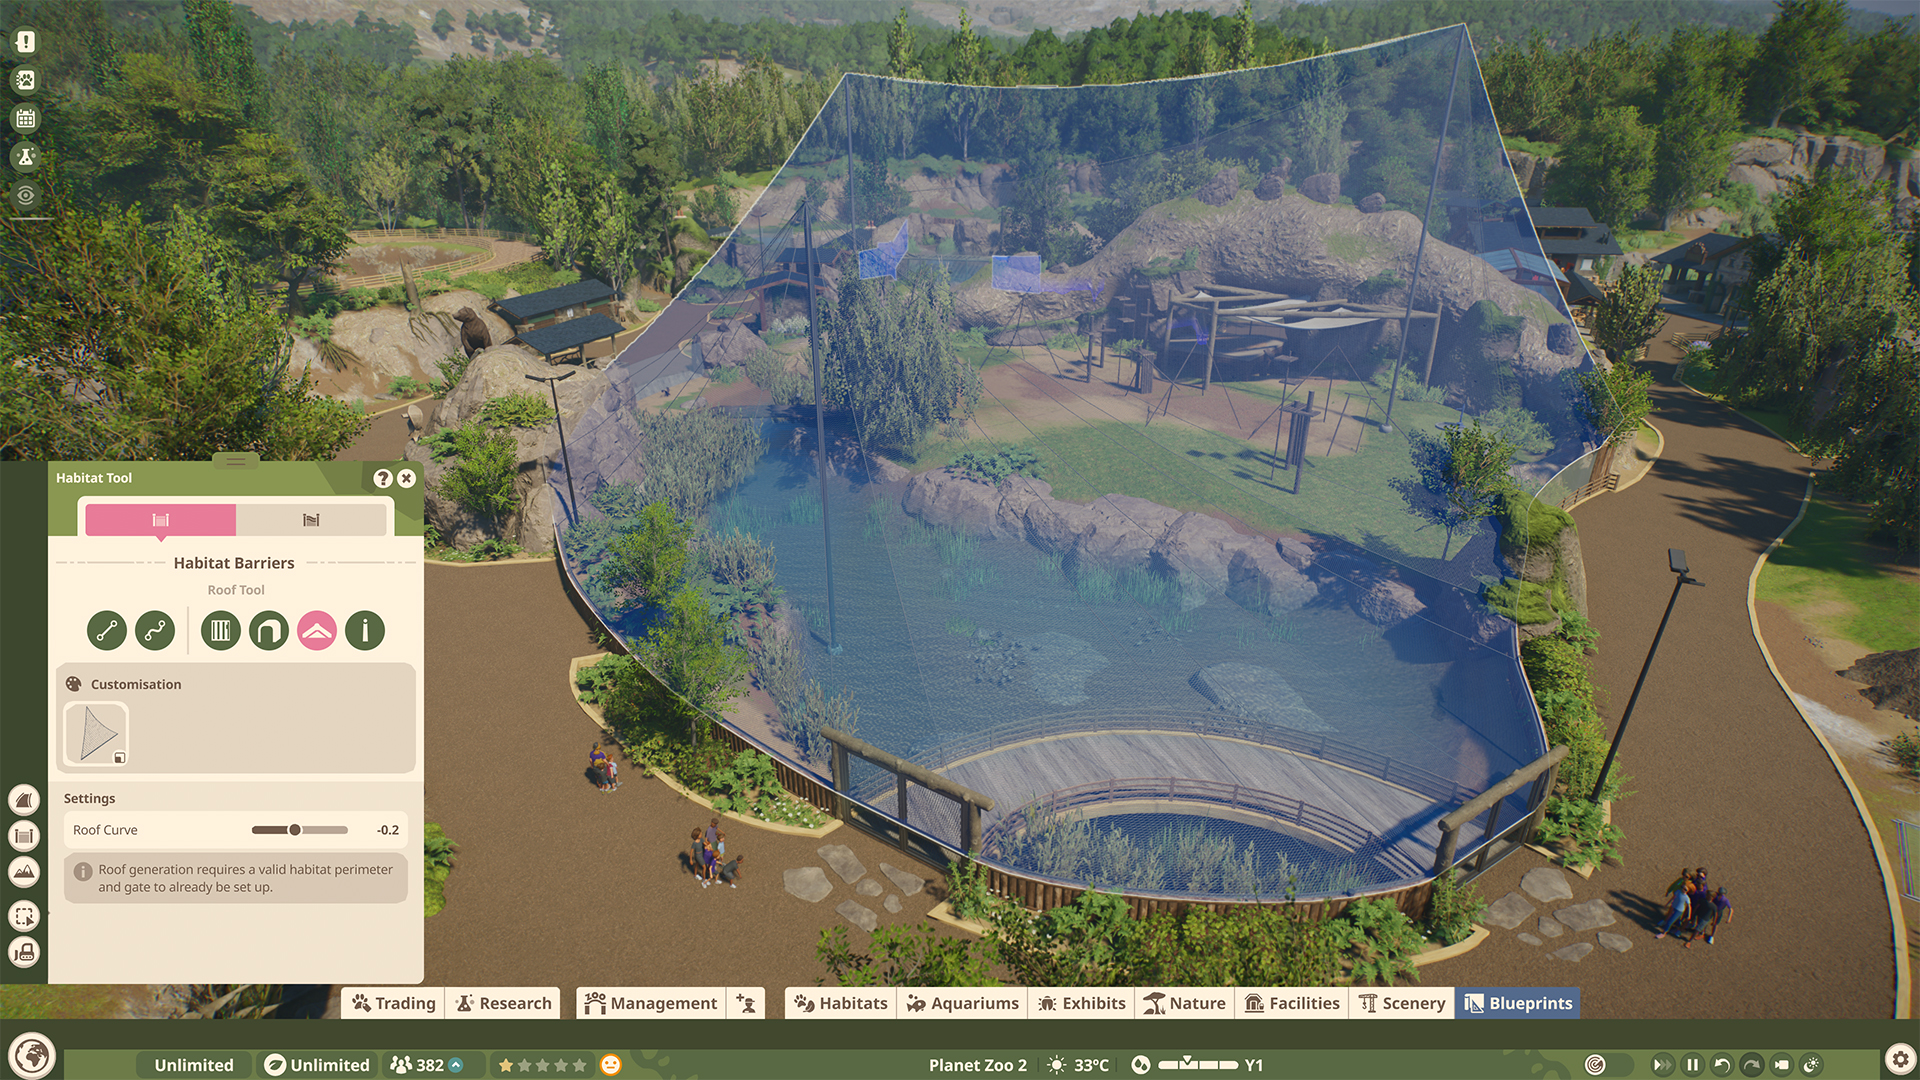
An aviary begins with the same barrier loop and single Staff Gate as a land habitat. Open the Roof Tool in Habitat Barriers, select the habitat and generate its roof. Place Roof Supports to raise parts of the mesh, then check both Flyable Area and ground space. If the roof is too low, add or adjust supports to give the birds more room above the ground.
Check the birds’ requirements for nests and add suitable feeders and enrichment. For egg-laying species, a mixed-sex group needs at least one accessible nest for each pair. Find the correct Nest Type through the species filter, or select Nesting Sites in the animal’s Social needs to show compatible nests. Keep the access route clear and use the Zoopedia to check whether the species prefers nests away from guests.
Exhibits use their own environment controls
Small snakes, frogs and some fish live in self-contained Exhibits. Place an appropriate exhibit shape, connect it to a path and provide power. Exhibits need no Staff Gate. Keepers still need an accessible Keeper Hut to prepare their food and must visit to keep them clean.
Open the exhibit’s Environment tab to configure the conditions listed for that species, including temperature, humidity or salinity. Add suitable Resting Points where required, then use the Animals tab to manage the occupants and their positions. Some inhabitants are managed as colonies or shoals. Good welfare grows these groups; at their maximum size they can split into another group. Contraception prevents that split when you need to control population growth.

Build an aquarium around its filtration network
For fully aquatic species, choose Aquarium within the Habitat Barrier tool. Draw an Aquarium Barrier loop and add an Aquarium Staff Gate. The completed enclosure fills with freshwater automatically. You do not need to carve a lake and fill it as though this were a semi-aquatic land habitat.
Place a Water Filter through Facilities > Utilities and power it. Select Edit Filtration Network and connect a pipe between the filter’s node and the node on the Aquarium Staff Gate. Configure the network for Freshwater, Brackish or Saltwater according to the species. Changing one network’s salinity affects every water body connected to it, so keep incompatible water requirements on separate networks.
Open the aquarium’s Environment tab to set its temperature. This control requires power at the Aquarium Staff Gate. Add suitable feeders, nests where needed and enrichment from the Aquarium tab, then meet the species’ terrain and aquatic foliage requirements. If you add a viewing tunnel, allow extra aquarium space: the tunnel occupies room that animals could otherwise use.
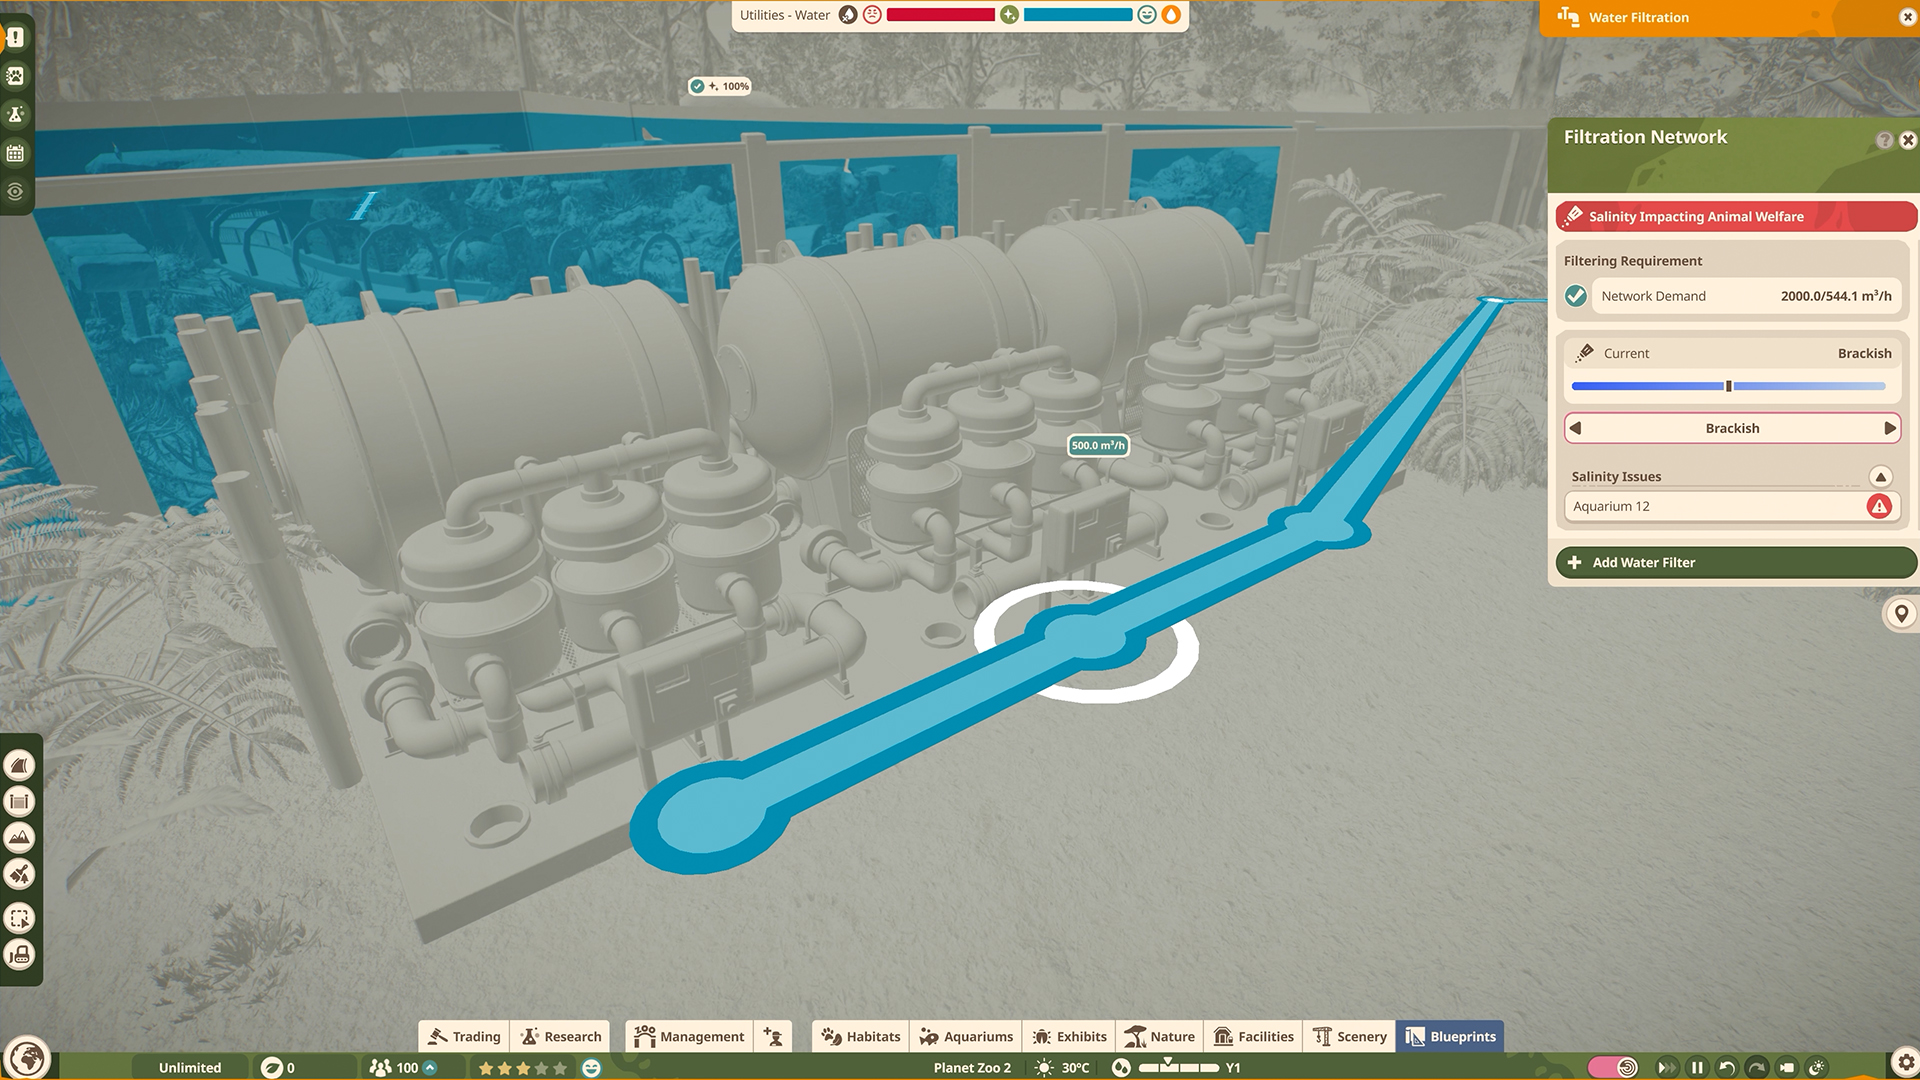
Inspect both Water Cleanliness and Tank Cleanliness in the aquarium’s panel. Filters clean the water, with demand increasing as the aquarium’s water volume and animal population grow. Keep the network’s Filtration Rate above its demand. Keepers enter in diving suits to clean the tank itself, and dirty water makes the tank deteriorate faster. If water cleanliness keeps falling after a keeper visits, inspect the filter’s power, pipe connections and capacity.
Mechanics maintain aquarium barriers. Poor condition produces cracks and leaks, which frighten nearby guests and can end an inspection with a fine. To resize an aquarium, first move its animals to storage, use Drain Water, then edit the empty barrier and restore the water. Check the environment and filtration again before returning the animals.

Adopt, quarantine and settle the first animals
With a functional Trade Centre, open Trading & Storage, choose an animal and select Adopt. It enters Animal Storage. Move new arrivals to Quarantine before housing them with the breeding group. If quarantine detects disease, treatment takes place at a Vet Surgery. This helps prevent an infected arrival from spreading illness through an occupied habitat.
For ordinary moves, an available caretaker or vet boxes the animal, carries it to the destination and unboxes it there. All animal moves require a Trade Centre connected to the main path network. If delivery cannot proceed, check that centre, the destination’s validity, its gate connection and the available transporting staff.
After arrival, open each animal’s Info Panel and fix the need that is low. For shy animals, provide hiding space away from viewing areas, screening plants or correctly facing one-way glass. Use heaters or coolers and the Temperature heatmap when the enclosure offers no suitable temperature. More enrichment is needed as the population increases, so review the habitat again after births and maturation.
Use Management > Staff > Work Zones to group the habitat with its supporting facilities, then assign the relevant staff. An unassigned facility appears red in Work Zones View; it can be neglected if all your staff are limited to other zones. Inspect a staff member’s travel, working and resting time when jobs fall behind. For an urgent dirty habitat, select Request Urgent Clean in its Info Panel while correcting the keeper’s route or workload.
Fund animal care from the viewing area
Place Donation Bins on paths beside useful animal viewpoints. Guests donate toward animals they have recently seen, and better views improve both the chance and value of donations. Give guests a clear sightline while retaining hiding areas for shy animals. Screen the hiding areas while leaving the intended viewpoints open.
Add food, drinks, toilets and nearby bins along the visitor route. Shops need vendors; when one rests, a free vendor can cover the shop. Caretakers clean toilets and empty bins. Place education boards or speakers near the relevant animals, give them power and path access, then assign a species and topic in their Info Panels. An unconfigured education item does not teach the intended topic.
Use Management > Finances to compare income and expenses across the current and previous season. Check Guest Thoughts when adjusting entrance prices: guests can refuse entry when tickets cost too much. Pause additional construction if the seasonal costs of staff, facilities and animal care exceed the income supporting them. In Management > Overview, inspect Animal Husbandry, Sustainability, Guest Education and Guest Experience to see which part of Zoo Reputation needs work.
Breed the animals and unlock their Release Group
Use the Genetics tab’s Compare Mates panel before selecting a breeding pair. It estimates the offspring’s genetics and identifies obstacles to conception, including illness or poor welfare. Check the species’ mating season, social limits and nesting requirements. Healthy adults can breed during their mating season when they are not already caring for juveniles.
As offspring mature, review the social group as well as its space. Some adult males can become outsiders when group limits are exceeded; rejected outsiders can fight. Move surplus adults into a suitable second habitat or storage as appropriate. Apply Contraceptives in an animal’s Overview, or through Management > Animals, when you need to prevent further breeding. Use Genealogy to avoid repeatedly mating close relatives, which reduces fertility and immunity potential.
Build a powered, path-connected Research Centre and open the Research tab. Choose Species, inspect the available topics and assign an eligible keeper or vet. Species Research can unlock Release Groups, fertility improvements and Thriving requirements. Staff prioritise feeding and treatment over research, so a stalled project can reflect care duties taking their time. Keep the first habitat functioning while the research proceeds.
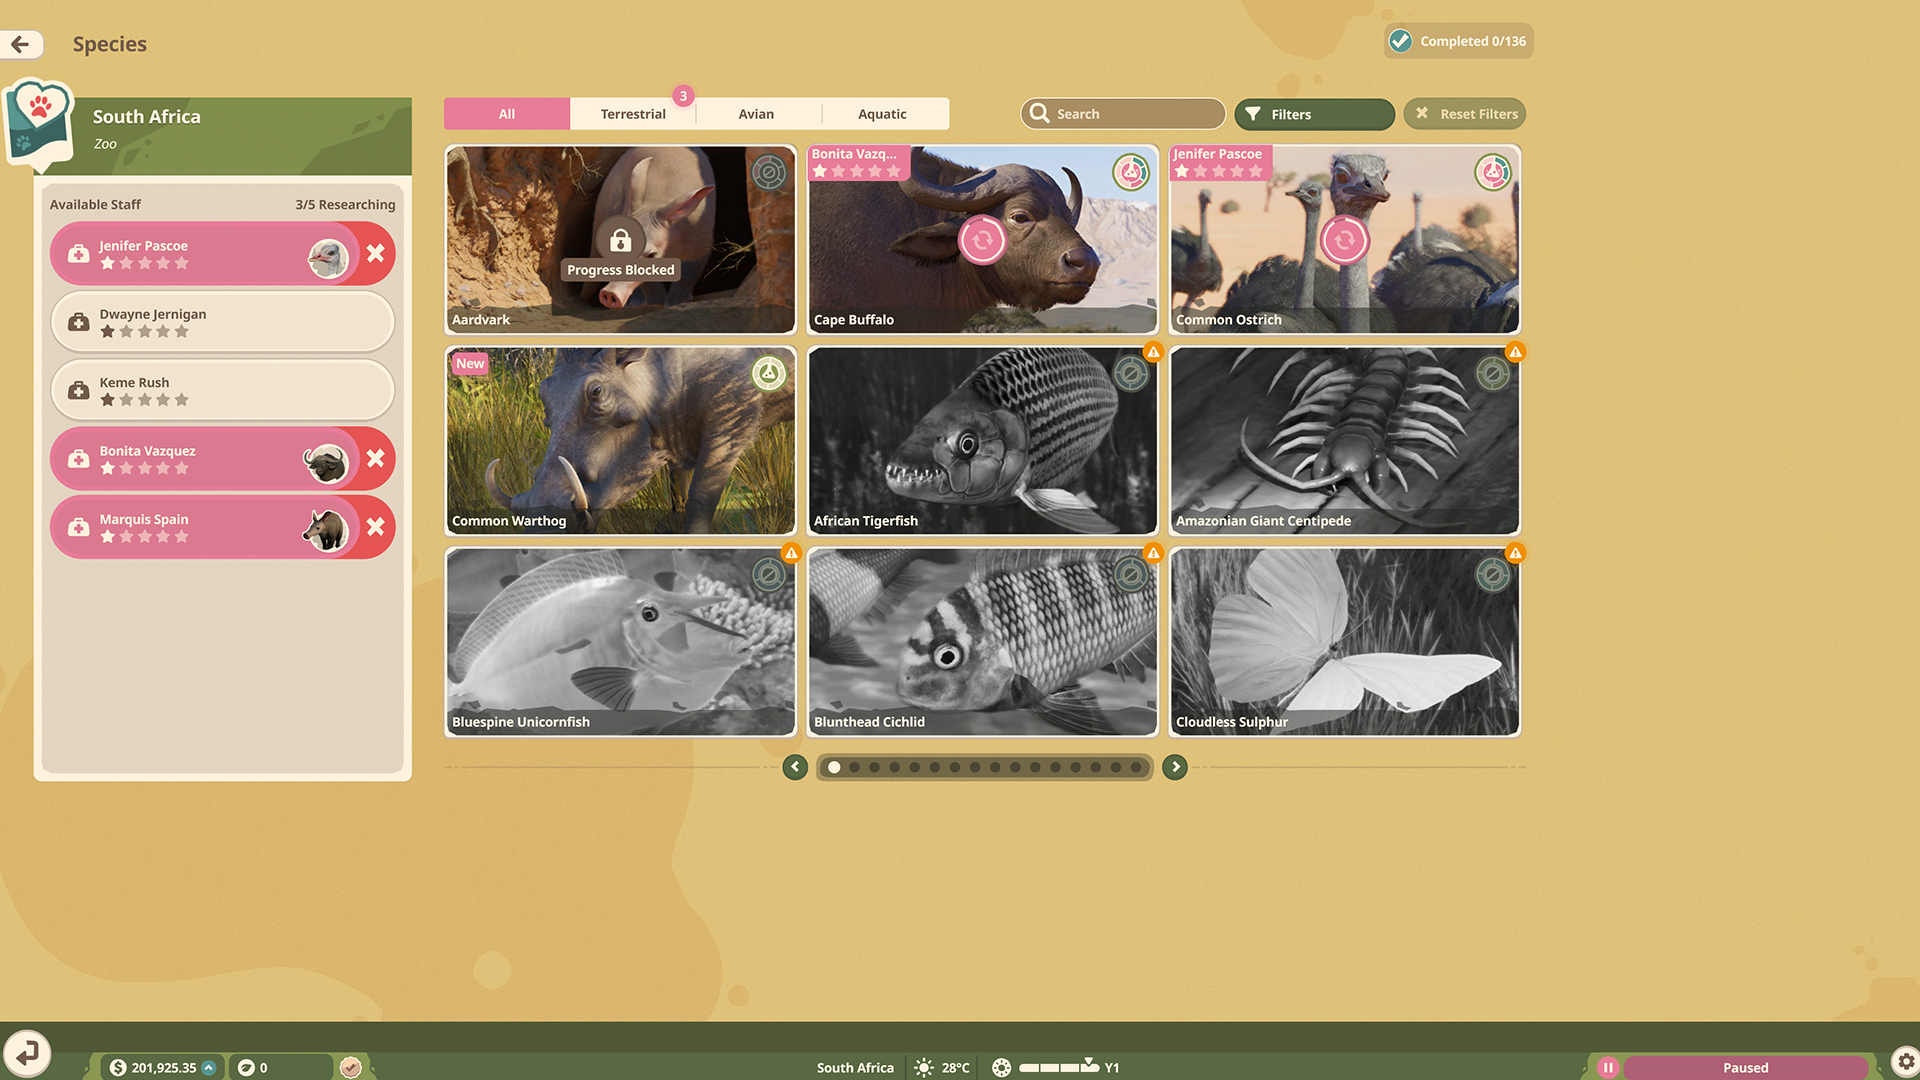
Research knowledge persists across your Planet Hub. Some higher species research needs observations from animals in Wildlife Reserves, so the first release also supports later research. Inspect the required unlock for your species instead of assuming every Release Group becomes available at the same research tier.
Prepare an ecosystem before committing the group
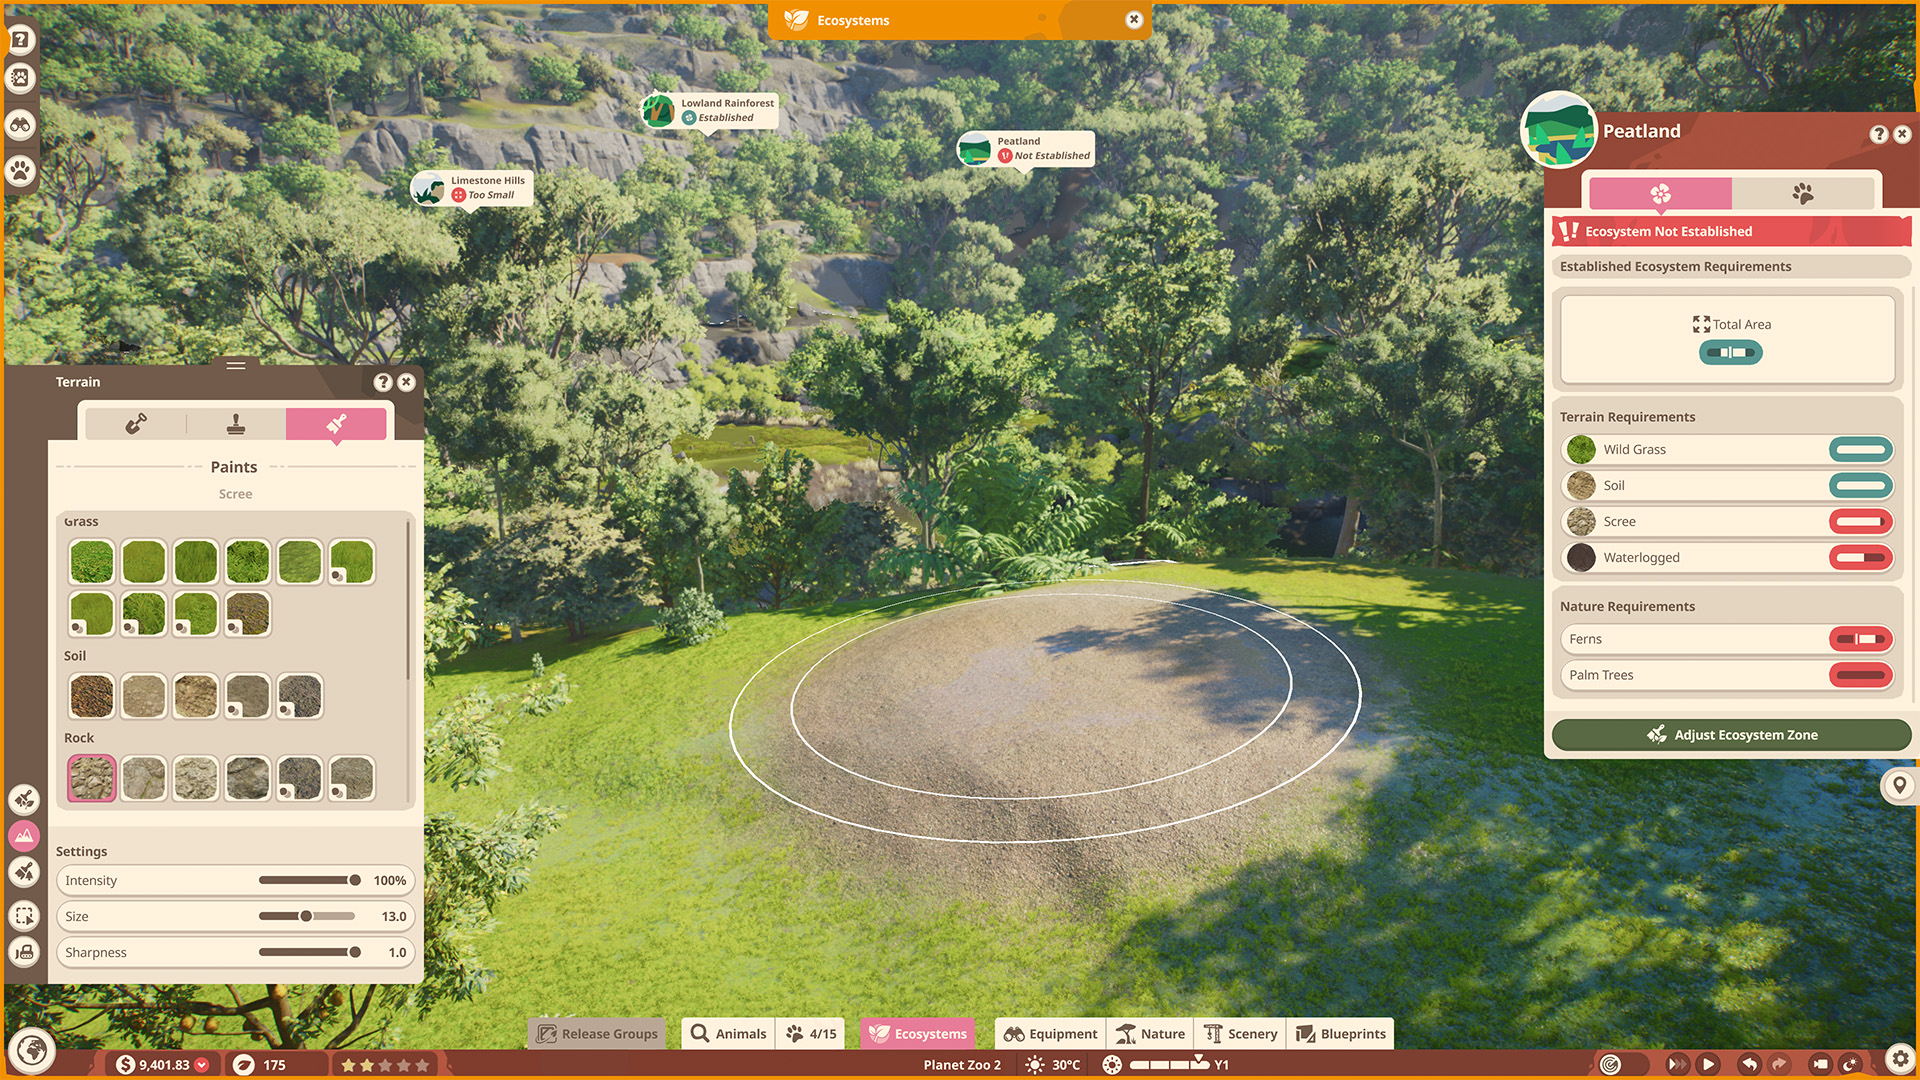
Open the Planet Hub through its world icon and create or visit a Wildlife Reserve. Place a Research Outpost to access Release Groups there. Choose an Ecosystem Type with the Ecosystem Brush and paint a sufficient area. Its requirements can include terrain, specific foliage, water and highland or lowland space.
Select a Nature Requirement to filter the Browser to the foliage it needs. Use Terrain Sculpting for height and water, Terrain Paints for ground composition and the Nature Brush for larger plant areas. An ecosystem moves from Invalid to Established when its area, terrain and nature requirements are satisfied. Prepare a suitable Established destination before finalising your zoo’s animals.
Some groups require a Flourishing ecosystem. That state follows Established and needs animals supplying the specified Ecosystem Roles. Read which roles each available Release Group provides, then release suitable groups that can fill the missing roles. If your planned group needs a Flourishing destination, first look for groups that can enter an Established ecosystem and supply those missing roles. Repainting a completed area will not supply an animal role. Remove pollution and invasive plants with the Demolish Brush to improve the reserve’s Ecosystem Rating.
Finalise the Release Group and choose its destination
Send the intended animals to Animal Storage, then open Release Groups from Animal Trading & Storage in the zoo, or from the reserve. Select Create Release Group, choose the species and Group Type, and select Create. Open the new group and choose Edit Group Members to add suitable animals from storage. The Group Type determines the number and composition you need.
Check the members and requirements before selecting Finalise Release Group. Finalisation starts acclimatisation and cannot be undone; these animals can no longer return to your zoo. Keep the animals you still need for the zoo’s breeding population out of this group. If the selected animals do not satisfy the group, change its membership while it is still editable.
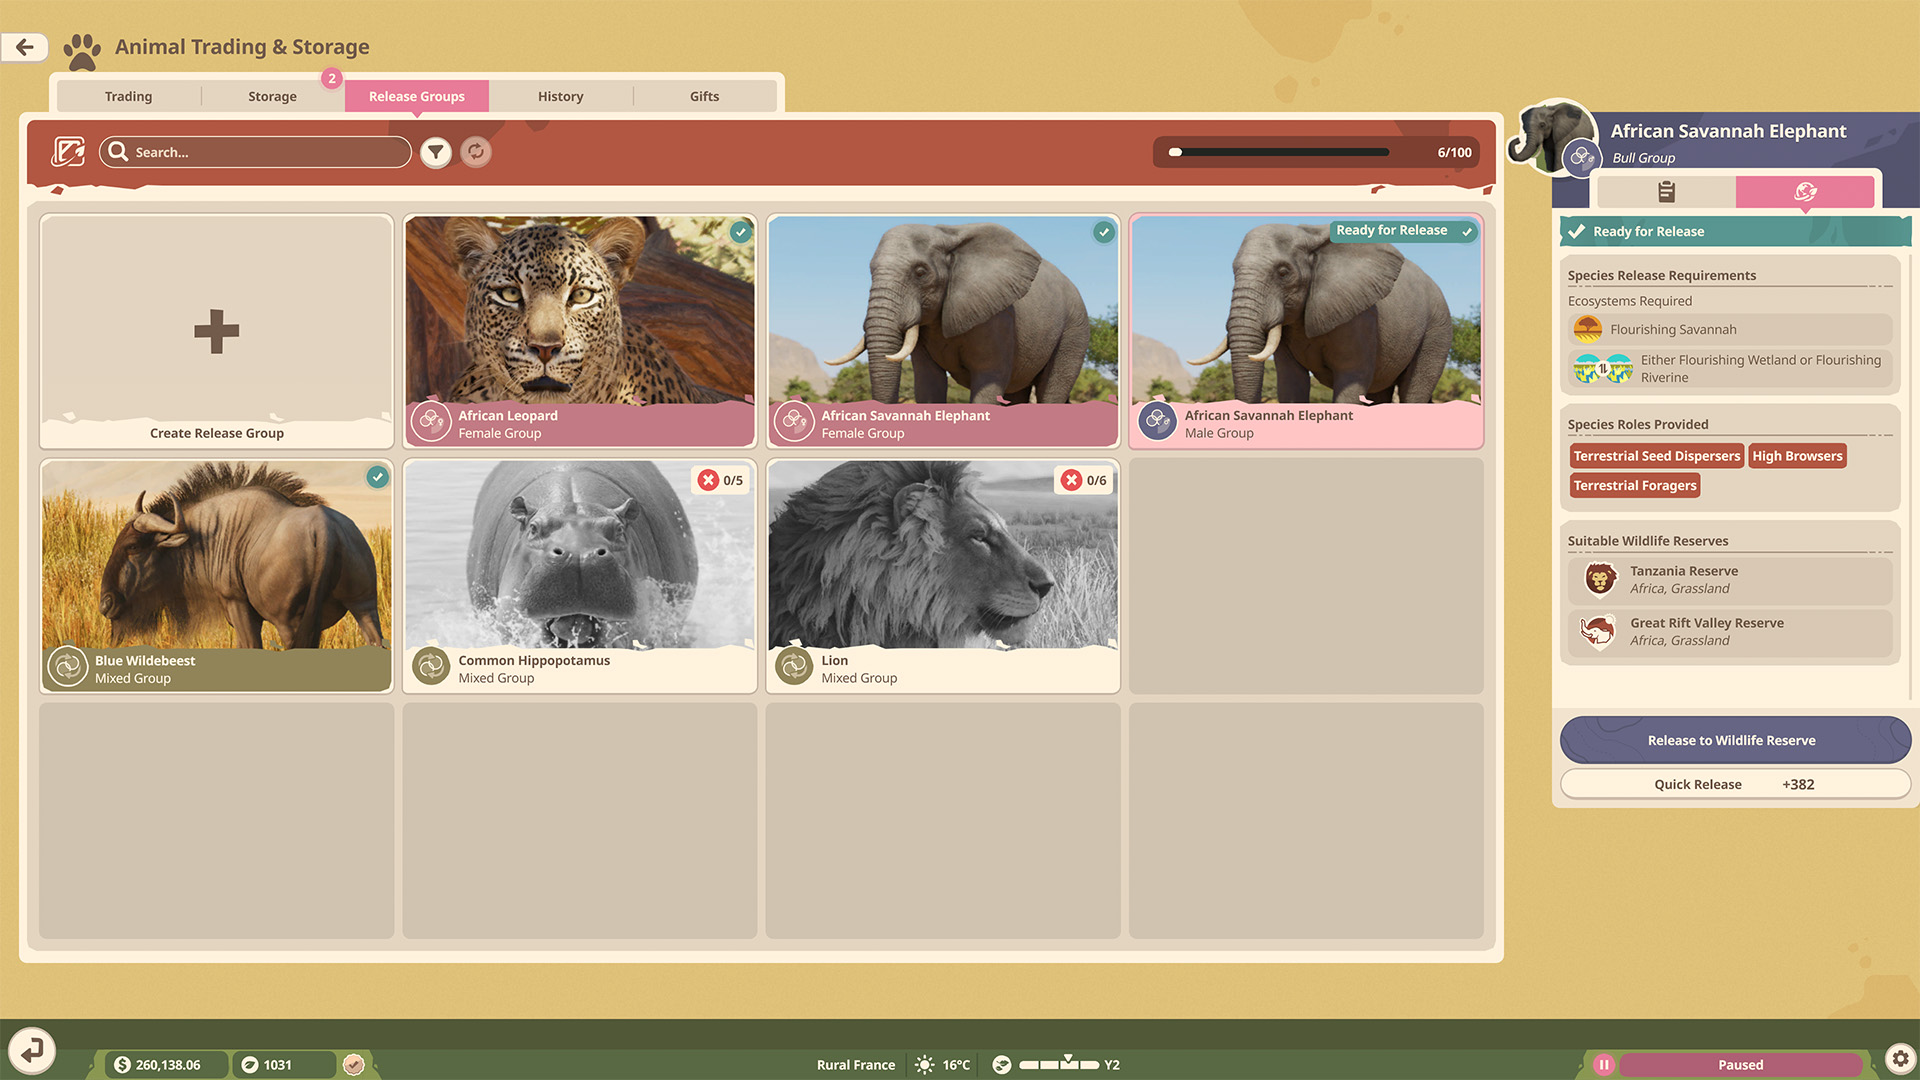
A group can need more than one ecosystem. The elephant group shown here requires Flourishing Savannah plus either Flourishing Wetland or Flourishing Riverine. Prepare both listed conditions in a suitable reserve before committing that group; a single Established area will not meet these requirements.
When the group meets its listed release requirements, choose Release to Wildlife Reserve. From a zoo, this opens the Planet Hub’s suitable destinations; select one and choose Travel to Wildlife Reserve. Select the appropriate Established ecosystem, meeting any additional group requirements, then confirm Release to Wildlife Reserve. A successful release places the animals in the reserve and awards Conservation Credits. If no suitable destination is offered, check the group’s ecosystem requirements and prepare that ecosystem in the reserve. Quick Release is a separate option for immediate credits and does not place the group in your chosen reserve.
To unlock further reserve research, inspect the network requirements and place the relevant Observation Platforms, Acoustic Monitors or Camera Traps. Acoustic monitoring needs sufficient ecosystem coverage, while camera traps need to capture the specified animal behaviours. The reserve’s Biodiversity Rating combines Ecosystem and Research ratings, so inspect both after the first release. Complete the missing monitoring coverage or ecosystem requirements to support the released population and continue Species Research.