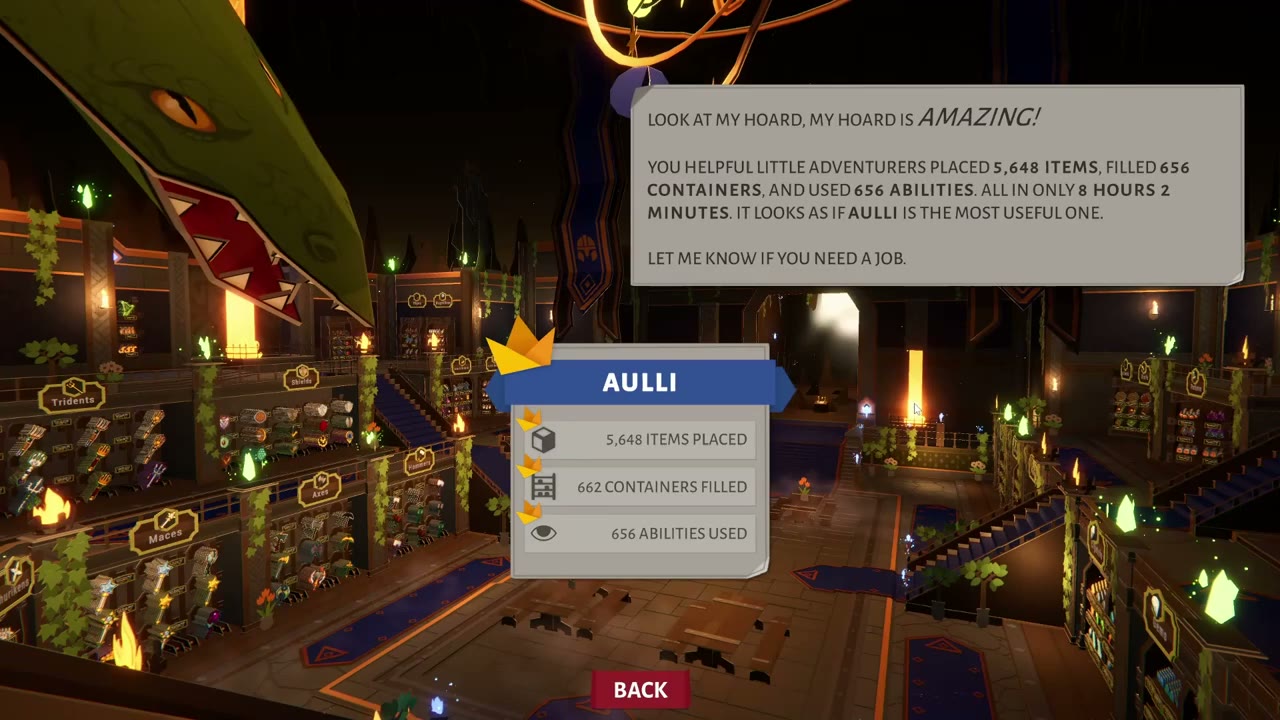
To finish Folded Fables: Tidy Up The Dragon Hoard, put all 5,648 treasures in their correct shelf spaces. Start with a category you can recognize, unlock Item Sense and Shelf Sense, and return hidden dragon eggs to their matching pedestals for passive bonuses. As the floor clears, use the shelf labels to finish incomplete sets. The last correct placement triggers the ending and the dragon’s tally.
This route covers a normal clear of Folded Fables, including the six egg locations. It uses activated abilities, so plan a separate run if you want The Old Fashioned Way achievement, which requires finishing without them.
Your first deliveries and the shelf labels
Pick up a small batch of one recognizable treasure type, then take it to the matching department. Paintings make a useful starting point: their framed pictures are easy to distinguish from the loose weapons, books and jewelry. The Paintings display has individual spaces for the different pictures, so match the selected painting to its own label instead of placing everything beneath the department sign.
You can carry five items at the start. Before placing one, check its name in the center of the screen. A mixed load can leave a book selected while you are standing at Paintings. Move the selection to the item you want to shelve, aim at its fixture and use the placement prompt. Correct deliveries award XP, and the item counter at the top right increases.

If the shelf preview turns red, you are trying to put the selected item in an invalid fixture. Check the item’s name, the department sign and the individual shelf label. A painting carried alongside several books still belongs at Paintings. Change the selection or walk to its actual display before trying again. If you have already left an item in the wrong place, pick it back up and deliver it correctly.
Check each fixture’s quantity as well as its name. A fixture labeled for five copies is complete when its count reaches 5/5. In builds that still contain duplicate sets, another fixture may need the same item. For example, King Reginald’s Crown has two five-copy spaces, and Abundant Mana Orb has two ten-copy spaces in the community item inventory. Use the second matching space when the first is full.
The developer has announced that duplicate sets will be replaced with distinct items. While your save still shows identical items in multiple spaces, use the labels and Shelf Sense to find the remaining valid fixture. Extra copies are not a reason to throw treasure away or empty a correctly filled shelf.

Find departments with the map, then shorten each trip
Use the map when you recognize an item’s category but cannot find its sign. The chamber spreads shelves around the central floor and raised galleries, with stairs connecting them. Check the map board in the room or open the menu’s Map tab; current builds also have an M shortcut. Use the staircase and the large dragon as landmarks when moving between levels.

Item names matter when neighboring departments look similar. Books and scrolls have separate displays, as do Wands and Staffs. Jewelry is divided among Rings, Necklaces and Bracelets. Carry a batch to the appropriate sign, then read the smaller names at the fixtures. Within that department, match the selected item to the smaller fixture label.
Return a few batches of paintings or books to earn your first skill points. Once you can highlight the correct shelves, branch out to the other departments without first having to memorize every sign.
Which abilities should you buy first?
Item Sense locates loose copies of your selected item. Shelf Sense locates valid fixtures for the item you are holding. Each initially costs one skill point. Buy Item Sense when you need help finding more copies, or Shelf Sense when you cannot find their destination.

Open the Abilities menu with Tab, then unlock Item Sense in Collection when searching through the floor pile takes too long. Select the treasure you want to collect before activating it, then pick up the matching highlighted pieces. Unlock Shelf Sense in Placement when the room’s many departments are slowing your deliveries. Activate it with the intended item selected, then follow the highlighted fixture.
Carry Capacity in Utility lets you transport more pieces per trip. Spend points there when you keep filling your inventory before reaching the shelf. Movement upgrades help with the repeated journeys between the central piles and the galleries. The Green Egg provides two extra inventory spaces as well, so collecting it early makes the next batch larger without spending another skill point.
Later, Shelf Teleport in Placement sends you to the proper shelf for the item you are holding. Select your delivery item first, then activate it. Teleporting with a stray item selected takes you to that item’s destination, which may be far from the department you meant to finish.

Follow the arrows and requirements shown in the tree. If an upgrade says to spend more points in its branch, you must meet that requirement before buying it. When the locating abilities already reach the right treasures but expire too quickly, their duration upgrades give you more time to gather a batch. Cooldown upgrades help when you are ready for another batch before the ability returns.
Spend Dragon Favor at the altar
When the Dragon Favor notification appears, visit the book on the raised altar directly beneath Ivy. Interact with it to open the Dragon Altar upgrades. These purchases use Dragon Favor, separate from the skill points in your Abilities menu.

Auto Sort groups identical items together in your inventory. It is useful once you are carrying mixed loads of coins, books or gems and repeatedly changing the selected item. You can then deliver adjacent copies without repeatedly scrolling past unrelated treasures.
Global Duration increases the active duration of abilities, while Global Cooldown reduces their cooldowns. Bonus Skill Points awards additional skill points to the players. If your inventory fills quickly, the extra skill points can go toward carrying upgrades. If highlighted pieces disappear before you can collect them, consider more duration. Reduce cooldowns when waiting for another activation is holding up your next batch.
The later Dragon Cooldown upgrade completes active cooldowns when you earn Dragon Favor. Dragon Extension resets active ability durations to their maximum when you earn favor. Both have their own prerequisites. Continue sorting and check the altar’s available points before trying to buy a lower node; a new favor notification does not automatically purchase an upgrade.
Collect the four eggs you can reach without the high jumps
Carry each egg back to the pedestals beside the dragon and interact with the stand marked by its matching colored diamond. Picking up an egg and returning it are separate steps. The Green Egg adds two spaces to your current inventory limit when you place it on its stand.
White Egg: beside the central table
Search the ground floor around the large dining table near the starting area. The White Egg is beside the table among the scattered treasures. Pick it up, return to the altar platform and place it on the white-marked pedestal. Its bonus is a 10% chance to skip ability cooldowns.

Green Egg: behind the Dragon Altar
Climb to the platform underneath Ivy and walk around the altar’s central book stand. The Green Egg is on the floor behind it. Carry it to the green-diamond pedestal on the nearby row of stands and use the interaction prompt to place it. The reward is +2 Carry Capacity, making this a useful detour before sorting larger batches.


Red Egg: the lava fountain by Staffs
Look for the lava fountain next to the Staffs department on the altar’s level. The Red Egg is inside the fountain. Aim at the egg and collect it, then return it to the red-marked stand. Its 25% movement-speed bonus helps with the longer delivery trips between the floor piles and distant shelves.

Blue Egg: the hatch beside Rings
Find Rings beside the staircase leading toward the dragon. At the end of its display, look at the stone support under the sloping stairs. A square inset panel sits beside the flowerpot. Use Pickup / Interact on that panel to open the compartment, then take the Blue Egg inside. Return it to the blue pedestal for 10% shorter ability cooldowns.


If a remapped interaction button does not open the hatch, update the game. The developer fixed the remapping problem in v146 and combined Pickup / Interact in the controls menu. Use the binding displayed by your current client instead of relying on an older guide’s E prompt.
Return for the Golden and Black Eggs after upgrading jumps
Invest in Double Jump and increased jump height before attempting the two elevated eggs. The Golden Egg is the useful first target because returning it adds another 20% jump height for the Black Egg attempt.
Golden Egg: the ledge to the altar’s right
Stand facing Ivy at the Dragon Altar, then look above the pedestals on your right. The Golden Egg sits on the raised ledge below the tall statue. Jump onto the nearby egg pedestal to gain height, then jump toward the ledge and pick up the egg as you come within reach. You can collect it in the air; landing on the ledge is not the only way to grab it.

If you fall short, return to the pedestal and try again after improving your jumps. Once you have the egg, take it to the golden-marked stand and place it before moving to the entrance end of the chamber.
Black Egg: above the lava flow beside the entrance gate
Go back toward the enormous entrance gate and look up at the tall stone spout pouring lava beside it. The Black Egg rests on top of that spout. Approach from the raised walkway and use your upgraded jumps to get close enough to pick it up.

Community players also report reaching it from the candle near the corner by Magnifiers, double-jumping around toward the spout and collecting it while airborne. If that approach falls short, improve your jumps and return with the Golden Egg bonus active. Avoid repeatedly jumping from the main floor when the raised walkway gives you a closer starting point.
Return the Black Egg to its matching pedestal for 10% longer ability durations. Placing all six eggs earns We’re Safe So Long As They Don’t Hatch! Check the stands before leaving: an egg still in your inventory has not been returned.
Clear the remaining hoard without losing track of full sets
Once locating abilities and carrying upgrades are available, work in batches of a selected item. Use Item Sense to collect its loose copies, Shelf Sense or Shelf Teleport to reach a valid fixture, and the fixture’s quantity label to see how many more belong there. If one matching fixture fills while you still have copies, look for another valid one before changing to a different treasure.
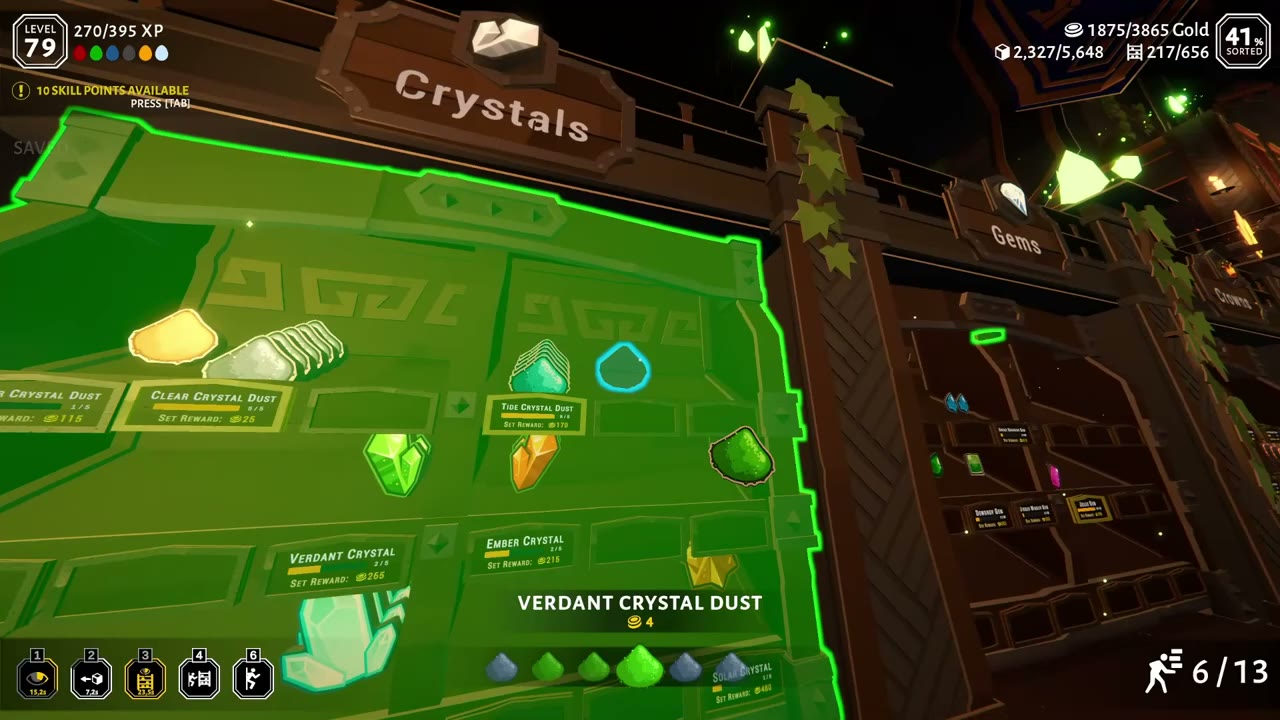
Shelf Sense – Auto Place can handle repeated deliveries once you unlock it, but the target fixture must already contain at least one matching item. Put the first copy into an empty fixture yourself. Then look at that fixture with Shelf Sense active to place more copies automatically. If nothing happens, check that the ability is still active, that you own Auto Place, and that the fixture has room. Merely highlighting an empty shelf does not satisfy the upgrade’s condition.

Give the large Bones items special attention. The community inventory identifies Draco the Rebuker and Murmuring Wyrm Skull as items for the upper-left spaces of the Bones display. Ordinary small bone slots are not interchangeable with those large fixtures. Check the large labels before assuming the item is a spare.
As departments fill, their signs glow, helping you distinguish finished categories from ones that still need attention. Return carried items before sweeping the floor for a new category. A nearly empty room can still have unfinished sets because the missing pieces are in your inventory rather than lying in the central pile.
Find the last items and trigger the ending
Use the item counter and incomplete shelf labels when only a few treasures remain. Search the stairs, gallery edges and floor beside displays as well as the open central space. Small coins and flat scrolls are much easier to overlook than a large weapon. Read the name of any loose item you target, select it after pickup and take it straight to a valid fixture.
When the floor looks empty, check your inventory before moving correctly placed treasure. Then inspect unfinished departments for a label below its required quantity. If you have a matching copy selected, Shelf Sense can distinguish a remaining valid fixture from an already full duplicate. Place the copies still in your load and check whether the total increases.
For items visibly stuck on an egg stand or the dragon pedestal, install the v150 update, which fixes that problem. Earlier updates also addressed thin objects beneath floor colliders and an invisible Formality Choker. Updating is the appropriate next step for those known problems, rather than starting a new save immediately.

In the recorded finish, the last loose gems are collected beside the Gems display and placed in their labeled fixtures. The counter reaches 5,648/5,648, the completion achievement appears, and the camera moves into the ending. You do not need to carry a final payment to the altar or search for a separate tally button.
Let Ivy’s dialogue finish and select Continue when it appears. The following results show the completed hoard and the player’s totals. Back returns you to the chamber, where the exit gate is open.