Build a workbench and rabbit trap, cook provisions, then sail to the ruined temple to advance the opening of Mayday: The Survival Island. Meet the Entity, mine iron, build a furnace and forge, and make iron equipment before the first raid. Stock the camp and prepare another load of food before setting out for the swamps.
This route follows the opening shown in the demo recordings, with the launch changes to storage, building and forge costs included. It ends at the first swamp expedition, before the sacred flowers, guardian battles and escape.
Gather tools and build a camp near the wreck
Pick up the loose twigs, leaves and flint around the crashed plane. Open the basic crafting menu with C and make a stone axe. Equip it from the bottom bar and cut the ordinary trees for wood. Keep the twigs as well as the logs: the tool recipes and construction recipes use different ingredients. The stone pickaxe uses the same early gathering area and lets you break rocks for stone and more flint.
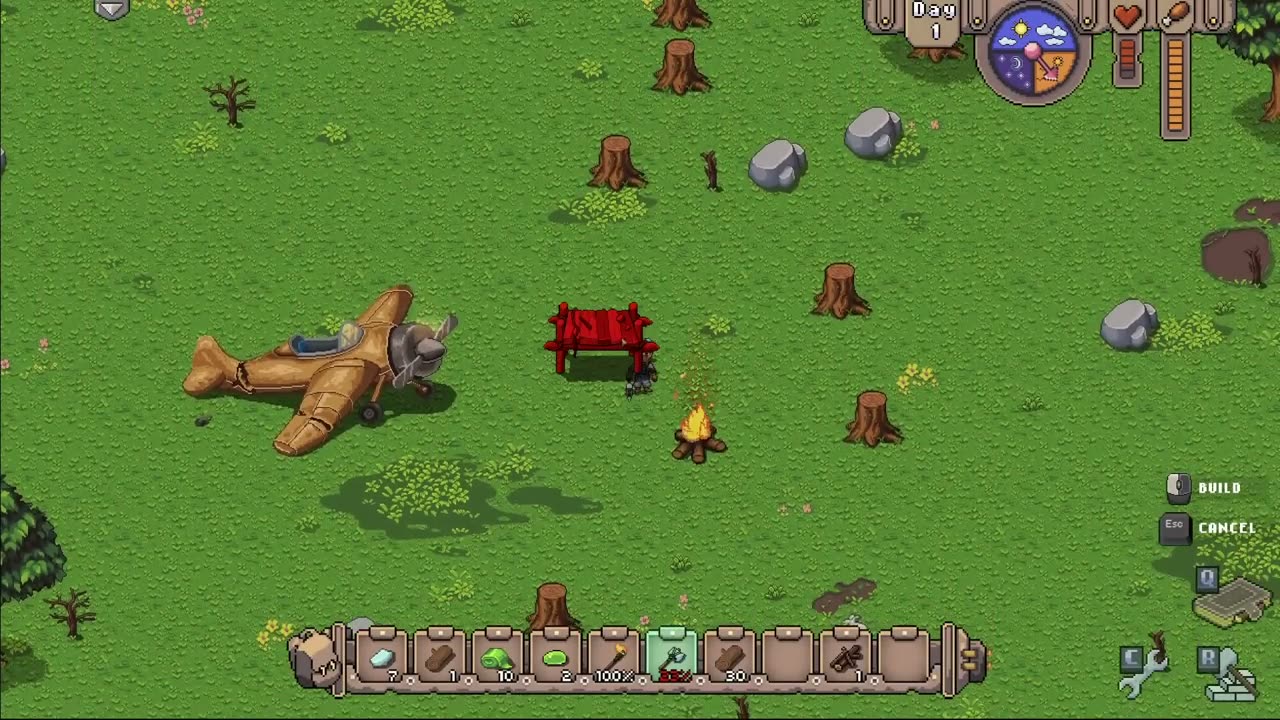
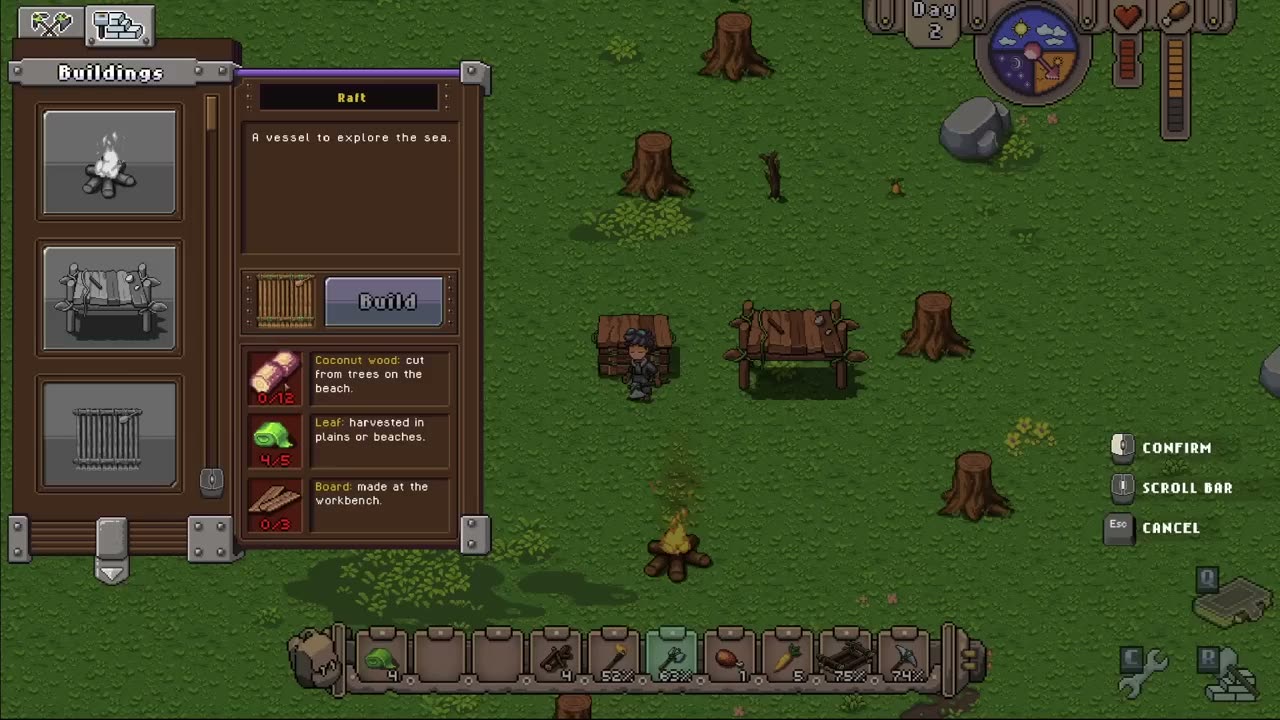
Open the construction menu with R and select the workbench. Its early recipe uses ordinary wood and leaves. Put it on clear grass where you can reach it from the wreck and the surrounding trees. A red placement preview means that position cannot be used; move the preview onto an open patch until it turns green, then confirm. Interact with the finished bench to open its recipes. The boards you need for a raft and small chest come from this menu.
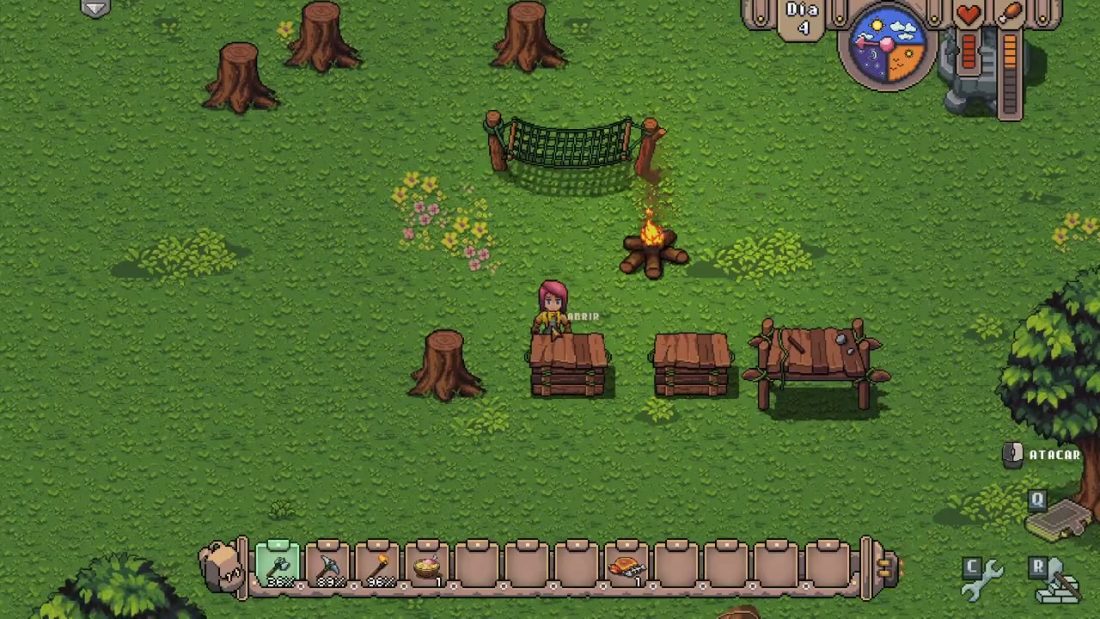
Build a small chest before your bottom bar fills with wood, flint, leaves, carrots and tools. In the launch version, crafting can use ingredients stored in chests, so you can put construction supplies away while keeping your axe, pickaxe and food accessible. Once the workbench is upgraded, a small chest can become a big chest in place. You do not have to empty and demolish it just to gain storage.
Add a campfire for cooking and a hammock for sleeping. The wreck makes a useful landmark when you return from the beach with palm wood. The ruins provide another place to establish a working camp after the first crossing. If you move an established camp in the current version, use the hammer to pick up and reposition constructions. Right-clicking with the hammer opens the house-building and decoration menu.
Set a burrow trap and cook your sailing supplies
Make a Burrow trap at the workbench using wood, leaves and a carrot. Look for a small dark burrow in the grass, select the trap, and place it beside the hole with the interaction prompt. Putting the item in your inventory does not complete the trapping step. After placement, the journal marks the task off and a prompt explains that the trap can be found again on the map with M. Leave it working while you gather wood or visit the beach, then return to collect the catch.
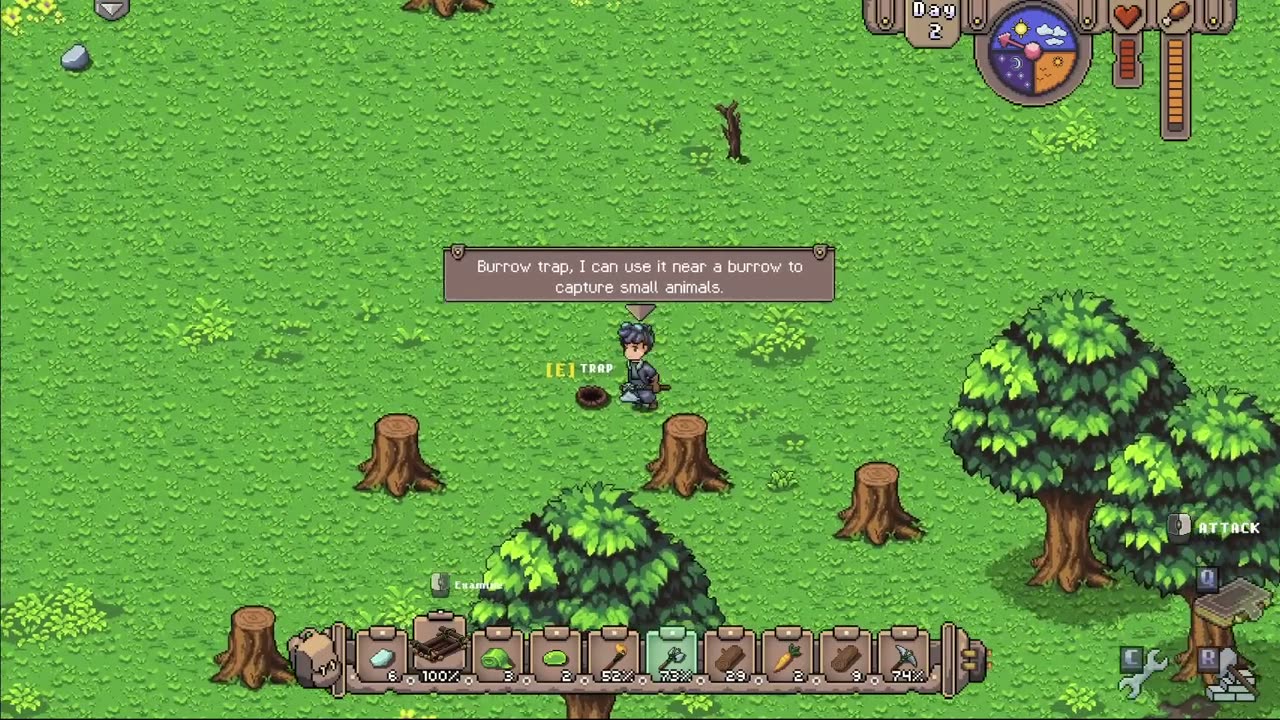
If the trap recipe is unavailable because you have no carrot, gather one of the orange carrots growing around the grassy island before returning to the bench. Save it for crafting instead of eating your last one. Rabbits are much faster than your early walking character; the burrow trap gives you a way to obtain food while you continue the workbench and raft tasks.
At the campfire, press E to open the cooking menu. Cook meat directly, or use a coconut bowl or pot to make soup with several ingredients. The container must go into the cooking interface. With that interface open, eligible food and containers are highlighted in green in your inventory; right-click the container to put it in its slot, then add ingredients and cook. Merely carrying a cooking utensil in the hotbar does not put it to work.
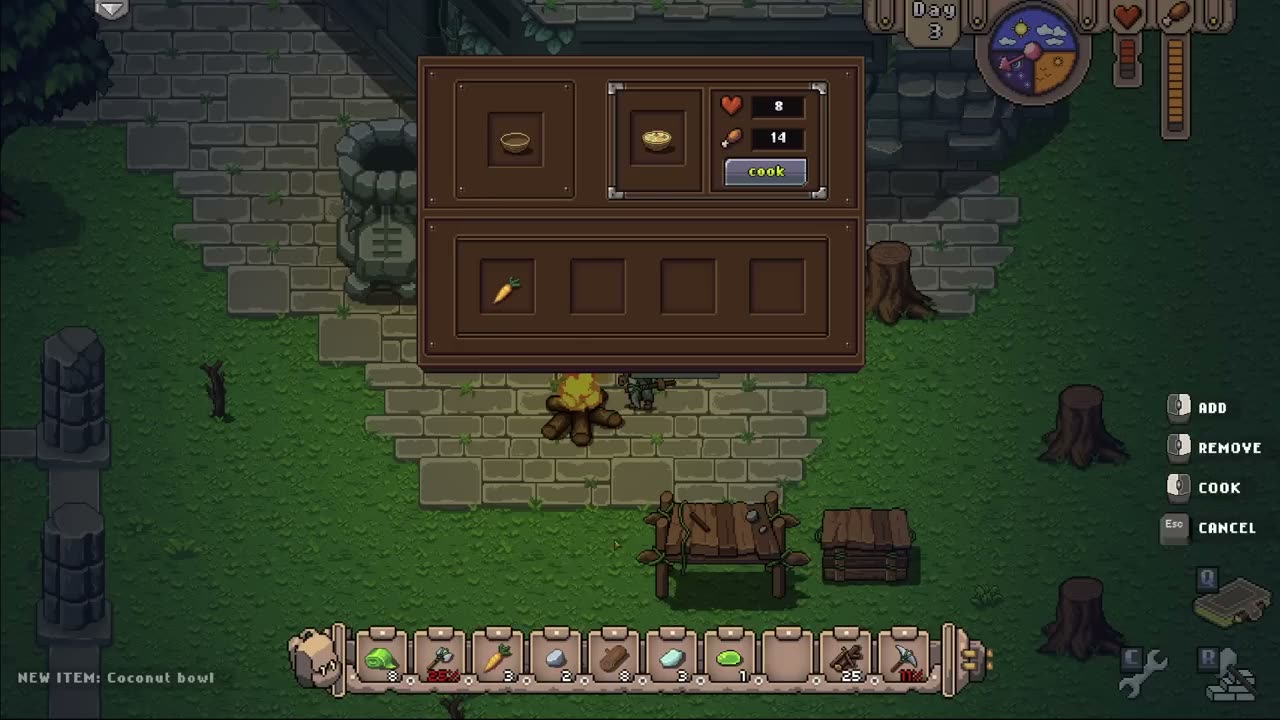
A pot gives you four ingredient slots. Combine the meat from your trap with vegetables rather than using the container as though it were another food ingredient. The tutorial also rewards variety in soup with better health and energy recovery. Watch the food’s displayed values when you choose what to eat and what to load onto the raft. Your own energy bar and the raft’s provision total are separate: eating dinner does not stock the boat.
Build the raft and fund your first crossing
The raft needs wood from the beach palms, leaves, and boards made at the workbench. Ordinary forest wood does not satisfy the palm-wood ingredient. Walk down to the sandy shoreline, cut palms with your axe, pick up their drops, and return to the bench for the boards. Open R again, select the raft, and place it at the water’s edge where the preview allows construction.
Interact with the raft to open the provisions window. Add food to its slots, watch the total beside the food basket, then choose Travel to inspect the exploration map. On the opening demo map, the first crossing costs 35 provision points. These are food values, not a demand for 35 individual objects. A mixture that leaves the counter at 31 still falls short; add another food item before confirming the destination.
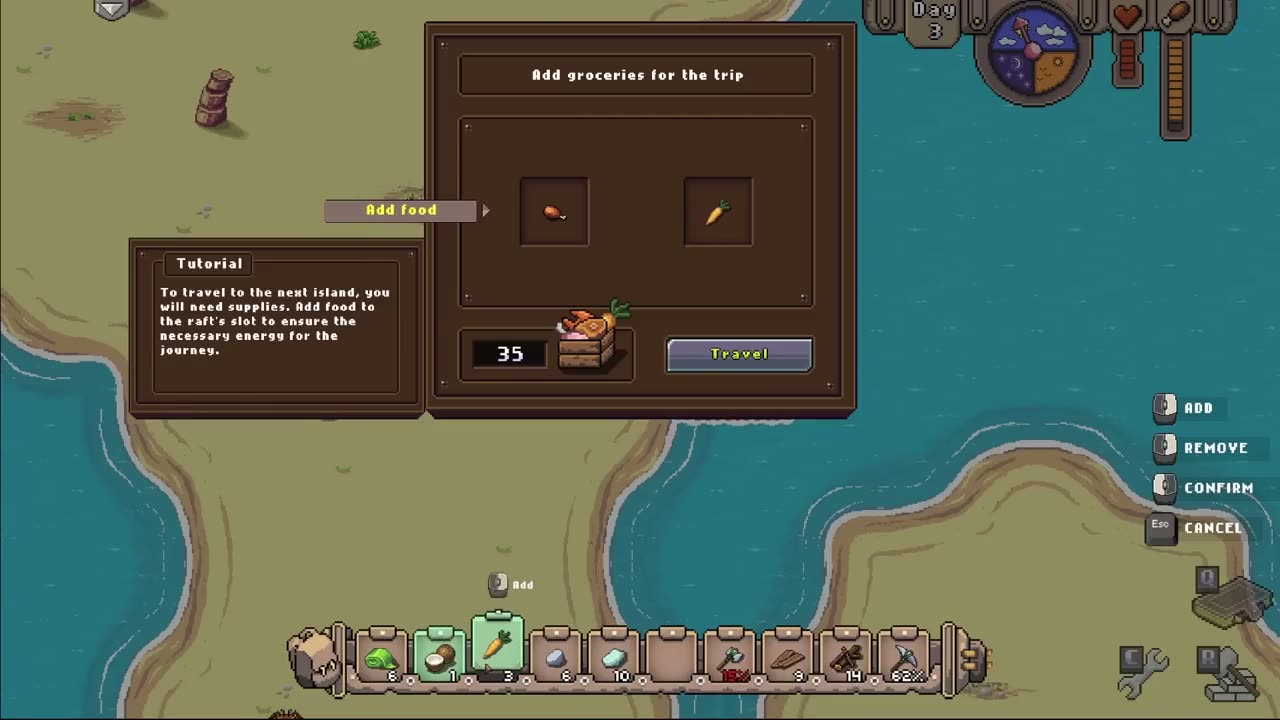
On the map, select the unexplored region next to the starting island and read its cost. When you have enough provisions, confirm the exploration. The map explains that future trips to an explored region are free. That lets you return to the crash island for your stored materials instead of hauling the whole camp onto your first voyage. Keep some edible food outside the boat’s supply slots for your character’s health and energy.
If you reach the map but cannot explore a tile, return to the provisions window and add more food. If you are trying to get back to somewhere already visited, select that revealed region rather than an unknown tile with a new cost. M opens your map while walking, which also helps you find the raft again after gathering on the far side of an island.
Find the Entity beside the ruined temple
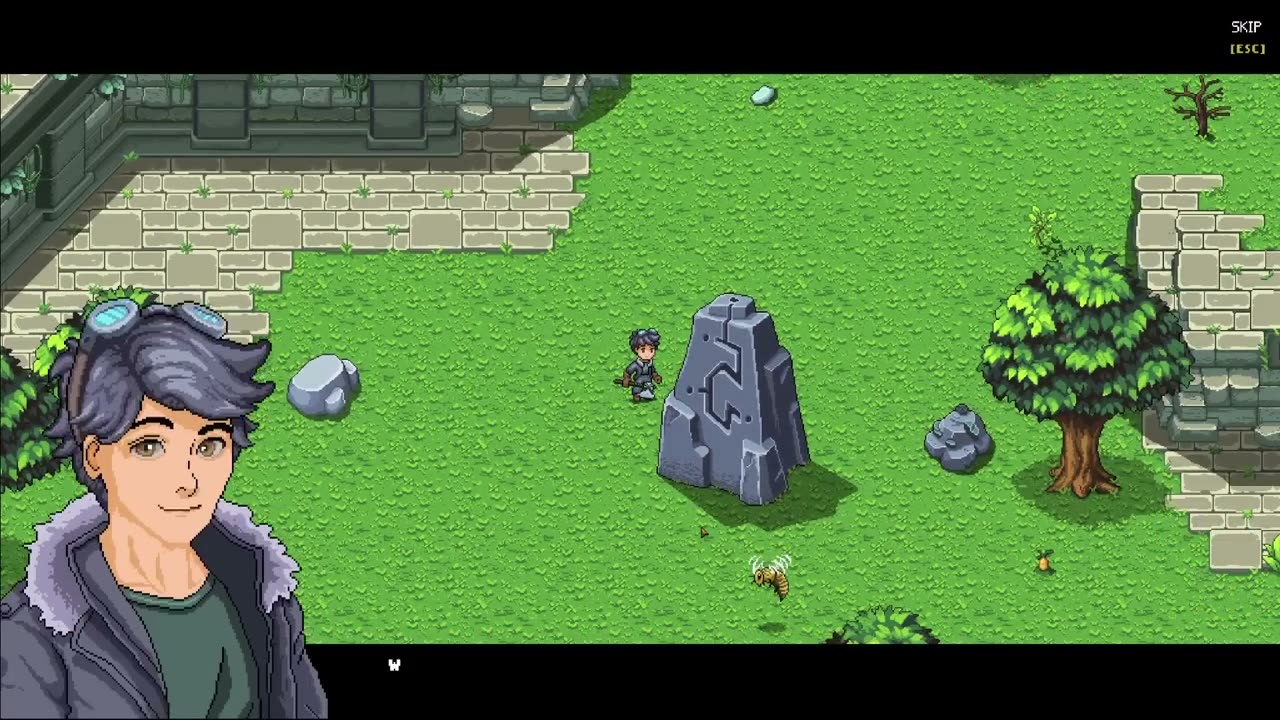
After the first crossing, walk inland from the landing beach toward the large ruined stone building. Look for the upright blue-grey stone with glowing symbols beside the ruins. Approach and interact when prompted. The conversation with the floating stone heads introduces the Entity and the threat facing you. Finishing this exchange unlocks the Furnace and Forge constructions.
Open the journal and read Chapter 2, Something unbelievable. Its route is to find the energy source, collect iron ore, and make an iron weapon. This is the point to stop treating every rock as interchangeable. Search the grassy ground around the ruins for the darker, knobbly ore-bearing rocks, break them with your pickaxe, and collect the iron ore they drop. A pile of ordinary stone will make bricks, but it cannot replace iron ore in an ingot recipe.
Return to the raft if your useful tools or building supplies are still at the wreck. You can also put a workbench, chest and campfire by the ruins before processing the ore. You can process the ore at your crash-site camp or beside the temple. Before settling in to smelt, make sure the Furnace has appeared in R and that you picked up iron ore from the rocks.
Turn iron ore into a forge and your first iron tool
Build the Furnace from the construction menu, then interact with it. Its recipes include Coal, Iron ingot and Brick. Start by making Coal from ordinary wood. Use that Coal with iron ore to make ingots, and with ordinary stone to make bricks. These are separate recipes in the same furnace; leaving ore in a chest or selecting the forge’s construction preview does not smelt it.
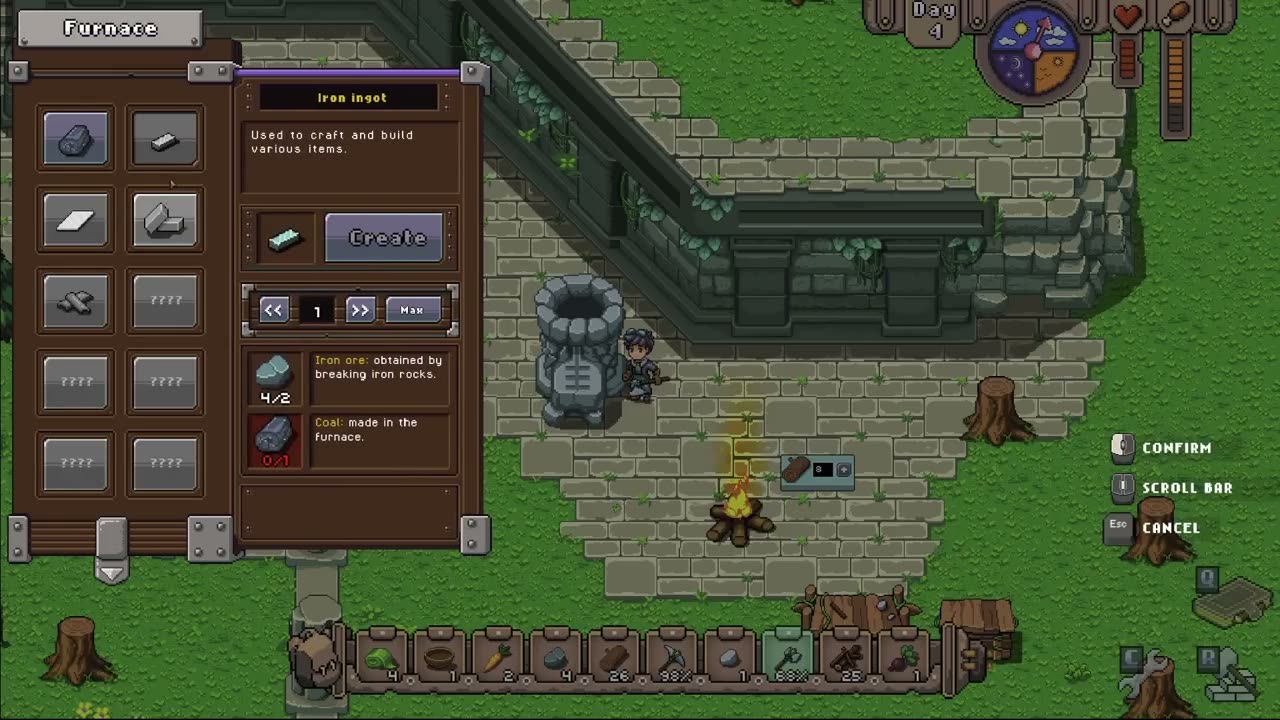
Make Coal from wood first, then split it between iron ingots and bricks. Keep enough wood and stone for those intermediate materials instead of spending everything on extra camp furniture. If the ingot recipe is red, check both its ore and Coal requirements. If the forge preview is red after you have ingots, check the brick requirement as well.
Reserve three iron ingots for constructing the Forge in the launch version, then make the additional ingots needed for your chosen tool. An October update reduced the construction cost from five ingots to three, so an older five-ingot demo recipe asks you to mine more ore than this step now requires.
Once the forge is built, open its recipe list and craft iron equipment. Crafting an Iron Axe completes the iron-equipment step shown here; the rest of the iron tool set can wait. The journal also points toward an iron sword or pickaxe. Equip the finished item from your hotbar. An ingot sitting in storage is still only a crafting material, and opening the Forge’s upgrade recipe does not make a weapon.
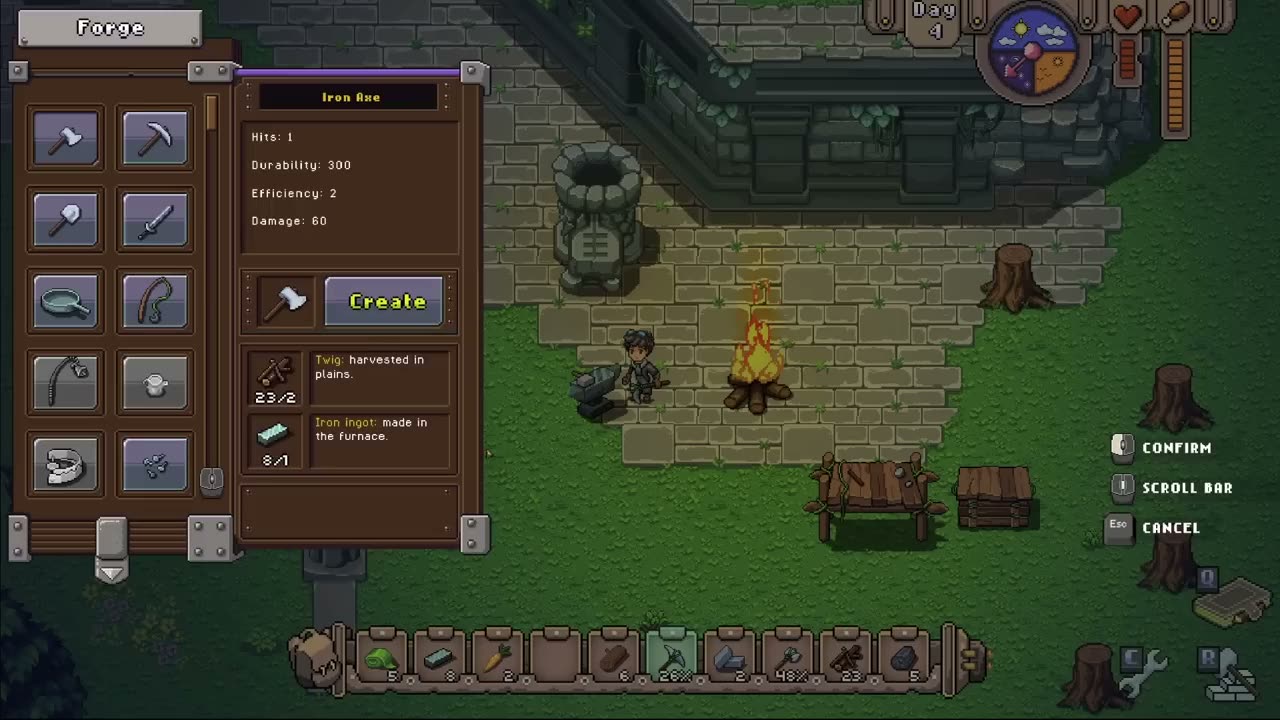
Finish the first raid and take the Entity’s next task
The opening progresses into a raid by small attackers around your camp. Keep your iron weapon selected and move across the cleared grass as you strike them. Leave room around your workbench and chests so the group cannot crowd you into a narrow gap between constructions. Eat your prepared food when you need its displayed recovery. Clearing the group leads to another conversation with the Entity.
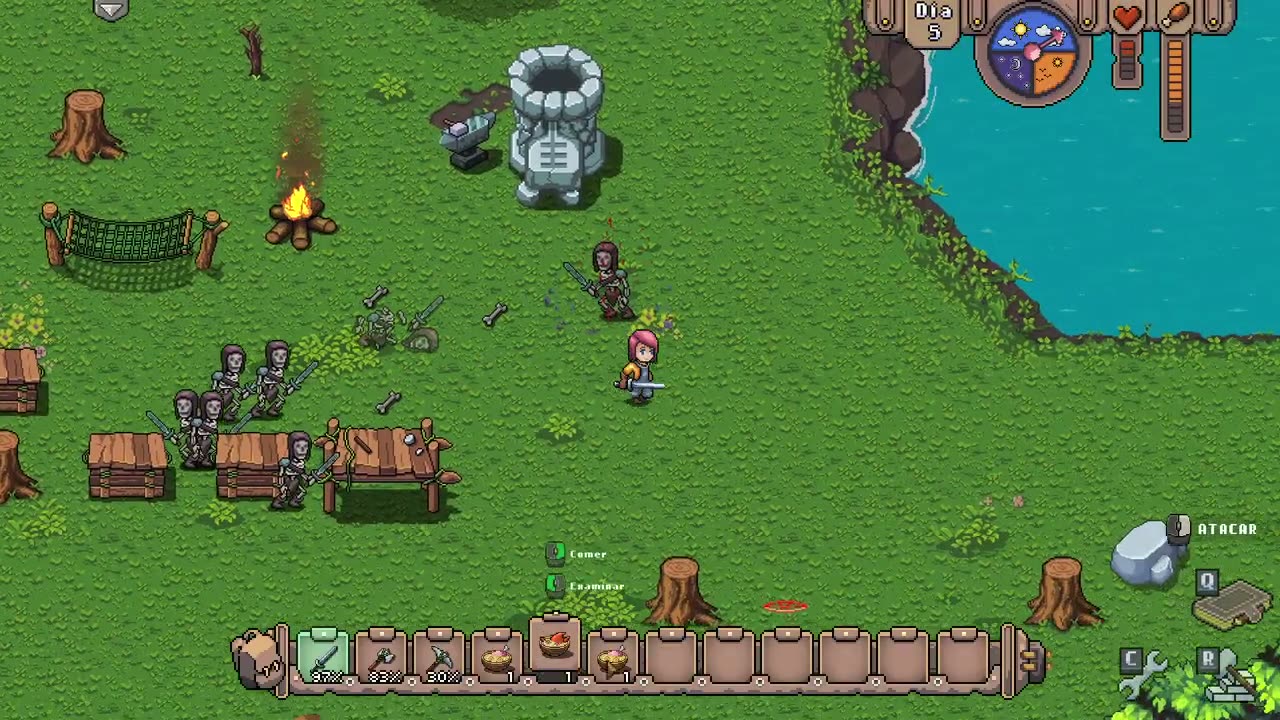
After the attack, the next Entity conversation explains that the guardians protect stolen crystals and introduces the Blade of the Hidden Root. It sends you to the swamps for the sacred flowers needed for that weapon.
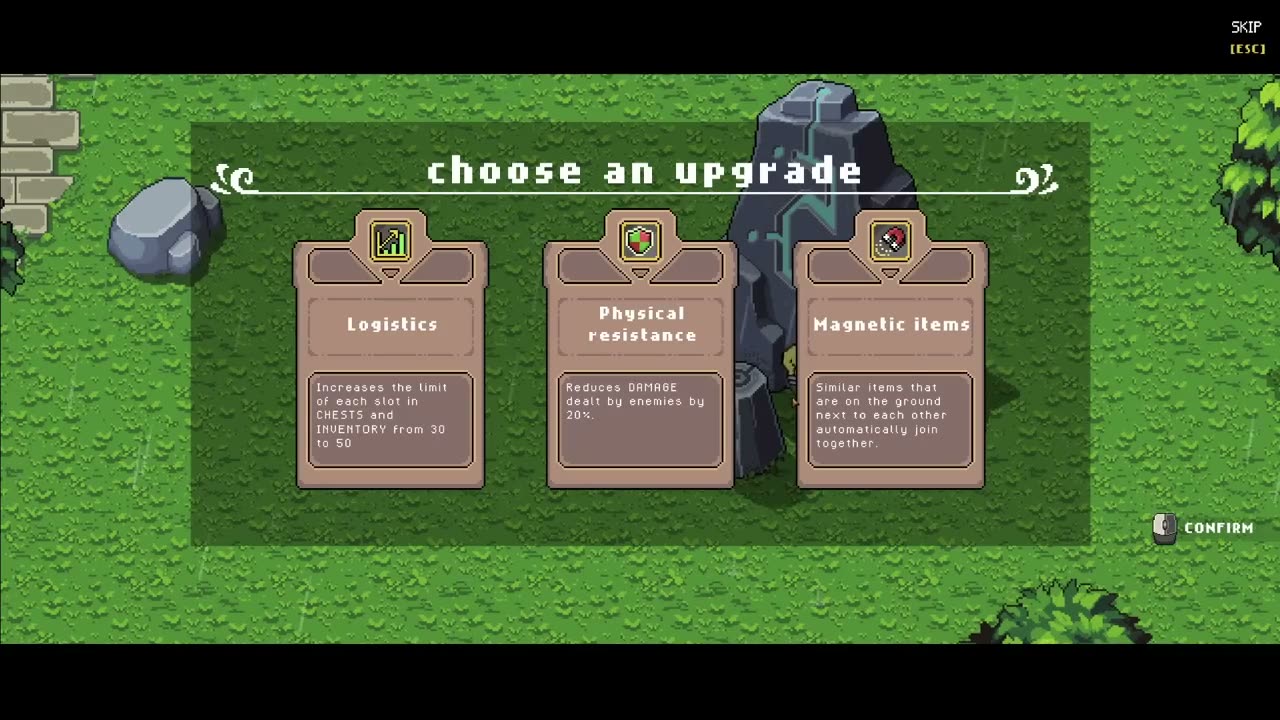
You also receive a choice of upgrades. Read the cards before confirming, because the available offers can differ. Logistics increases stack capacity in chests and inventory, while the displayed production and resistance options affect different parts of the next expedition. Choose the stack upgrade if you keep running out of room while gathering ore and food. Do not plan around receiving all three cards’ benefits at once.
Prepare food and useful equipment for the swamp
Chapter 3 is called A special weapon, and its first checklist asks you to find two swamps. The new sword recipe needs an iron sword and the two quest flowers. Making an ordinary iron tool does not give you the Blade of the Hidden Root. Keep your working iron equipment for this first trip and treat the flower quests as the next stage after finding the swamps.
Use the newly available Sewing Table when the camp’s small inventory is becoming restrictive. It becomes available before the Drying Frame in the updated progression, giving you earlier access to backpack upgrades. Its recorded construction recipe uses boards, nails and rabbit pelts, so keep checking your burrow trap and save the pelts. Make nails at the forge instead of searching the island for loose nails.
Cook the meat and vegetables you have collected to build your next travel budget. If you start growing crops at camp, build a Water Well and craft a Watering can at the forge. Hold the can to draw water from the well, then water the planted ground. The can’s tooltip says watered crops grow twice as fast.
A fishing rod also needs worms in your backpack. If the rod reports that you have no bait, take an iron shovel to the swamp and dig for worms before trying the beach again. Use the shovel to collect bait during the same trip as your first swamp exploration. Keep some worms in your backpack when you return to the beach instead of storing the whole catch at camp.
Choose a swamp region and make your first landing
On the demo map pictured below, explore the 130-point region directly above the central island. Both recordings reach a swamp through that region. Load at least 130 provision points, select the tile, and confirm exploration. The resource panel shows question marks before discovery, so it cannot tell you the biome in advance. The position and cost here refer to this opening demo map, rather than a route through all 24 launch islands.
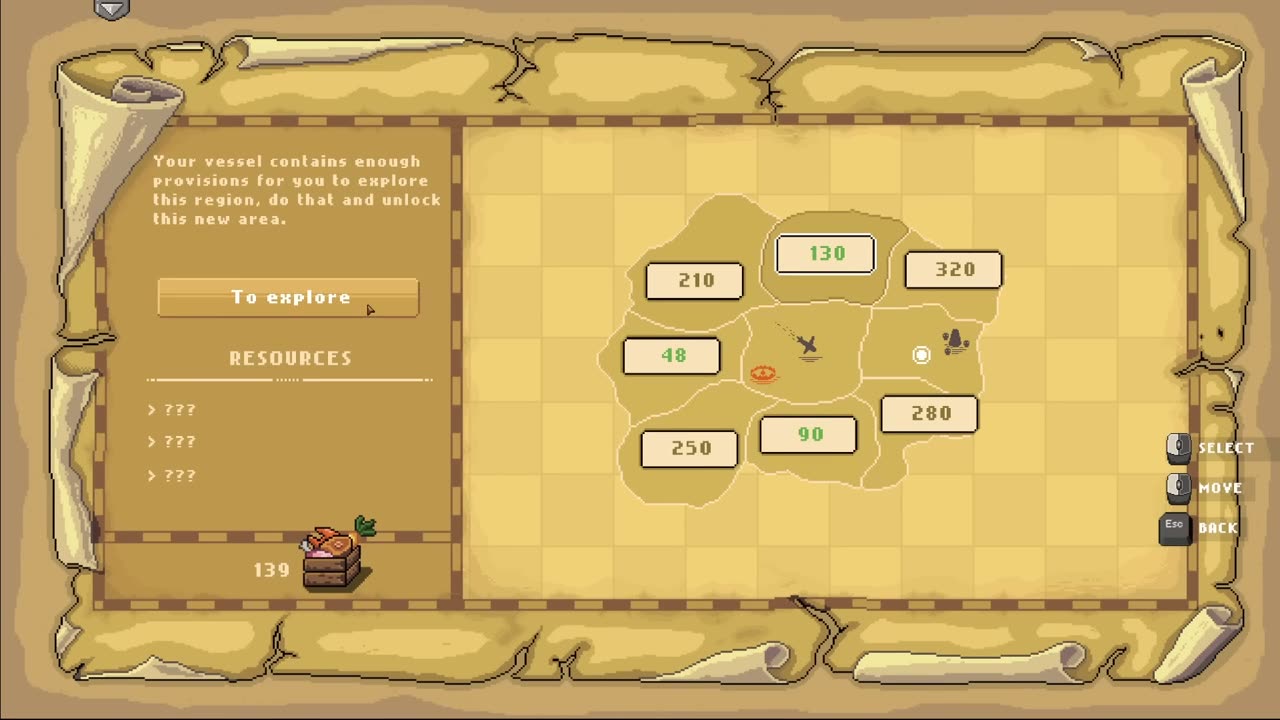
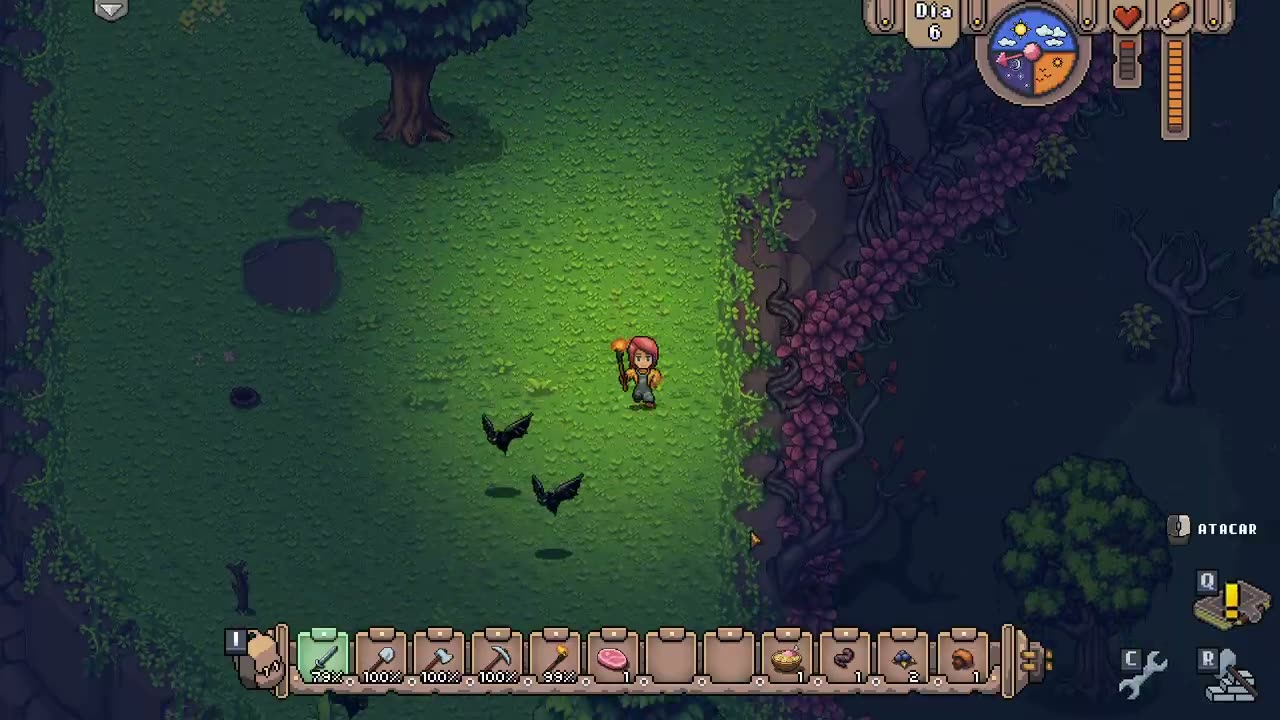
The swamp has dark ground, murky pools, pink growth along the rock edges and hostile creatures beyond the landing area. Get your bearings from the raft before moving inland. Keep the map available for the return trip, and keep your axe or other iron weapon accessible while collecting the new materials. Returning to camp for food or free inventory space uses the region you have already explored; you do not need to pay to discover it again.