Build a small shelter beside your first Flame Altar, rescue the Blacksmith, and keep a wand ready while you work toward the Alchemist’s Eternal Ice Bolt. A mage can handle the opening without collecting stacks of arrows, but you should still carry a basic bow for distant switches. This route takes a fresh PC character through the five early craftspeople to Flame Level 3 in Enshrouded 1.0.
Follow the sections in order if you are starting from the Cindervault. If you already have the Alchemist, continue with the Hunter rescue, then collect the eternal spell. Flame Level 3 is the stopping point here; later biomes and the ending require a separate journey.
Leave the Cindervault with supplies for your first shelter
Commune with the Flame in the adjoining room, then follow the path outside toward the cave. Open the roadside chest and collect the torch before descending. Inside, pick up the sword and the Explosive Powder Balls. Throw the explosives at the rubble blocking the passage, clear the enemies in the Shroud, and loot their bodies before leaving through the far exit.
Read the glowing lore pages along this opening path. Some reveal destinations as well as granting experience. Once outside, follow the road down toward Longkeep and the marked plains. Gather loose Stone, harvest shrubs for Plant Fiber and Twigs, and collect Wood Logs. Plant Fiber becomes String in Manual Crafting, so keep collecting it while moving between the ruins and your base.
Craft and place the Flame Altar inside the starting quest area, then speak to the Flame. Make a Workbench and Construction Hammer, plus an axe for woodcutting and a Pickaxe. Put up walls and a roof, place a bed inside, and keep a source of warmth nearby. Check that the Rested panel recognizes shelter, warmth and comfort before leaving for the first vault. A bed standing outside will not provide the sheltered living space your survivors need.
Cook raw meat at a campfire before eating it. Keep berries and Bandages available for healing, and draw water from Longkeep’s well for your journeys. Interact with the Workbench to repair your wand and tools before another trip into the Shroud.
Rescue the Blacksmith and equip both movement tools
Track Find the Sleeping Survivor. From the starting base, follow the northern route toward Braelyn Bridge. Before you have a Grappling Hook, use the path down into the Shroud instead of trying to jump the broken bridge. Continue north through the low ground, then take the climbing route out through the mineshaft and metal grating. Once back above the fog, follow the road west to the Ancient Vault.
Clear the Scavengers outside and loot their Metal Scraps. Inside, open the glowing pod containing Oswald Anders. Return to your Flame Altar, craft the Summoning Staff, and place him under your roof. Speak to him after placing him. His crafting menu and dialogue move the opening on toward equipment and the first Elixir Well.
Use your Workbench to make the Grappling Hook and Glider, then equip both. For the hook, keep Metal Scraps, String and Shroud Spores. For the Glider, you also need Shroud Wood, which comes from trees inside the larger Shrouded areas. A tree beside a small patch of fog can still give ordinary Wood Logs, so read the name of the material you actually collect.
Use the hook at Braelyn Bridge and the anchors inside towers. From a Spire summit, deploy the Glider to reach the surrounding hills. Both consume stamina during traversal, so leave yourself enough stamina for a landing or a final climb. If you fall back into the Shroud under the bridge, return through the mine route you used on the outward trip.
Use a wand while the staff does the expensive work
A basic Wand can be made from two Bones. Keep it on the action bar, and replace it when you find a stronger wand or a useful second element. Wand attacks use no spell charges. A staff fires your selected spell and uses mana. Ordinary staff spells also consume charges, so carry a spell as well as the staff.
In 1.0, wands have a Heavy Attack as well as their regular attack. The heavy projectile can pierce enemies and interrupt weaker foes. Use it when enemies line up in a narrow passage. In a room where you need to hit a wall switch, move until the switch is visible and aim at it; retain the bow for switches that are too far away for the wand.
Carry a shield or magical Ward beside your wand, and use block or parry when a melee enemy closes the distance. Create space before charging a staff spell, then return to the wand if an enemy reaches you. If an enemy’s damage text says Resisted, change element or use another weapon instead of emptying your remaining mana into that resistance.
Spend early points on Double Jump if the vaults and broken walkways are slowing you down. As more points arrive from Shroud Roots, build toward Water Aura in the Healer branch. It heals you and nearby injured allies, and its healing scales with Intelligence. Keep healing items for immediate danger; the aura takes time to restore health.
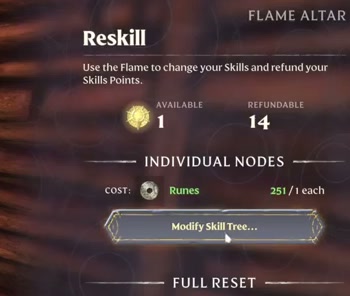
You can change those choices at the Flame Altar. Open Reskill, then use Modify Skill Tree for individual nodes, or choose Full Reset to refund the whole tree. Move early melee points into the blue branches when your magic equipment is ready. Keep Runes for equipment upgrades as well as reskilling, and salvage weapons you have finished using instead of deleting them.
Clear the first Elixir Well, then climb the Springlands Spire
The first well is in the large Shrouded area north of your starting base. Approach the raised ruins and activate the Return Beacon near the top of the stairs. The shaft behind it is the way down. Descend the metal grate and follow the stairs into the chamber containing the Fell Thunderbrute.
Keep an escape route toward the stairs while attacking with your wand. Move out of the broad melee swings, then fire during the opening between attacks. Explosive Powder Balls are an extra damage option if you still have some. Watch the Shroud timer during the fight; a Return Beacon gives you a nearby respawn point, but it does not make the fog harmless.
Loot the Thunderbrute, then continue to the red Shroud Root and chop it with your woodcutting axe. Killing the boss and destroying the root are separate actions. The root’s destruction clears the immediate Shroud and awards skill points. Once the area clears, you can fast travel home to repair and spend those points. If fast travel is unavailable, climb back to the beacon and leave the fog on foot.
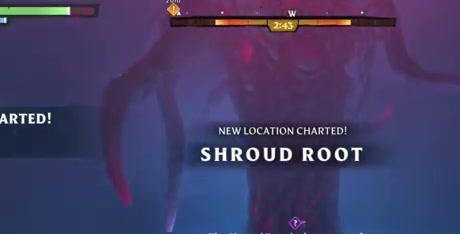
Speak to Oswald about the Ancient Spires and head north again, crossing Braelyn Bridge with the Grappling Hook. Follow the road toward the Springlands tower. At the entrance, use the purple teleporter.
- On the first floor, press the wall button, pass through the opened door, climb the stairs and grapple across the gap. Continue to the next teleporter.
- On the second floor, jump to the wall grate and climb up and left. Shoot the high button with a wand or arrow, then take the opened route to the next teleporter.
- Cross the spike corridor on the third floor, using the side room as a pause between sections. In the lava room, jump across the pillars to the teleporter. The two-button chest door is a loot detour: one button is above the lava-room grate, and the other is reached from the opposite stairs and grate.
- At the summit, commune with the Flame. The tower becomes a fast travel destination, and nearby locations appear on your map.
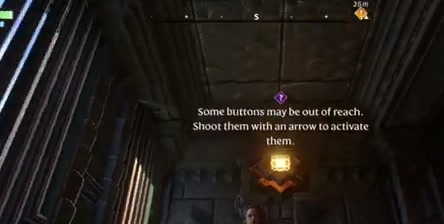
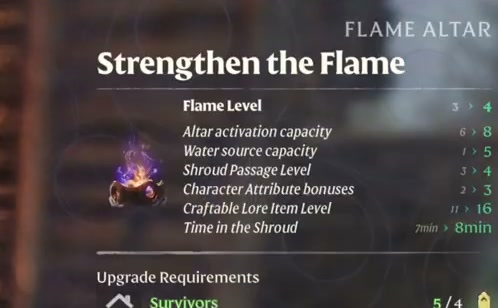
Reserve these materials for the first Flame offering: five Resin, five Penny Bun, five Bones, five Shroud Liquid, five Animal Fur and one Spark. Collect Sparks from Flame Shrines or Sanctums. At the altar, select Strengthen the Flame to reach Level 2. Upgrade Altar is the separate option that expands the building area.
Recruit the Alchemist and Hunter
For a mage, the Alchemist is worth visiting as soon as the early survivor quests open. His Ancient Vault lies on the western side of Springlands. Track Powerful Alchemy and approach the marked vault rather than following a nearby stash marker. Scavengers occupy the courtyard; clear a path and use the repair anvil in the outer encampment if your wand is wearing out.
Inside, go west through the vault, defeat the enemies and climb the rear stairs. Follow the passage to Balthazar’s pod. Open it, return home and summon him into shelter with an assigned bed. Speak to him to take An Eternal Spell. His menu provides spell crafting and upgrades for your magic equipment.
The Scavenger Stash near this western route contains the Wailing Blade. It is an optional melee backup that also gives light when equipped. Bring a Lockpick for the stash chest if you want the blade, then return to the survivor route.
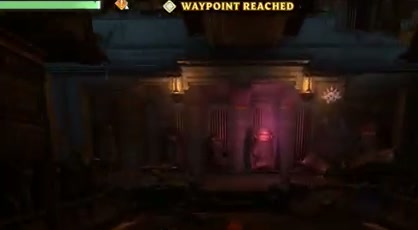
For Hunter Becomes the Hunted, travel east from the Springlands Spire toward the Hunter’s Ancient Vault. Use the intervening high ground and Flame Shrine to break up the glide. Inside the vault, pass the shock traps, grapple over the lava and climb the stairs to Athalan Skree’s pod. The three-lock side door holds optional treasure; it is separate from reaching her pod.
Return home after releasing the Hunter and use the Summoning Staff to place her under shelter. Assign her a bed, then take Salt Mine Location and Growing Stronger Together from her dialogue. Her Drying Rack will turn the salt and hides from your next trips into backpack material.
Find Eternal Ice Bolt in the Buried Tomb
Track An Eternal Spell and set a waypoint at the Buried Tomb marker. The tomb lies northwest of the Low Meadows Spire, but you can approach it overland without unlocking that tower. Search the Shrouded low ground for the ruined stone entrance. If the marker says Location Below, descend toward the tomb rather than continuing up the hill. A nearby Flame Sanctum can supply a Spark, but visiting it does not collect the spell. If the objective still says Reach the Buried Tomb, you have not reached the correct chamber yet.
Bring a repaired Pickaxe, a wand and healing supplies. Use a Shroud Survival Flask before entering if you have one. Clear rubble from the tomb entrance and descend the stairs. There is an anvil below if you need a repair. Follow the corridor east and then south, cross the narrow beam, and deal with the skeletons and skeletal dogs before moving deeper.
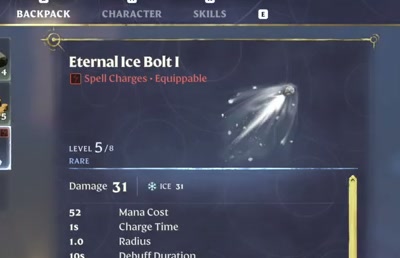
In the next eastern room, climb the wall grates to the upper passage. Continue through the Gravewalkers to the chamber with the glowing sarcophagus. Open that central tomb and take Eternal Ice Bolt I. The quest changes after the pickup. Optional sarcophagi and hidden side rooms can wait if your Shroud timer is nearly empty.
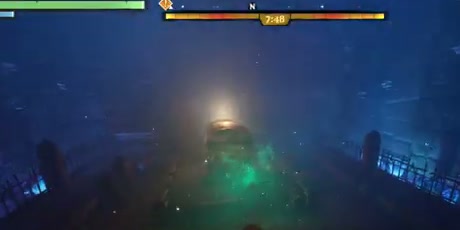
Ready your staff and choose Eternal Ice Bolt I in the spell selector. It has unlimited charges, but each cast still spends mana. When your blue bar is too low for another cast, switch to your wand, recover mana or use a Mana Potion. Keep the spell in your carried inventory for the next expedition.
At home, open the Alchemist’s Item Upgrades menu to improve the eternal spell alongside your other magic gear. Check its Mana Cost before leaving, and keep the wand ready for the gaps between staff casts.
Bring back the Carpenter and Farmer
Speak to Balthazar for Carpentry Assistance. The Carpenter’s vault is east of the starting region, near Morwenna. Bring the Pickaxe and enter the underground vault through its marked entrance. Activate the Return Beacon outside. Destroy the beetle nests in the opening chamber so new beetles stop emerging, then use ranged attacks against the floating enemies in the next rooms.
Follow the chasms to the tall wall grate. Refresh your Shroud time at the nearby lantern, climb the grate and look for the breakable section of the far wall. Mine through it to reach the chamber containing another floating enemy and Cade Hawthorn’s pod. Release him, take the opened door on the chamber’s west side and glide from the broken walkway toward the vault entrance. Get above the Shroud before fast traveling home. Summon him under your roof and assign him a bed.

For the Farmer, follow Growing Stronger Together north from the Springlands Spire through the Ferndale area. The Ancient Vault has a central chamber with a three-lock door across the gap. Work around its wings to light all three locks:
- Take the broken stairs on the west side. Use the grappling route, platforms and grates to reach the shock-trap corridor. Sprint through when the traps leave an opening and press the button at its far end.
- Go east from that button, climb the grates and continue south to the Return Beacon. Use the gap in the western wall and the two grappling bars to reach the second button.
- Climb the northern room’s grate to the roof. Follow the eastern balconies through the greenish door. Cross the staged spike corridor and press the button in the southern room.
After pressing the third button, turn right into the adjoining room and take its northern exit. Glide down to the central door with the three lit locks, which is now open. Open Emily Fray’s pod, then return to base and summon her into a shelter with an assigned bed. If a door still shows an unlit lock, retrace the corresponding wing; the roof route is easy to overlook after finding the second button.

Turn salt and hides into a Small Backpack
Track the Hunter’s Salt Mine Location quest and travel northwest from the Springlands Spire, landing on the intervening hills between glides. In the Shrouded mine, clear the beetles and skeletons, then use your Pickaxe on the grey, cubed salt deposits in the walls. Reserve ten Salt for Flame Level 3 and bring extra home for Dried Fur. The Salt Mine quest can finish before you have gathered enough for both jobs.
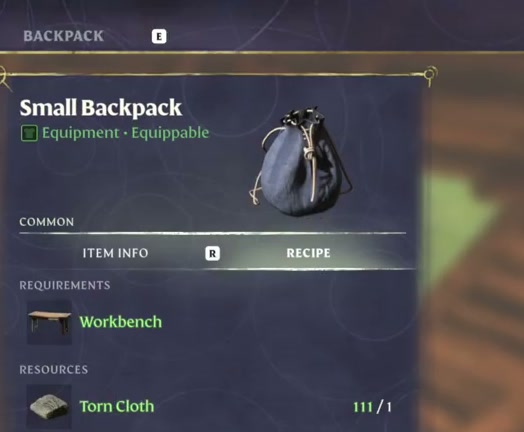
Place the Hunter’s Drying Rack and select Dried Fur as its active recipe. Load Animal Fur and Salt, start production, and collect the finished output. A rack working on another recipe will not turn your stored hides into Dried Fur. Craft the Small Backpack at the Workbench using Dried Fur, Torn Cloth and String, then equip the backpack extension in your character equipment. Leaving the crafted bag in an ordinary inventory slot does not add carrying space.
Strengthen the Flame to Level 3
Keep the altar’s building upgrade separate from its global Flame strength. Shroud Cores used to expand a building area will not pay the Level 3 offering. For the early 1.0 upgrade, prepare these materials and sheltered survivors:
| Requirement | What to prepare |
|---|---|
| Survivors with sheltered beds | At least two rescued survivors, each with an assigned bed under shelter. |
| Wax | 10, collected from beehives. |
| Salt | 10, kept aside from your Drying Rack supply. |
| Sparks | 5, collected from Flame Shrines and Sanctums. |
| Shroud Wood | 10, from Shrouded trees. |
| Flintstone | 10, mined in Springlands. |
| Mycelium | 25, mined from fungal ground in the Shroud with a Pickaxe. |
| Scavenger Matron Helmet | Loot the Matron at the Hill of Scavengers. |
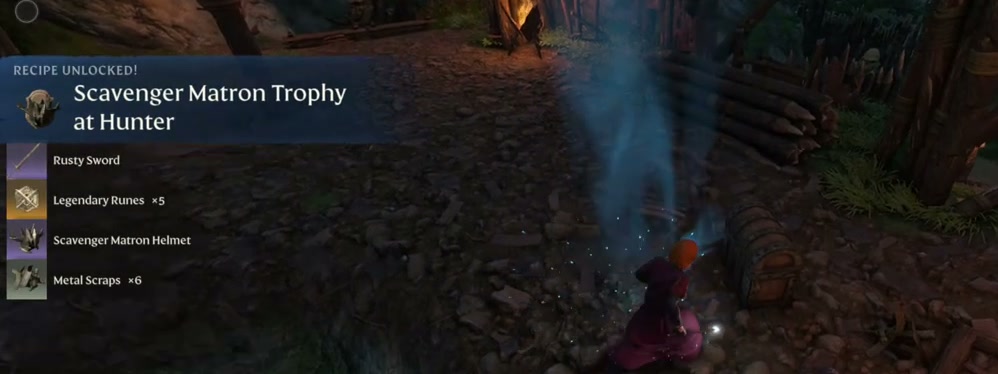
Track The Alchemist’s Rumors from Balthazar to the Hill of Scavengers, east of the Farmer’s vault. The camp contains a Scavenger Gorger Matron. Clear the ordinary Scavengers around the approach before drawing her into the fight. Keep moving out of the poison she throws, use the wand while repositioning, and cast a staff spell only when you have room to finish it. Loot her Scavenger Matron Helmet before leaving the camp.
Return to your base with the offering materials, speak to the Flame, choose Strengthen the Flame and confirm the upgrade. The map’s Flame readout should now show Level 3. The altar now displays the next offering. Your Shroud passage level rises, and the next tier of craftable armor becomes available.