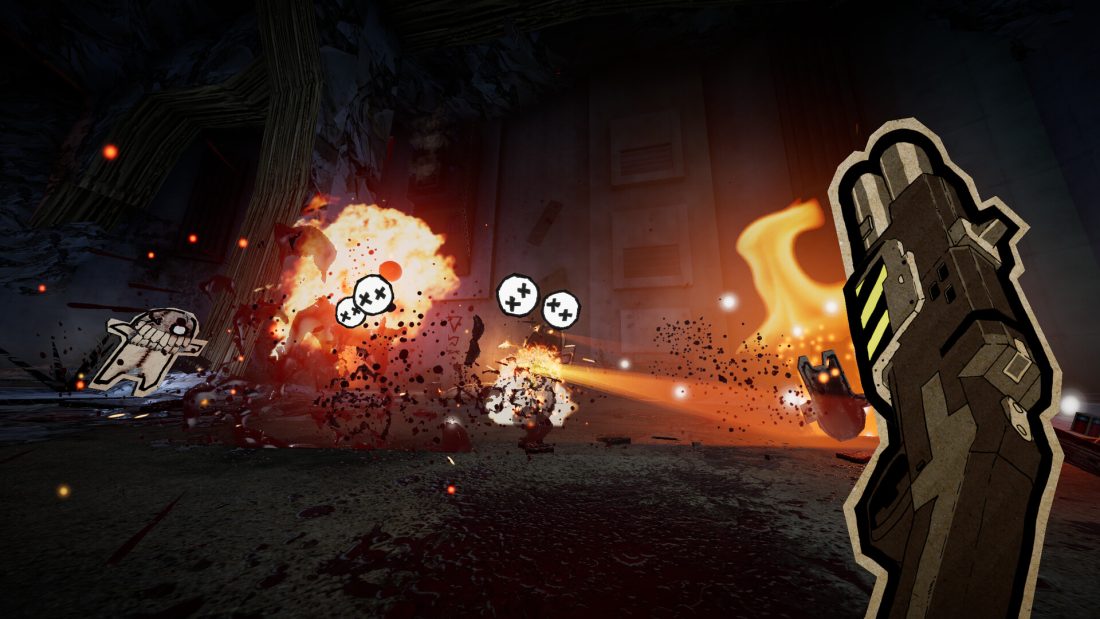
PAPERHEAD’s pencil opens blocked routes and keeps you alive in combat. Erase a security console’s value and draw FALSE, fill the white breaks in power cables, and check the coloured key icons before backtracking to a locked gate. Those interactions open several of the routes that gunfire cannot.
This walkthrough follows the main story through all 18 chapters, including the short story interludes and Handy Helper at the end. It covers progression rather than every secret, gold clip or lore entry. The controls below are the PC bindings shown by the game; use your assigned binding if you have changed it. PAPERHEAD’s official Steam page identifies the game.
The controls that keep you moving and alive
| Binding | Use |
|---|---|
| Space | Jump and double jump. Jump again as you land to maintain momentum. |
| Left Ctrl | Slide through low openings and keep moving across an arena. |
| Left Shift | Kick enemies and loose objects, including explosive barrels. |
| E | Use a button or door, or draw at an interactive outline. |
| X | Draw and throw a pencil bomb after obtaining the pencil. |
| C | Erase an interactive drawing or a corpse. Erasing corpses restores health and reduces the bomb cooldown. |
| R | Use the healing and slow-motion ability after it unlocks in The Farm. |
The pencil has two separate jobs. In combat, throw bombs into groups, then close the distance to erase fallen enemies when you need health. At a puzzle, aim directly at the white outline until the draw or erase prompt appears. Pressing the key while looking at the surrounding wall will not target the drawing.
Keep an eye on finite ammunition. The basic Stapler-gun has an infinity symbol, while the shotgun and later weapons have ammunition counters. Use the pistol when a room is nearly clear, then collect the drops before moving on. A corpse left behind can also give you somewhere to recover health during a later wave.
A red barrier across an arena usually requires you to finish the encounter. A coloured key prompt asks for a pickup. A message saying that a door opened elsewhere means you should return to the nearby junction. These are different obstacles, so look for the prompt before spending more ammunition on the gate.
1. The Descend: quarantine and Big Zombi
Follow the opening route down into the facility and practise jumping, sliding and kicking as the tutorials appear. Left Shift is the kick shown in the opening tutorial. Use it to push the small enemies into walls and to move barrels toward a group before detonating them.
The BIO-FOLD rooms introduce the facility’s sealed doors. When the quarantine sequence starts, stay in the room and deal with the enemies it releases. Once the sequence finishes, take the corridor that has opened beyond the paired hand-marked doors. The narrow passages that follow are a good place to use wall kicks, but move away from the enemy before it crowds the exit.
At the broad road arena, the boss bar reads Big Zombi. Keep moving around the road and the central structure rather than standing against the spiked panels. Kick the red explosive barrels into the fight; their blasts damage the boss and nearby enemies. Leave yourself room to jump or slide past its approach, then turn and attack again.
When the boss falls, gather the nearby health and continue through the exit route to the chapter-clear screen. The pencil arrives later, so the opening boss does not require pencil bombs or corpse erasing.
2. Project G.E.P.P.E.T.T.O: the passage between fights
This is a short story section after the opening battle. Follow the facility passage, stop at the project material if you want to read it, and continue through the open doorway. There is no extended arena to clear here.
Keep following the corridor until the next chapter loads. You do not need to find a new gun or solve a security-console puzzle during this interlude; those interactions belong to the sections ahead.
3. Object 808: obtain the pencil and change the lockdown value
Work through the facility to the pencil pickup. Its tutorial introduces X for bombs and C for erasing corpses. Try both before the next large encounter: a bomb clears space, and erasing a body gives you health while reducing the wait for another bomb.
The security console is labelled SUPER SECURITY OS, with a LOCK DOWN == expression beneath it. Aim at the value beside that expression. Erase the existing drawing with C, then use E at the blank outline to draw FALSE. The contextual draw action supplies the word.
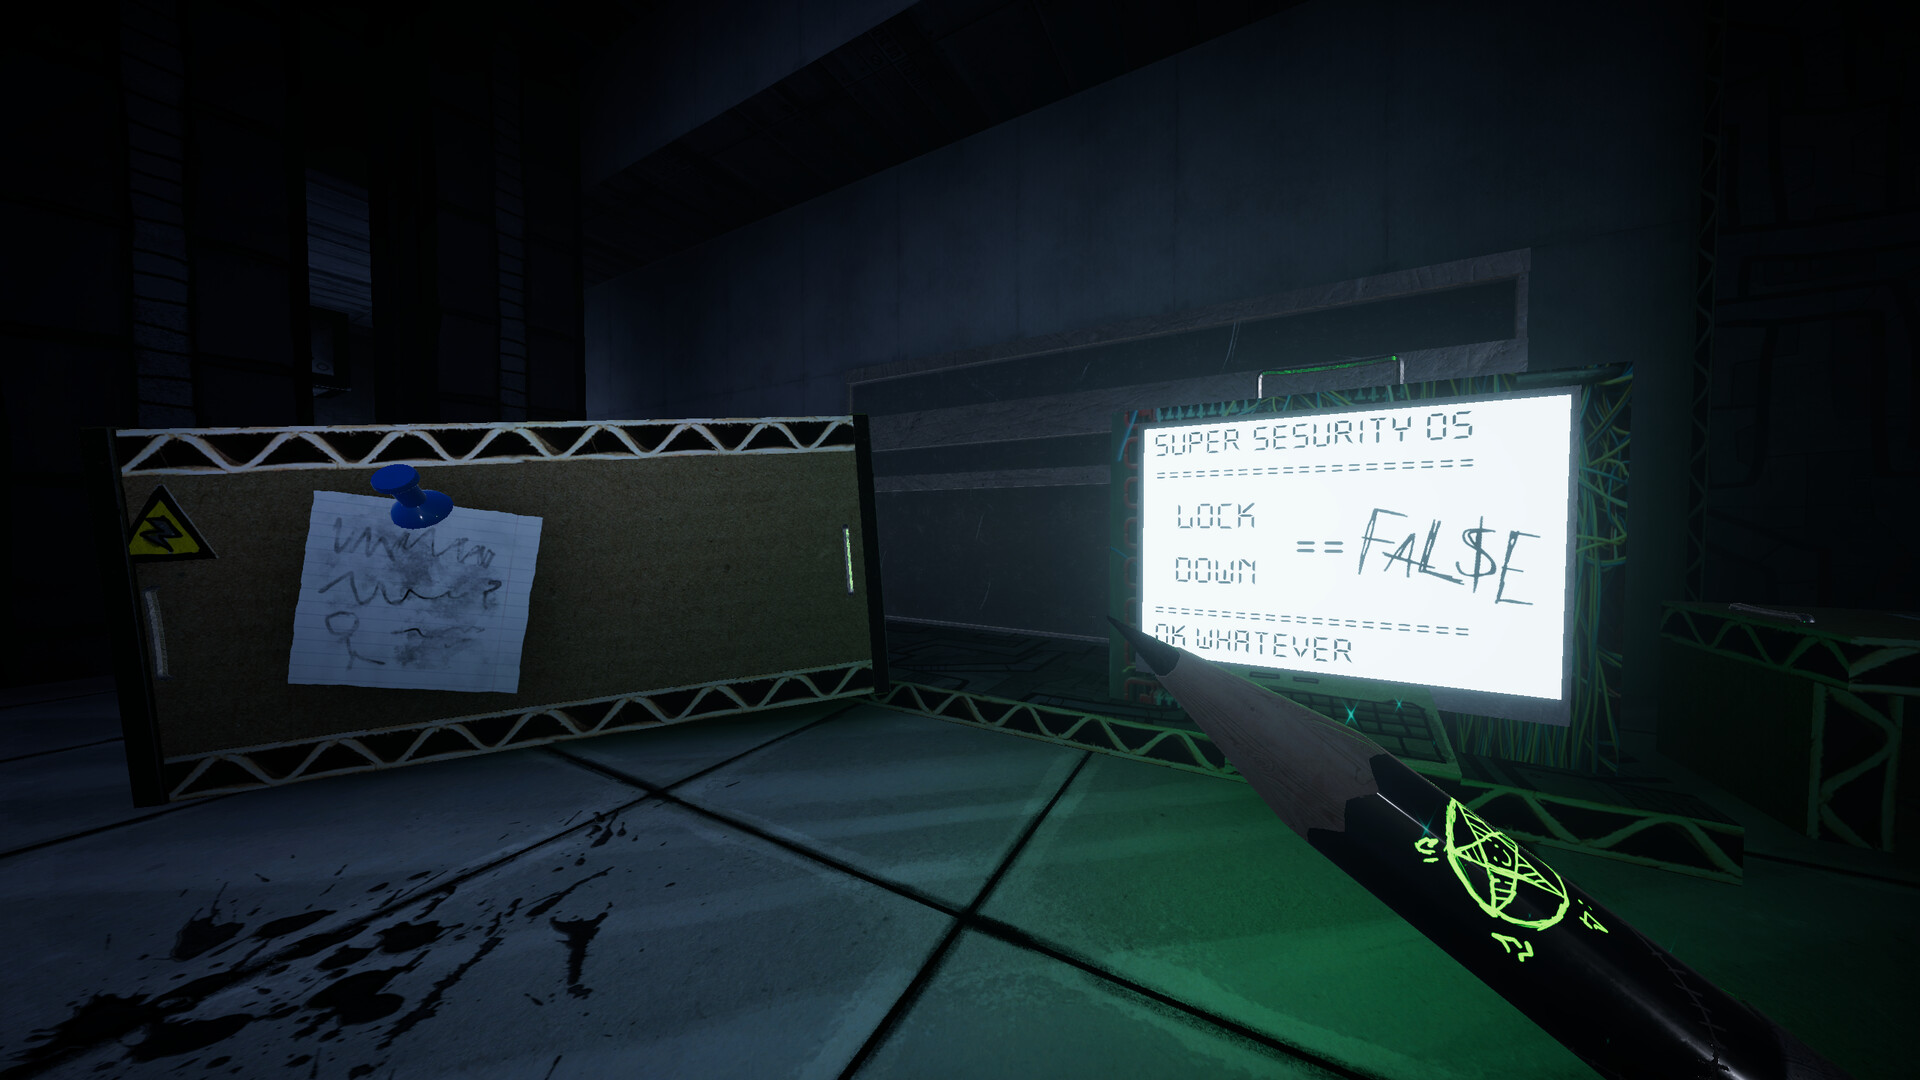
An empty value produces a compiling error. That is the intermediate state after erasing, so draw the replacement before leaving. Wait for the console to finish compiling, then proceed into the corridor beyond it. You still have enemies to clear on the way to the green-lit gate.
Use the remaining rooms to practise throwing bombs into clusters and erasing corpses between attacks. In the larger encounters, circle away from a fresh group, throw a bomb, and return to the fallen enemies once you have space to heal. Continue through the final arena and its opened exit to finish Object 808.
4. Let’s Talk: Larry’s weapons and the raised route
Speak to Larry at the beginning of the section. Follow his directions through the room and collect the guns offered along the ramp between the red banners. The shotgun gives you a stronger close-range option; the pistol remains available when you need to conserve its ammunition.
Continue along the raised passage. The white, sparkling door outline is an interactive drawing: approach it and use the contextual E prompt to make the doorway available. Climb through the raised route and vent, then drop back into the facility passage on the other side.
The side passage contains optional material and a secret, but the main route continues below the low doorway and onward to the large EXIT sign. Follow that sign to the chapter-clear screen. You will return to Larry later, so this conversation is not the final confrontation.
5. Subject Z: complete the three power cables
Fight through the connected caves and facility rooms with the pistol, shotgun and pencil. At the room with three parallel cable rows, stop firing at the powered devices and inspect the cables between them. Each row has a white break that can be filled with the pencil.
- Face the cable wall. The rows are numbered from 1 at the bottom to 3 at the top.
- Aim at a white break until E shows the draw prompt, then fill that gap.
- Repeat for the other two rows. Watch the remaining-connections message fall as each cable is completed.
- When all three indicators are green, go through the doorway beneath the face between the devices.
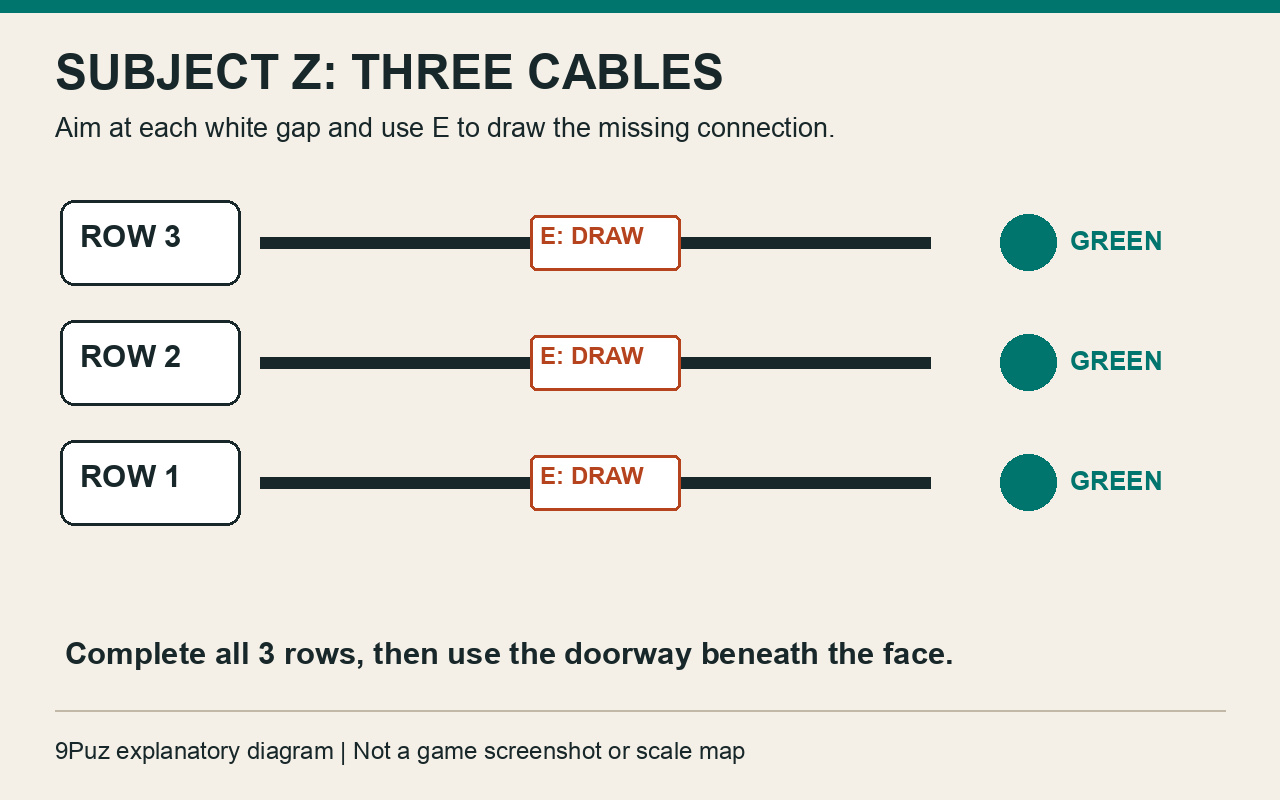
The visible completion messages count unfinished connections. You do not need to enter a numerical code. If a row remains red, check the white break in that row. C erases completed ink, so drawing a connection and then erasing it undoes your work.
After the cable room, continue through the opened doorway and the remaining cave encounters. Clear the final group before heading for the exit. The lore screen after the chapter records discoveries and enemy information; it does not replace the route through the level.
6. The Shelter: bypass the debris and open Shelter Leader Entry
The direct approach to the cafeteria is blocked by debris. Take the side passage, climb past the interactive box outline and follow the SHELTER CAFETERIA sign into the occupied part of the shelter.
At the desk, the security screen has its lockdown value set to TRUE. Erase that word, then draw FALSE at the same field. Finish the replacement even if the empty screen briefly reports a compiling error. Once it compiles, continue through the newly available route.
Listen to Dr. Jeb’s recording and allow it to finish. Return to the upper passage marked SHELTER LEADER ENTRY when the door opens. The nearby OPEN ME arrows point into the next corridor. Follow them through the story event and onward to the chapter’s end.
If the upper door is still closed, check that you have completed the console interaction and heard the recording. This section ends through exploration and the story sequence; the route continues after the recording.
7. Hunting Grounds: the ruined offices, pink key and yellow FARM gate
Follow the facility rooms into the underground BIO-FOLD cavern. Fight through the broad space and the damaged office passages around it. When the game announces that a door opened elsewhere, return to the cavern junction and take the newly available route through the broken offices.
A pencil sharpener along the route has an E prompt. Use it when you need to replenish your bombs. Follow the orange-lit cave to the small room with the upgrade terminal. Collect the minigun at the entrance and the blue key glowing on the floor beside the hazard-striped wall. Check that the blue key icon appears beside your health before returning through the cave.
Clear the next waves in the cavern until The path is free appears, then continue through the opened office route. In the room with wire cages, aim at the white web across the passage and erase it with C. Slide through the low doorway beyond the cages to reach the next rooms.
In the later shelter area, search the raised platform for the pink key. It glows above the broken surroundings near the blocked wall. Take the pickup before dropping down, then continue through the passages beyond the shelter.
The yellow key lies on sloping rubble in a dead-end nook under a wall light. Pick it up, return to the yellow gate marked FARM, and open that route. If the gate still asks for a yellow key, check the rubble nook rather than the room where you took the pink one.
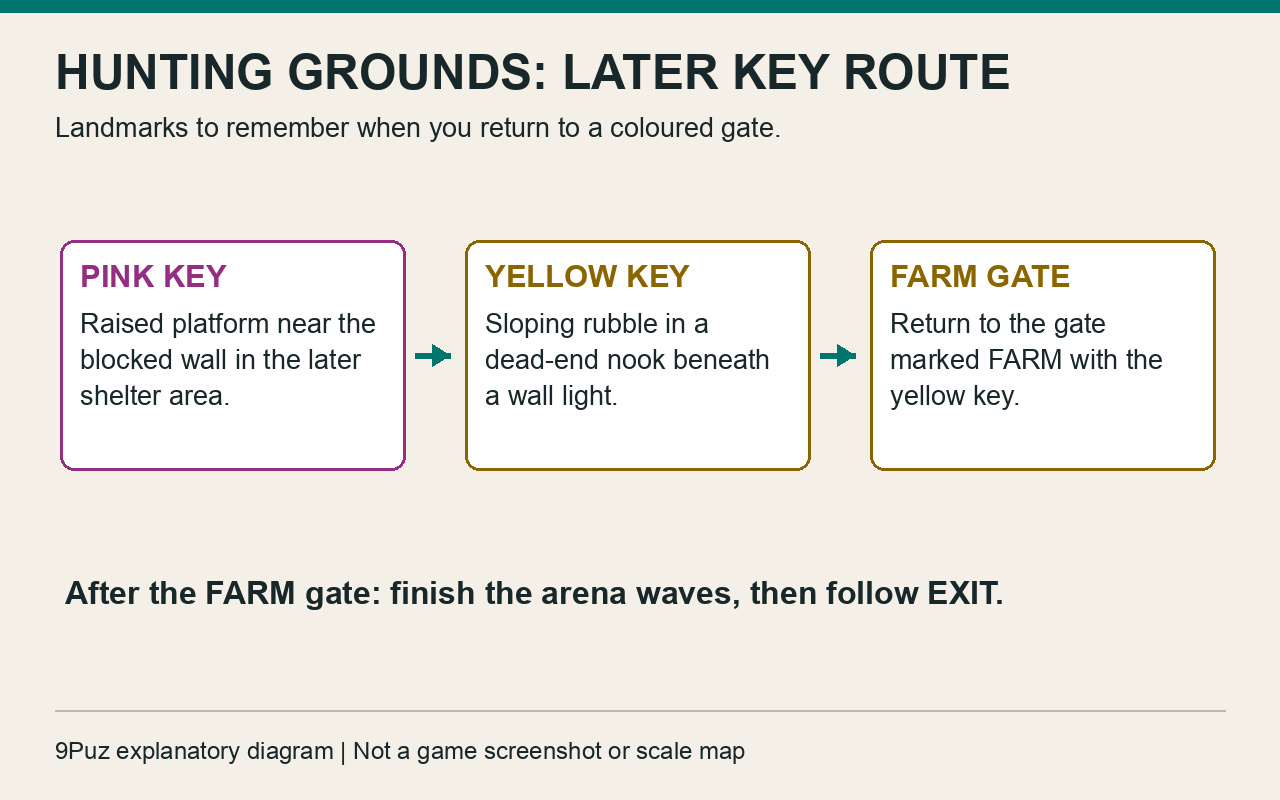
The route beyond the FARM gate still contains an arena. Keep moving through its waves, erase corpses when your health drops, and wait for the red barriers to clear. Then take the passage with EXIT written on the wall.
8. On the Way To…?: continue toward The Farm
Follow the connecting passage after Hunting Grounds. This short section lets you inspect more project and serum material while moving toward the farm. Continue through the open corridors and the story scene until the next chapter begins.
Leave the chapter through its available main passage. Reading every document is a separate collection task; you can follow the story route without completing the entire lore screen first.
9. The Farm: Meatgrinder, Sanctuarium and The Commander
The Farm opens in the orange industrial area marked HOLZ KLOTZ. Work through its lower routes and raised walkways, noting the purple SANCTUARIUM entrance for your return. Continue through the areas marked PIGS FARM and toward COMMANDER’S CAVE as the fights open the way.
In the cave approach, use the green laptop buttons when you reach them. Their remaining-count message tells you whether more switches are still waiting nearby. After the warehouse encounter, follow the GRINDR sign toward the Meatgrinder machinery.
- Climb the raised edge of the Meatgrinder area. Look for the cable panel beneath the dark rectangular window.
- Fill the white cable break with E. The message Meatgrinder opened confirms that you have changed the machinery’s state.
- Go through the machinery passage and into the warehouse beyond it. Clear the enemies around the conveyor, then climb the ladder beside the warehouse. The pink key glows in the barred side-room beside the upgrade terminal.
- Take the pink key and return to SANCTUARIUM. Use the purple button at its entrance to open the door.
- Follow the passage inside to unlock the healing ability. Continue to the yellow glow beside the tall pipes and wall light, between the ritual markings. Approach the key and let the story scene finish. Check for the yellow key icon, then return to the Commander’s Cave approach.
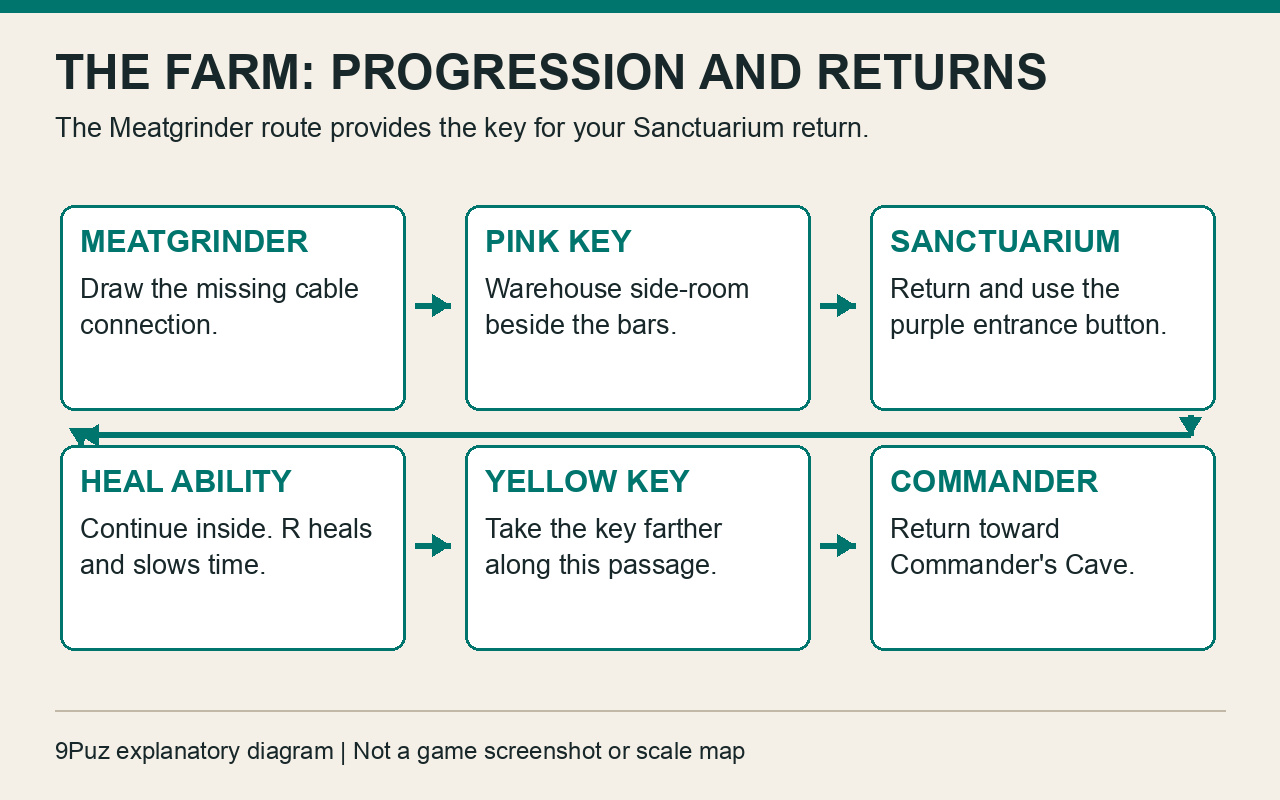
The new ability uses R to slow time and heal you a little. Its tutorial explains that kills and standing in blood puddles refill the slow-motion bar. This gives you another way to recover during the coming boss fight, but watch the bar before relying on it.
The Commander attacks in the chamber beyond the cave approach. Keep moving around the room, use the shotgun or minigun when the boss is in front of you, and throw pencil bombs when enemies cluster around it. Move away from the bright vertical attacks and crowded corners instead of trying to finish the entire health bar from one position.
When the boss falls, collect the drops and wait for Larry’s dialogue. Follow the route that opens after the conversation, use the exit button, and continue to the chapter-clear screen. The fight is followed by a short system interlude.
10. Critical Error: let the system sequence finish
This interlude displays NO DATA and CRITICAL ERROR while the system reports damage. Let the sequence run through to the implant-success message and the chapter transition.
You do not need to repair a panel or hunt for a switch while these messages are on screen. Once the interlude finishes, the route continues in Depth Dweller.
11. Depth Dweller: power gaps, rising water and four exit buttons
Climb through the first dark facility room. The early cable wall has two white gaps beneath the circular fixtures. Use E to complete the gaps, then take the opened passage when the game announces that the path is free.
Continue through the fleshy caves and tooth-lined passages. Clear the encounters around each blocked route before returning to the next opening. The facility corridors eventually lead to the Wireless Charger pickup. Its tutorial describes an electric shot that pierces enemies and stuns organic monsters; use it to interrupt a group while you move through a tight passage.
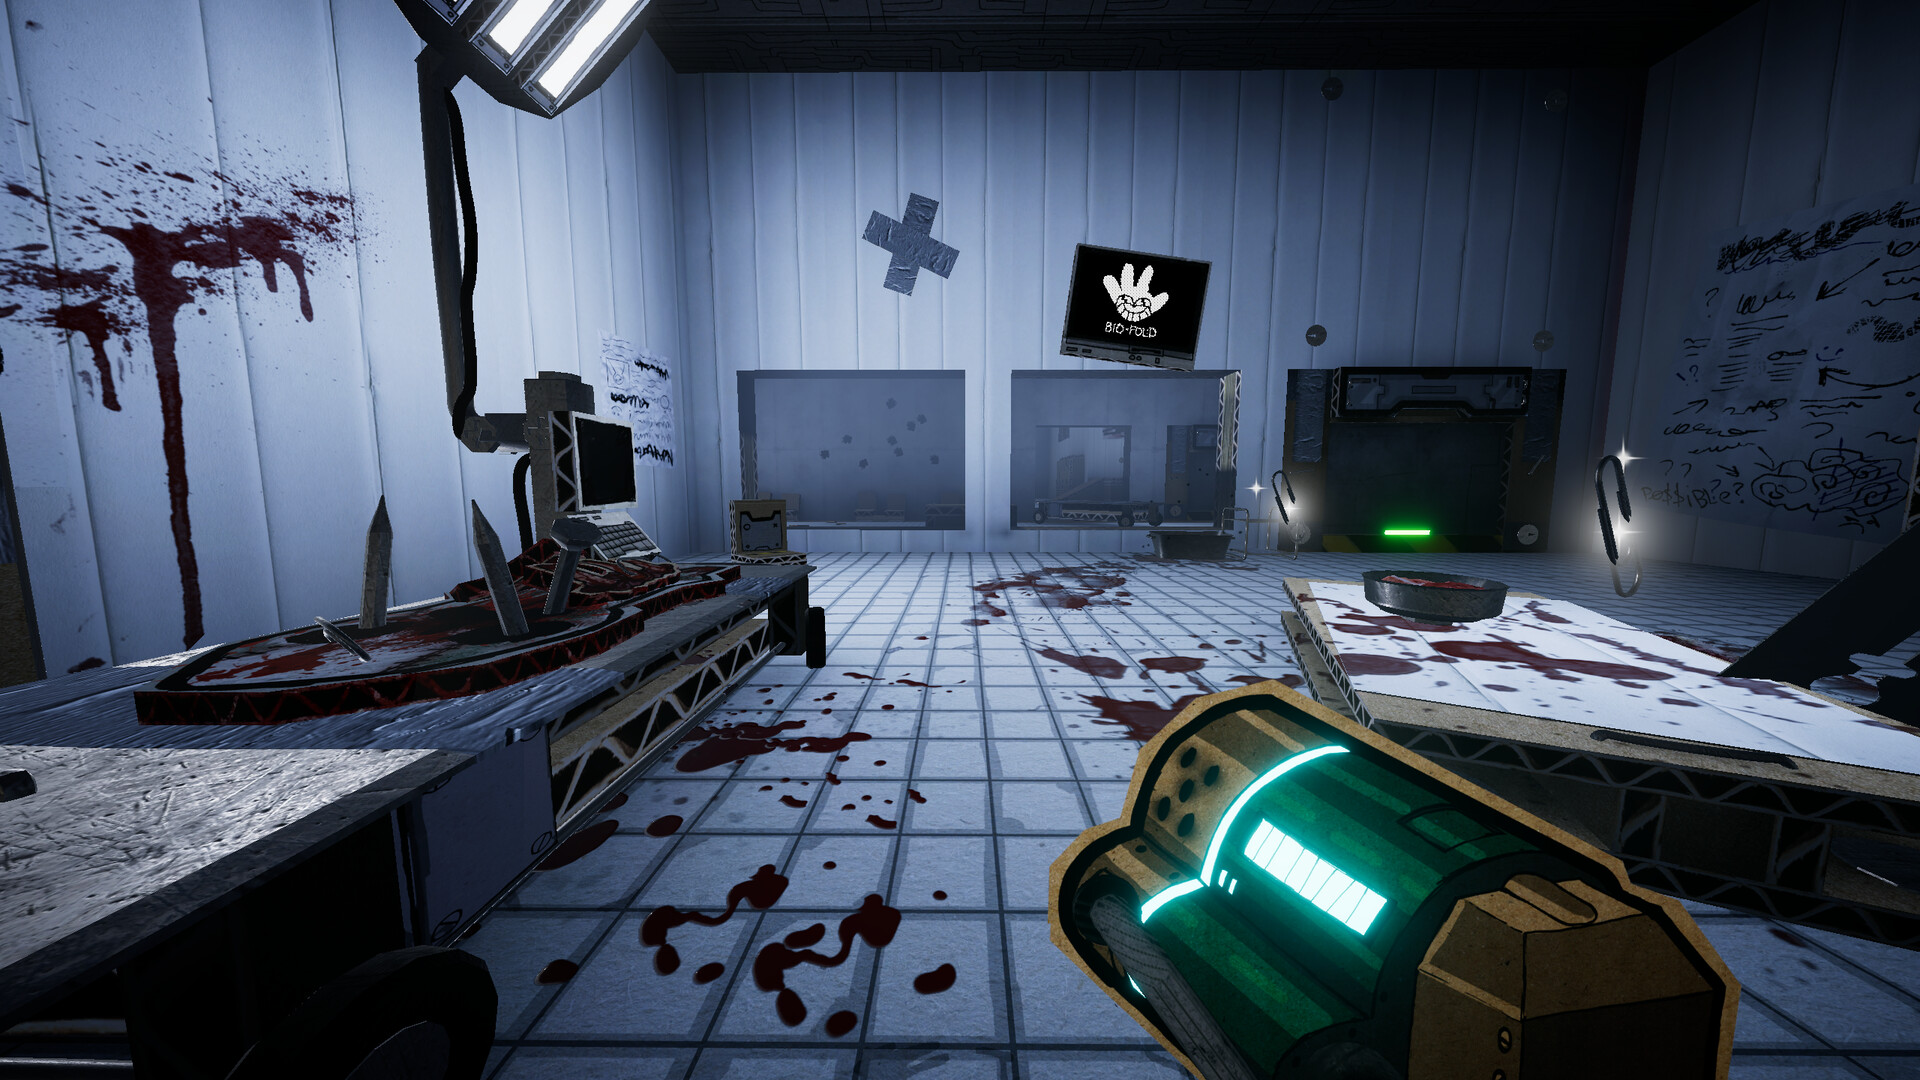
In the large flooded arena, keep working through the enemy waves. The water rises as the encounter progresses. When the message says it has risen again, return up the wooden ramp and look for the higher route near the paired BIO-FOLD screens. The opening you need is above the earlier floor route.
Follow the darker cave passage toward EXIT. At the final gap, use all four green buttons beside the laptops on the rock ledges. The first interaction leaves three still to do. Work around the ledges, use each remaining button, and watch the count drop.
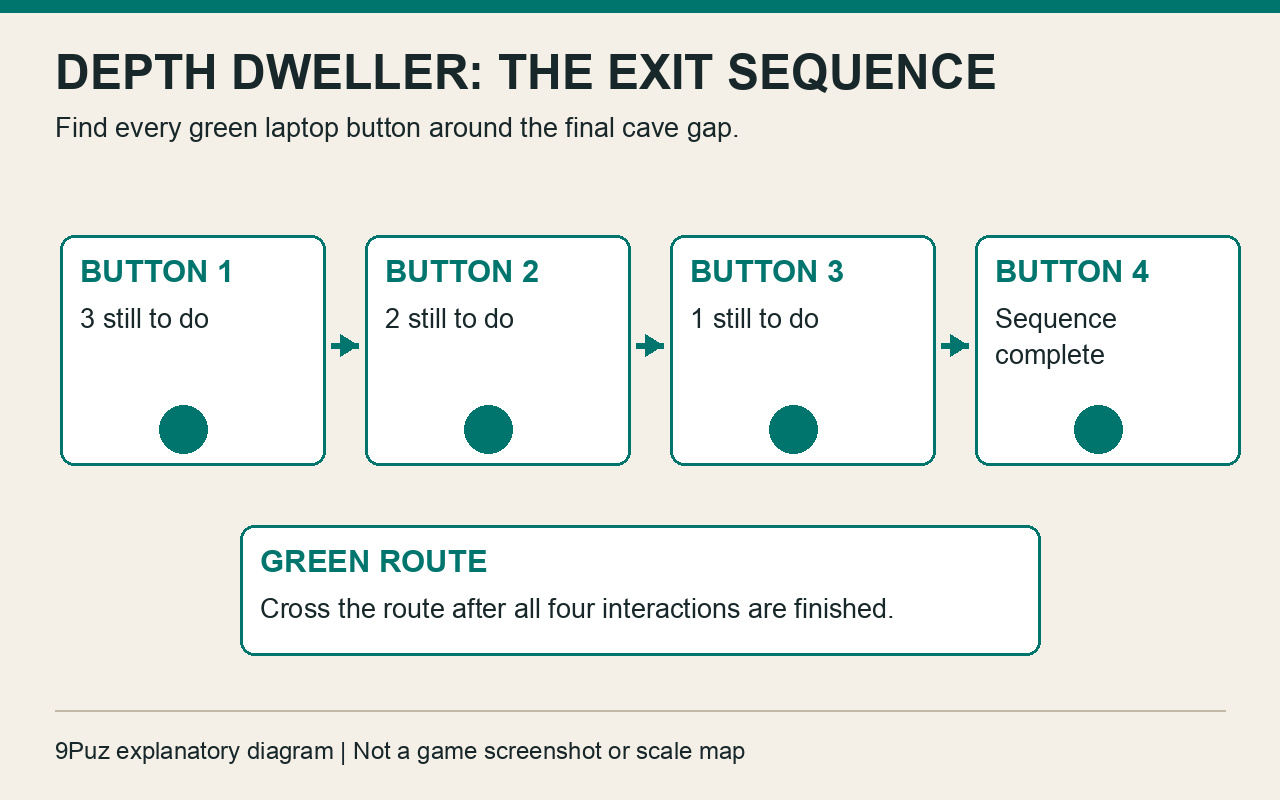
After the sequence completes, cross the green-lit route to finish the chapter. Reaching the EXIT marking alone does not finish this last interaction. If the crossing has not appeared, look for the unused laptop button on another ledge.
12. Broken Paper Man: wait for Jeb and follow the white passage
Continue through the quieter facility section and allow Dr. Jeb’s dialogue to finish at the closed door. The wait is part of the scene. When the route opens, move through the next room and follow the passage into the bright area covered with black-and-white linework.
A fallen character along the way offers a 500-clip sacrifice prompt. It is separate from the main corridor. For the story route, continue through the white passage and inspect Jeb’s material in the chamber beyond it.
After the conversation and reading stop, take the available exit to the chapter-clear screen. There is no combat puzzle to solve in the linework room before proceeding.
13. G.PRJ HQ: open the Freezer and get through the RUN passage
Work through the headquarters’ warehouse rooms, ramps and large facility arenas. Use the open floor to circle around groups, then move back toward the shelves and lower passages once the encounter lets you through. Keep enough health for the later narrow route by erasing bodies before leaving each fight.
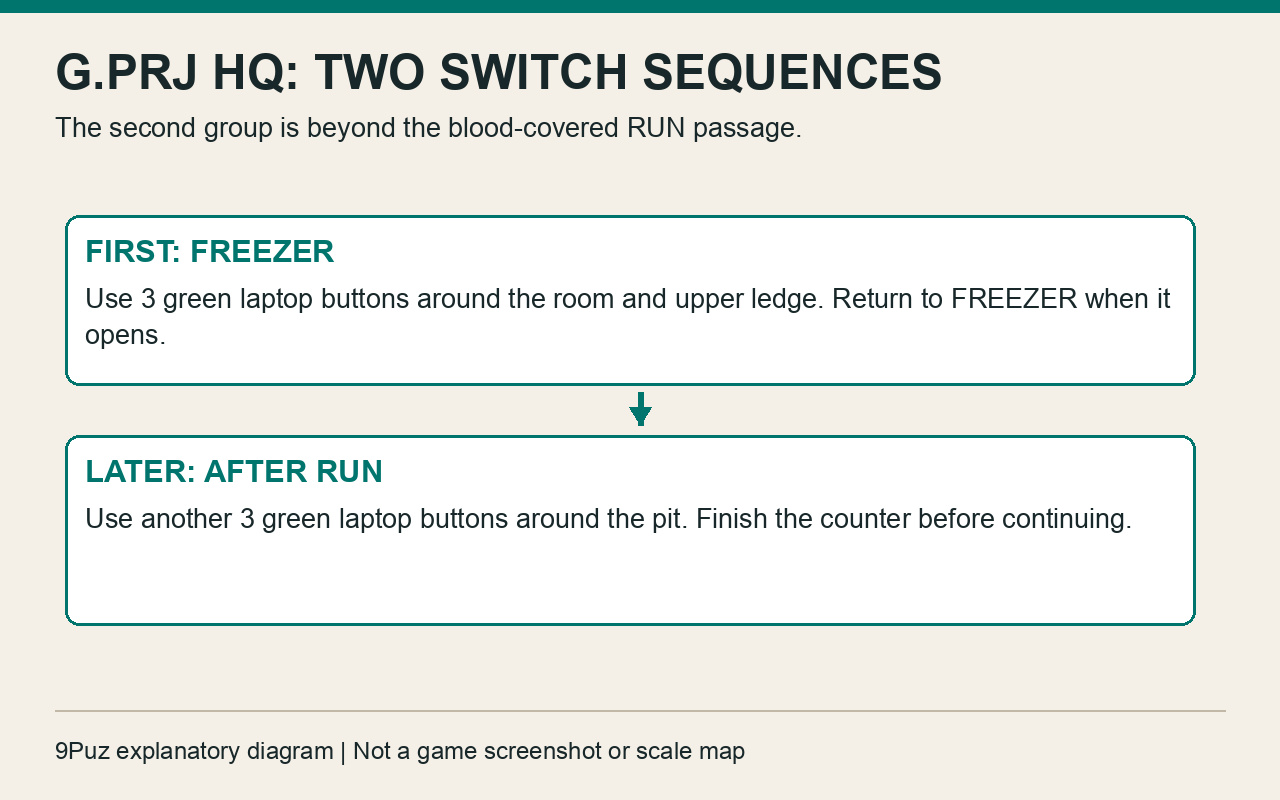
The FREEZER entrance has a switch sequence nearby. Use the green laptop buttons around the surrounding room and its upper ledge. There are three to activate. The remaining-count message drops as you use them, and Freezer opened confirms the last interaction.
Return to FREEZER and go through the dark interior and its rows of glass pods. Continue through the fights beyond it until you reach the blood-covered passage marked RUN. Follow that passage through the low openings and broken rock without stopping to investigate side details.
After this passage, another three-button sequence sits around a pit. Move along the ledges and use each green laptop button. A counter showing two left means you have used the first one. Finish the remaining pair, then continue through the route it opens.
The chapter ends with another broad arena. Clear the armed enemies and ritual groups, using the Wireless Charger to interrupt dangerous targets and your heavier weapons when they gather. When the barriers clear, take the exit to New Project.
14. New Project: follow the project corridors
Read the project notes if you want the story context, then continue through the facility corridors. The PINNOCHIO project signage helps identify this stretch. Follow the open passage through the smaller rooms rather than returning to the headquarters’ arenas.
This is another short connecting chapter. Keep moving through the story route until Vivisector begins; it does not require a separate boss fight.
15. Vivisector: reach the blue key above the bloody chamber
Fight through the dark vivisection rooms until you reach the blue-locked route. When the door asks for a blue key, leave it and work through the adjoining rooms. The key is on a higher ledge in the bloody chamber beyond the large fight.
Climb the fleshy slope beside the cage and the white box. There is also a white, question-marked drawing in this area that can be erased with C. Work up to the higher wall ledge and take the blue key. Check that its blue icon appears beside your health before dropping down again.
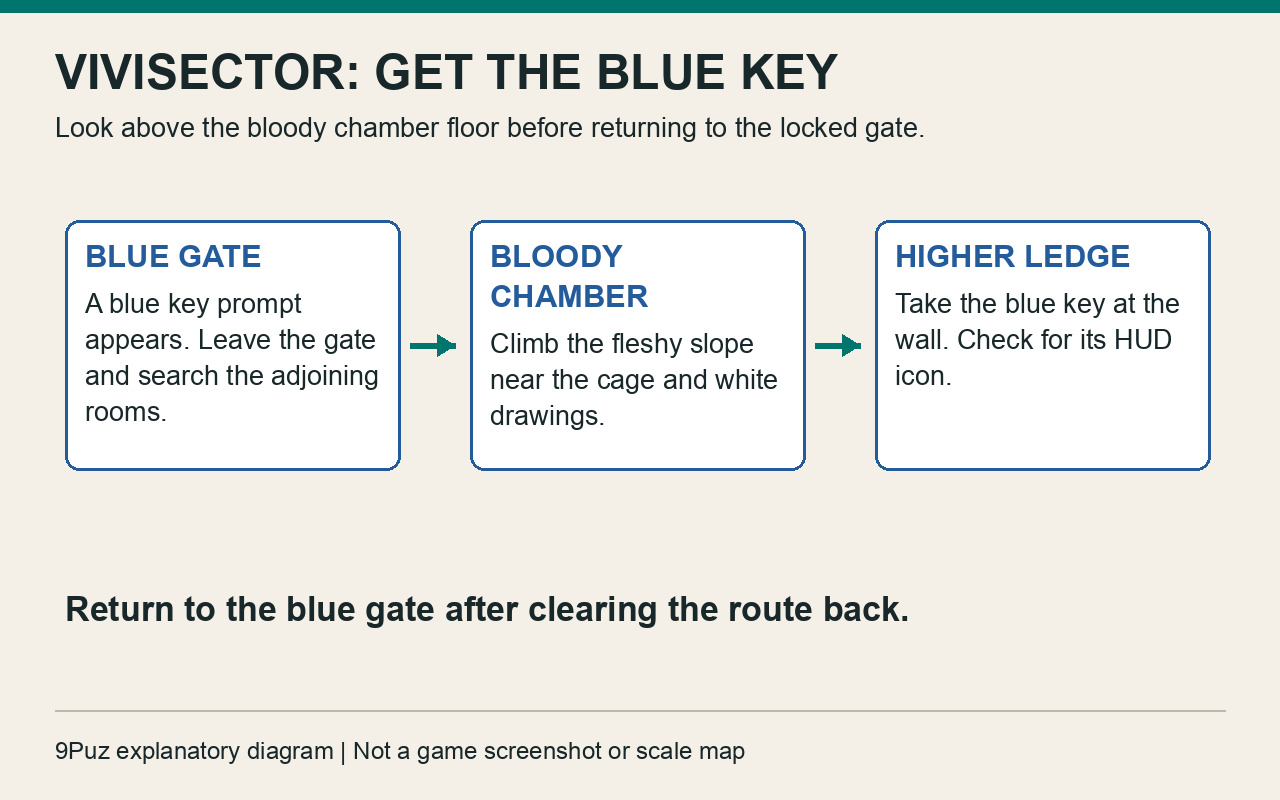
Clear the enemies on the return route and go back to the blue door. Beyond it, continue collecting ammunition as the route leads through more facility rooms. Take the large weapon pickup in the later room with the checkerboard floor, then continue into the final arena.
The last encounter uses the broad room with glass pods, raised walkways and ritual markings. Keep rotating around the floor as more enemies arrive. The electric weapon can hit through lined-up targets, while the shotgun handles enemies that close the distance. Erase fallen enemies during a pause in the attack, then finish the remaining group and take the cleared exit.
16. Rituals: the story meeting and M4G Hybrids
Follow the ritual passages and the project material through to the green-lit meeting room. Let the conversation play out; the next fight begins after this scene rather than at the first document you find.
The combat bar identifies M4G Hybrids. Move away from the group as it approaches, use bombs or the electric weapon to break up the pressure, and finish the guards before heading for the exit. Once the fight is over, continue to Assault.
17. Assault: cut the power and enter the fortress
Start through the broken rock and facility entrance. The panel marked POWER SOURCE has devices at each end of a drawn cable. Aim at the black ink connection and erase it with C to cut the power. Leave the connection erased and return to the entrance when the door opens.
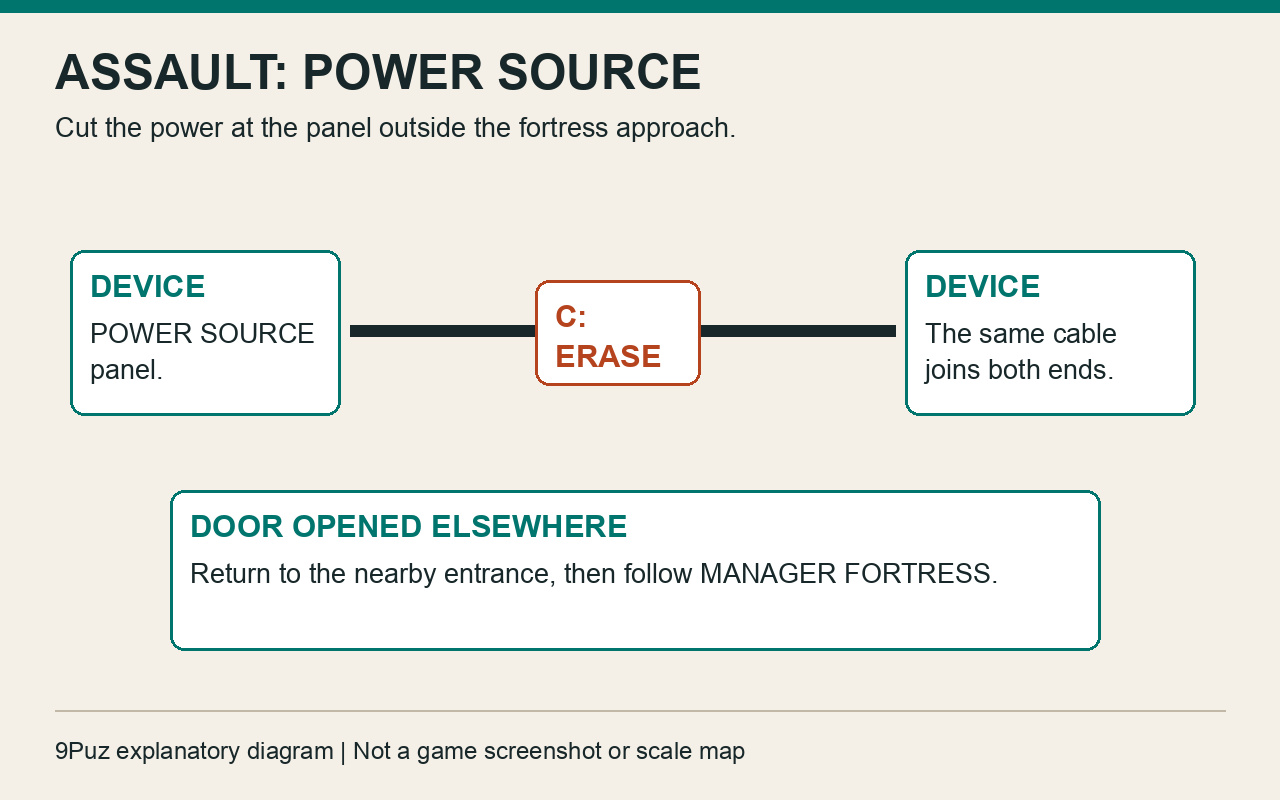
When the game announces that a door opened elsewhere, return to the nearby entrance and follow the route toward the MANAGER FORTRESS sign. Cross the broken approach and enter the fortress. If the entrance stays closed, return to the outside panel and erase the ink connection.
The interior has several large fights across rooms, ramps and balconies. Keep the floor route available so that enemies cannot pin you against a ledge. Shielded guards are easier to expose with a kick, explosives or electricity than with repeated shots into their steel shields. Switch back to a gun once the shield is out of the way.
Follow each newly opened route through the fortress. After the later waves, take the passage onward to the chapter’s exit. Use the quiet stretch to gather ammunition and restore health before entering The Manager.
18. The Manager: defeat Handy Helper and reach the ending
Use the shop and the available pickups before continuing into the final room. Stock the finite weapons you use most, then follow the passage upstairs to the arena with the glass cylinders. The chapter is called The Manager, but the boss health bar reads Handy Helper.
Keep moving around the cylinders while facing the boss. Use the shotgun or minigun when you have a clear line of fire, then switch weapons when their ammunition runs down. The red floor circles and bright vertical attacks mark places to move away from. Give yourself a clear lane across the arena instead of retreating into a cylinder.
Additional enemies join the fight. Clear the ones in your path and use their corpses to restore health with C. R can also buy you time and heal you when its bar is charged. Spend the bar when you are under pressure, then refill it through kills or blood puddles while continuing to move.
Keep attacking Handy Helper as the room fills, collecting ammunition where you can reach it safely. Its health bar must empty to finish the fight. The story scene begins immediately after the boss is defeated, so allow that scene and the credits to run.
After the credits, the final chapter-clear screen leads into the closing PaperTown scene and a new-character unlock message. That is the end of the main-story route covered here. The chapter results also record secrets and lore separately if you want to return for a collection run.